Sourdough Starter
This easy Sourdough Starter Recipe will have you making your own homemade bread with your own starter before you know it. A step by step guide with a choice of three different recipes to get you on your way.
I decided to do something a little different this time, this is what I am going to call a live blog post. A lot of people are running out of yeast and bread so why not try making our own starter!?
And since a starter takes about 7 days before it is ready to use, I thought I would post daily for the next 7 days until we arrive at a fresh from the oven Sourdough bread.
Because what else do we have to do? Unless of course you are still working from home or home schooling (I feel for you). But a little bread baking is good for the moral, so take a break or get the kids to give you a hand. A science project!
I know what a risk taker, because if it doesn’t work? Well I did give myself 3 different choices and I am an optimist so …
What equipment do you need?
To get everything set up to start, you are going to need, all purpose, bread and or whole wheat flour (rye flour works well too), chlorine free water (bottled or filtered), a scale – because I think working in grams is best for bread (although the last recipe is made using cups), a thermometer, a glass bowl (1 1/2 quarts or 1.2 litres) or even a jar with a lid.
This post includes three different ways to make a starter, so choose yours or make them all! Or you can wait until day 7 to decide when you see the final results of all three. 🙂
I really hope this post doesn’t confuse you too much, I guess we all need something to keep us occupied and this is mine, and please excuse the less then lovely photos as I have resorted to using my phone.
How to make a Sourdough Starter
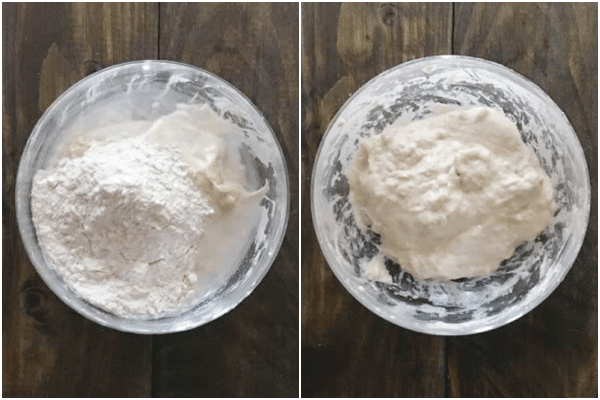
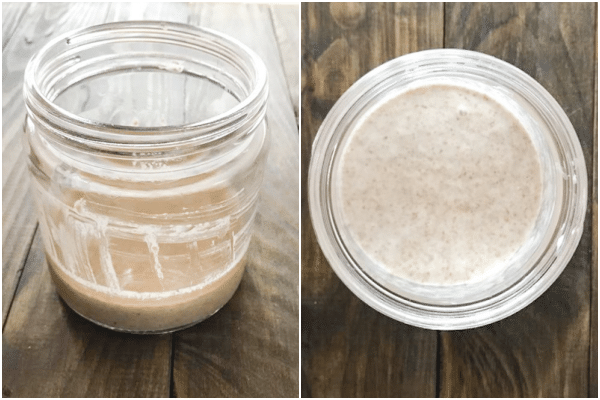
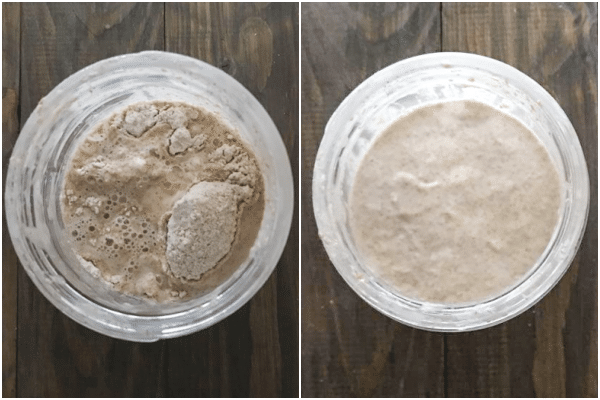
#1 Recipe – Day 1
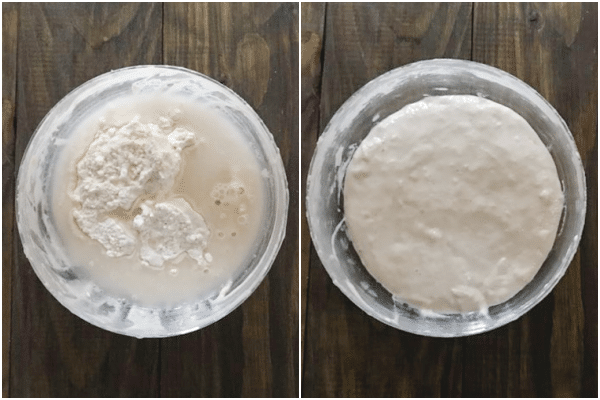
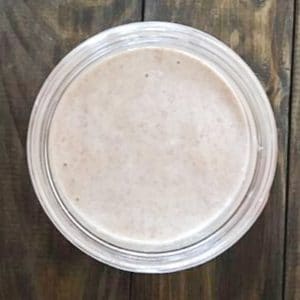
In a medium bowl or jar add the flour and the lukewarm water.
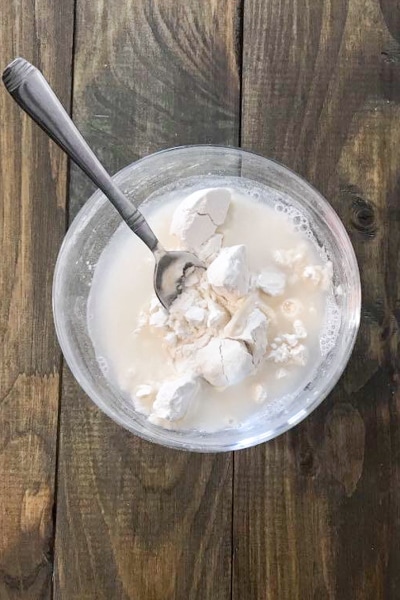
Mix well cover loosely with plastic wrap or place the lid on the jar, but do not close it. Leave the container on the counter in a warm area for 24 hours.
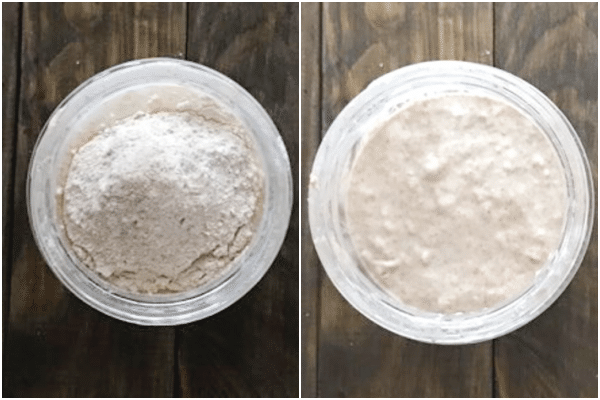
#1 Recipe – Day 2
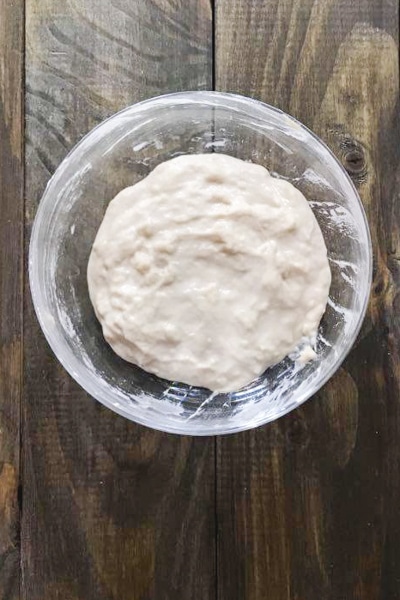
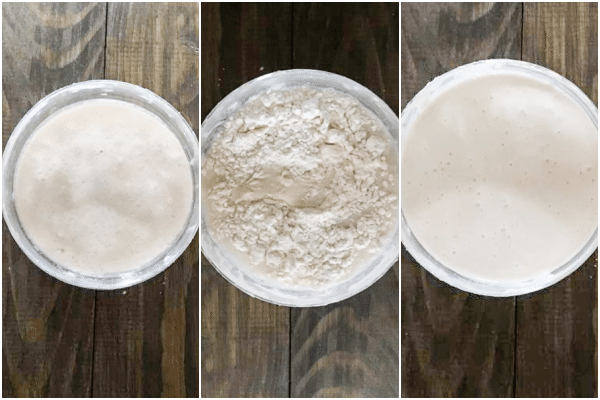
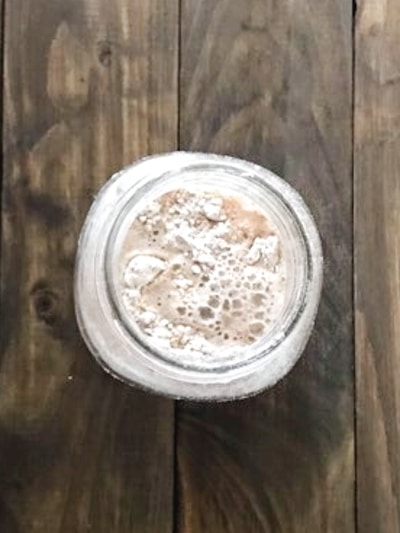
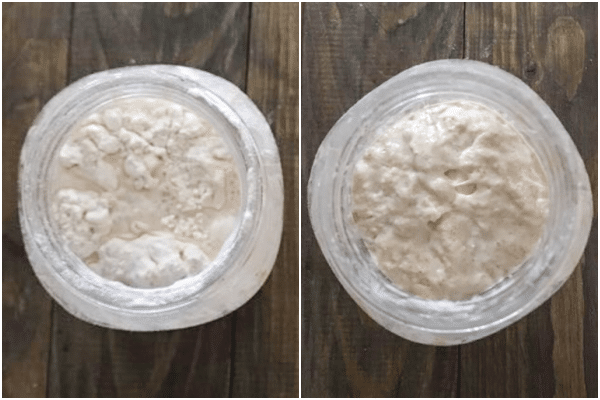
Bubbles may start to appear, but if they don’t, don’t worry, it’s fine. You may have a crusty top, if so just stir it in.
Add the flour and water, mix well, cover loosely with plastic wrap, place in a warm area and let rest 24 hours.
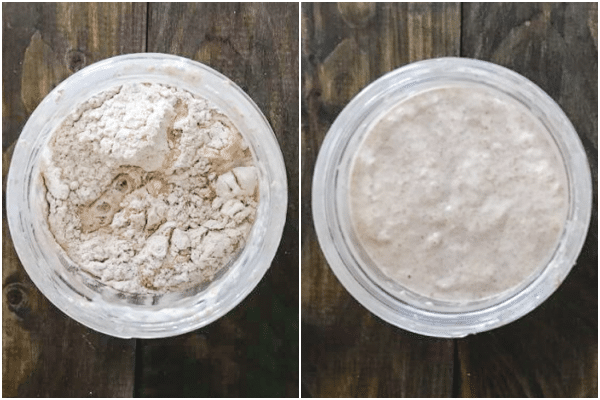
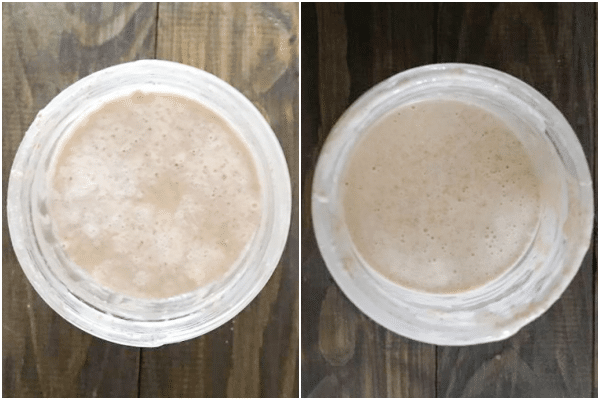
#1 Recipe Day 3
Today you should be seeing bubble and maybe a bit of a sour smell. If there is a crust just stir it in. Although if you use plastic wrap there should be no crust.
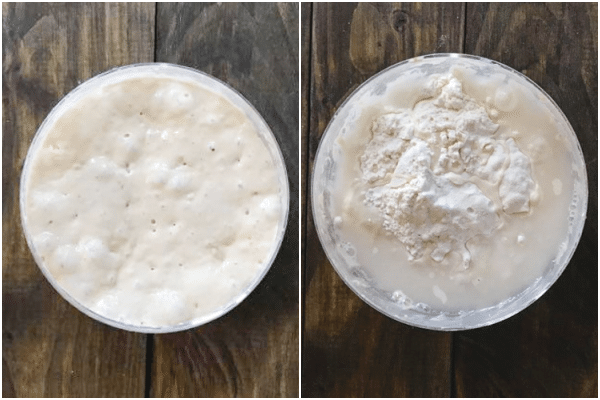
Add the flour and water, mix well, cover loosely with plastic wrap, place in a warm area and let rest 24 hours.
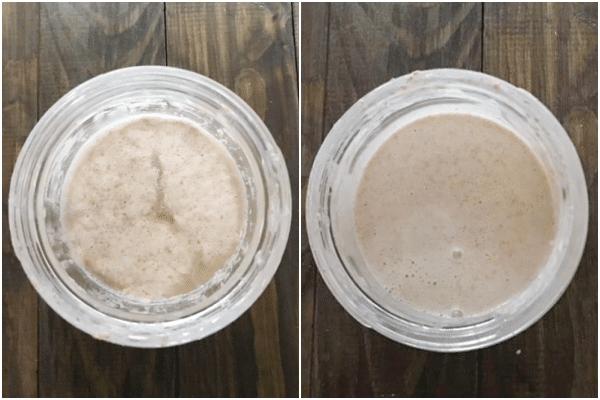
#1 Recipe – Day 4
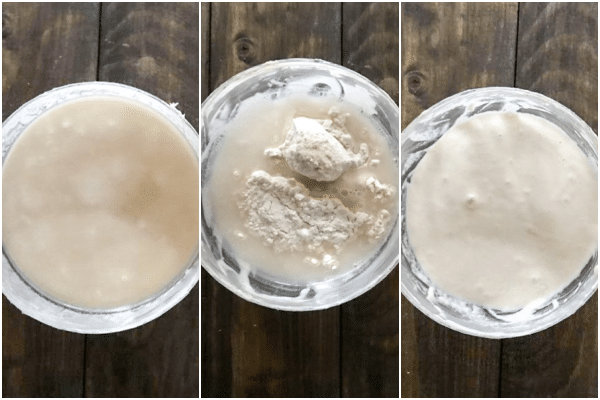
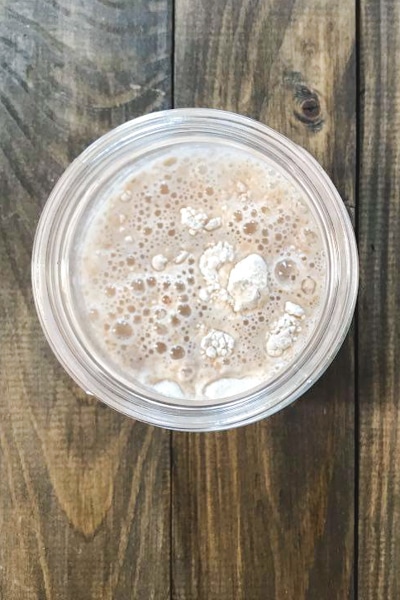
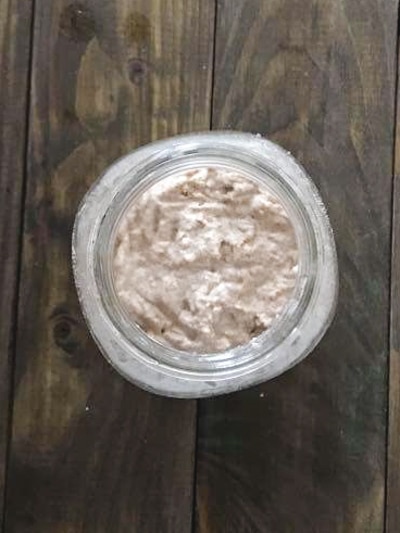
Today you should be seeing lots of bubbles and there should be a slight sour aroma.
Stir the starter and then remove half of it and discard.
Add the flour and water, mix well, cover loosely with plastic wrap, place in a warm area and let rest 24 hours.
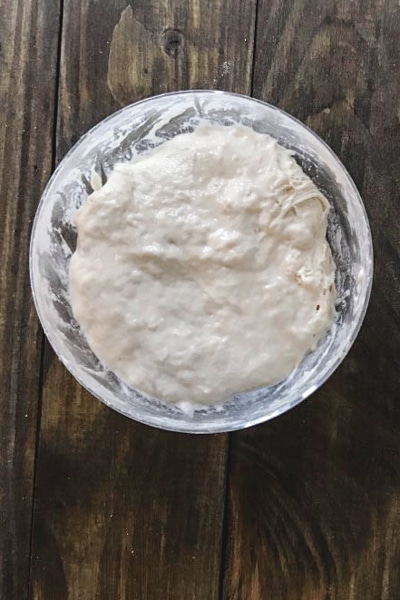
#1 Recipe – Day 5
Today you should be seeing lots of bubbles and there should be a slight sour aroma.
Stir the starter, add the flour and water, mix well, cover loosely with plastic wrap, place in a warm area and let rest 24 hours.
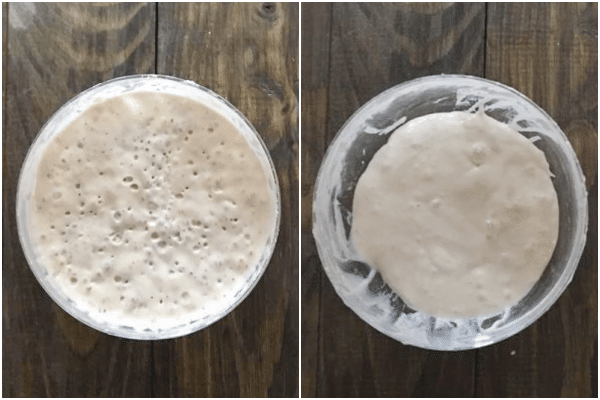
#1 Recipe Day 6
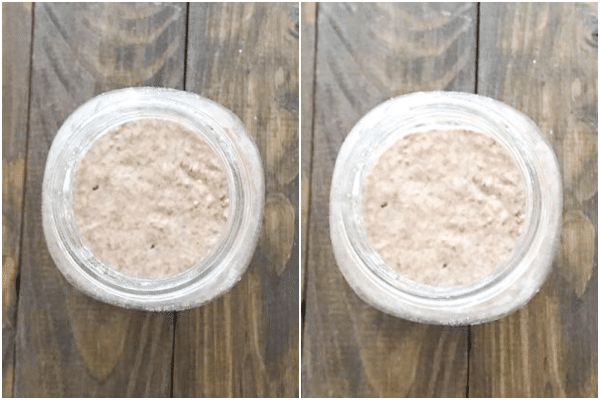
Today you should be seeing lots of bubbles and there should be a slight sour aroma.
Stir the starter and then remove half of it and discard, add the flour and water, mix well, cover loosely with plastic wrap, place in a warm area and let rest 24 hours.
#1 Recipe Day 7
Day 7 will be the same as day 6, after today your starter should be ready to make Bread.
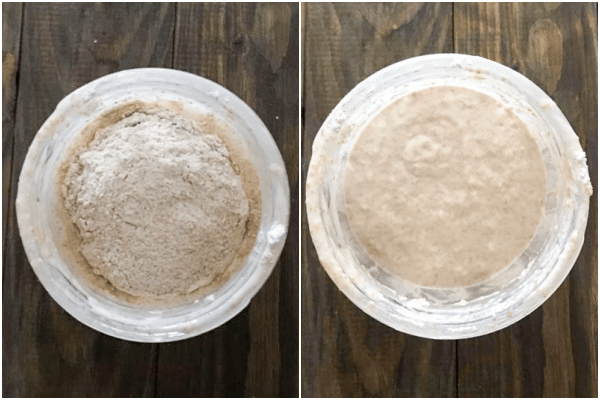
#2 Recipe – Day 1
In a medium bowl or jar (be sure to weigh your jar or bowl first and write it down, you will need this amount in the coming days), add the all purpose flour, the whole wheat and the lukewarm water.
Mix well cover loosely with plastic wrap or place the lid on the jar, but do not close it. Leave the container on the counter in a warm spot for 24 hours.

#2 Recipe – Day 2
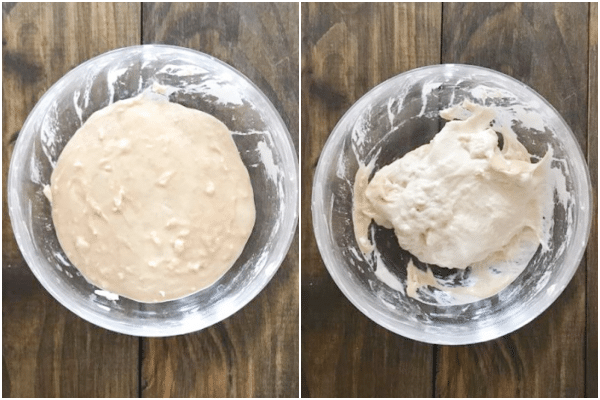
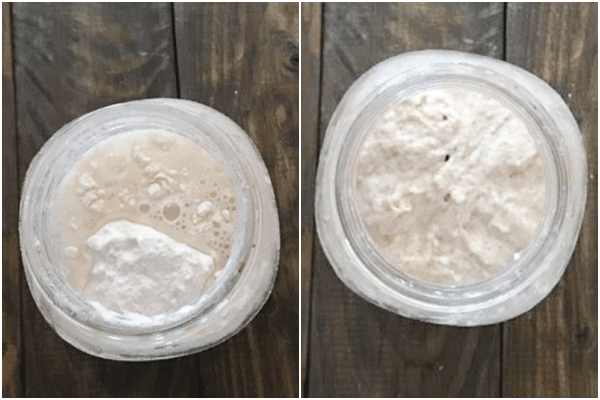
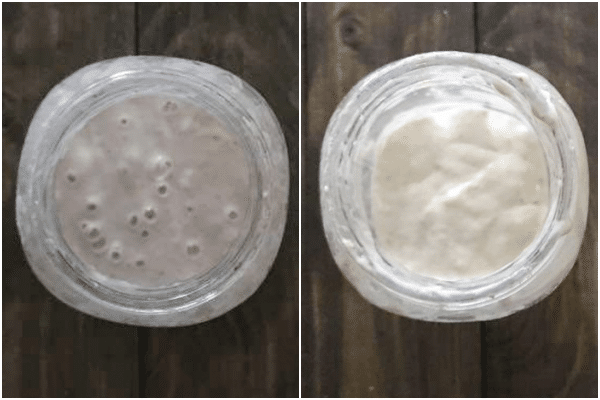
You may see some liquid on top of the dough, this is normal, you can either stir it back in or pour it out.
So this is where weighing your jar comes in, place the jar on the scale, you must leave only 70 grams of starter (the remainder is discarded). So add the weight of the jar + 70 grams, anything over that remove and discard. Stir the starter before discarding.
Then add the two types of flour and the lukewarm water. Mix well, cover loosely with plastic wrap or place the lid on the jar, but do not close it. Leave the container on the counter in a warm spot for 24 hours.
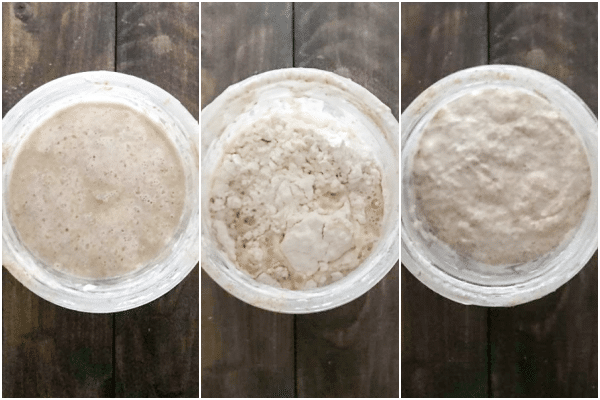
#2 Recipe – Day 3
You should start to see some bubbles at this point, you may again see some liquid on top of the dough, this is normal, you can either stir it back in or pour it out.

So this is where weighing your jar comes in, place the jar on the scale, you must leave only 70 grams of starter (the remainder is discarded). So add the weight of the jar + 70 grams, anything over that remove and discard. Stir the starter before discarding.
Then add the two types of flour and the lukewarm water. Mix well, cover loosely with plastic wrap or place the lid on the jar, but do not close it. Leave the container on the counter in a warm spot for 24 hours.
#2 Recipe – Day 4
There will be bubbles at this point, you may again see some liquid on top of the dough, this is normal, you can either stir it back in or pour it out.
Again place the jar on the scale, you must leave only 70 grams of starter (the remainder is discarded). So add the weight of the jar + 70 grams, anything over that remove and discard. Stir the starter before discarding.
Then add the two types of flour and the lukewarm water. Mix well, cover loosely with plastic wrap or place the lid on the jar, but do not close it. Leave the container on the counter in a warm spot for 24 hours.
#2 Recipe – Day 5
There will be bubbles at this point, you may again see some liquid on top of the dough, this is normal, you can either stir it back in or pour it out.
Again place the jar on the scale, you must leave only 70 grams of starter (the remainder is discarded). So add the weight of the jar + 70 grams, anything over that remove and discard. Stir the starter before discarding.
Then add the two types of flour and the lukewarm water. Mix well, cover loosely with plastic wrap or place the lid on the jar, but do not close it. Leave the container on the counter in a warm spot for 24 hours.
#2 Recipe – Day 6
There will be bubbles at this point, you may again see some liquid on top of the dough, this is normal, you can either stir it back in or pour it out.
Again place the jar on the scale, you must leave only 50 grams of starter (the remainder is discarded). So add the weight of the jar + 50 grams, anything over that remove and discard. Stir the starter before discarding.
Then add the two types of flour and the lukewarm water. Mix well, cover loosely with plastic wrap or place the lid on the jar, but do not close it. Leave the container on the counter in a warm spot for 24 hours.
#2 Recipe – Day 7
Day 7 will be the same as day 6, after today your starter should be ready to make Bread.
#3 Recipe – Day 1
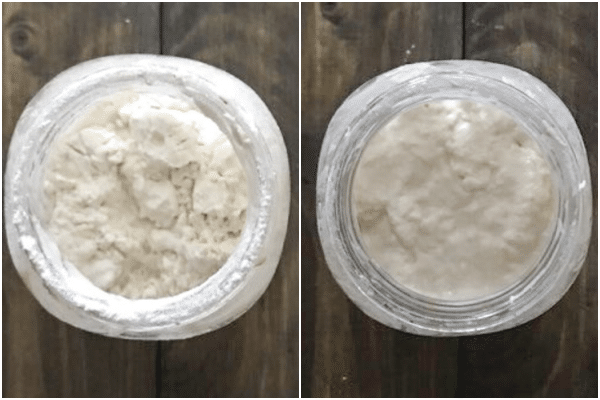
In a medium to large glass jar with a lid add 1 cup of whole wheat or rye flour and 1/2 cup of water.
Mix well then place the lid on top without closing it. Leave the container on the counter in a warm area for 24 hours.
#3 Recipe – Day 2
You may start to see some bubbles if not, don’t worry. Stir
Stir the starter then discard about 1/2 cup of the starter, then add the flour and room temperature water. Mix well then place the lid on top without closing it. Leave the container on the counter in a warm area for 24 hours.
#3 Recipe Day 3
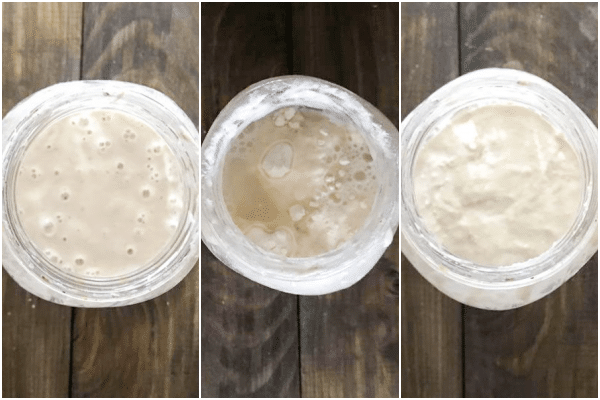
This day you should see some bubbles and a fresh fruity aroma. Starting with Day 3 you are going to feed this starter 2x a day. Every 12 hours or so.

Both feedings will be the same, stir the starter then discard about 1/2 cup of the starter, then add the flour and room temperature water. Mix well then place the lid on top without closing it. Leave the container on the counter in a warm area for 12 hours then repeat exactly.
#3 Recipe – Day 4
Today there should be lots of bubbles and a fresh fruity aroma. You are going to feed this starter again exactly as day 3, 2x a day. Every 12 hours or so.
Both feedings will be the same, stir the starter then discard about 1/2 cup of the starter, then add the flour and room temperature water. Mix well then place the lid on top without closing it. Leave the container on the counter in a warm area for 12 hours then repeat exactly the same.
#3 Recipe – Day 5
Today there should be lots of bubbles and a fresh fruity aroma. You are going to feed this starter again exactly as day 3, 2x a day. Every 12 hours or so.
Both feedings will be the same, stir the starter then discard about 1/2 cup of the starter, then add the flour and room temperature water. Mix well then place the lid on top without closing it. Leave the container on the counter in a warm area for 12 hours then repeat exactly the same.
#3 Recipe – Day 6 & 7
By today your starter should have doubled and have lots of bubbles and a sour fruity aroma. If you don’t, then continue day 6 and 7 as you did in Day 5.
What is the best room temperature for the starter?
The starter should be kept in a warmish room, the best temperature would be anywhere from 70-85F (21-30C). You may not see any bubbles on the second day but do not despair, all is good.
Why is Whole Wheat or Rye Bread used in a starter?
Because they have more nutrients for the starter and apparently ferment more actively, rye flour is just easier to work with because it has a lower gluten amount which just makes it easier to stir. I couldn’t find any rye flour so I used whole wheat and it’s working for me.
What is the liquid on the starter?
This liquid is called “hooch”, you can discard it or you can stir it back into the starter mixture. I stirred mine back in.
Why is there a crust on top of the starter?
This is caused by too much air getting into the starter, this happened to me when I covered it with a paper towel. If your starter develops a crust, just stir it back in and continue. Covering with a lid (but not tightly) or plastic wrap should keep this from happening.
Why is the starter dough discarded?
The starter is discarded so that there is less flour need to maintain it. If you just added the same amount of flour each time you refreshed the stater (without removing any starter), you would eventually come to a point where the added flour is not enough to refresh the starter and it would starve.
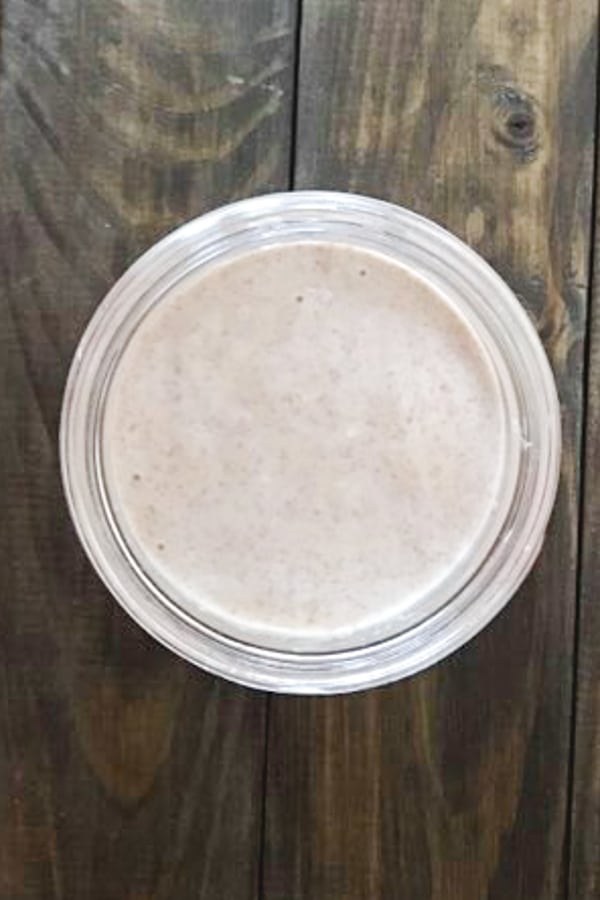
The sourdough starter is not a real starter until it is about 3 to 5 days old and sometimes longer. It takes time for the organism balance to get established.
What to make with discarded starter
Lots of people, me included would rather not throw away food, and that goes for discarded starter, here are a few ideas that you can use with it. A fast and simple one is frying it, sprinkle with your favourite spices and fry in some oil. You could share it with friends (well not now but in the future).
Apparently it makes a delicious coating for fish or onion rings, just add some salt, pepper and onion or garlic powder. If it’s too thin then add a little flour or too thick some extra water, a little baking powder might be a good idea also.
Or you could refrigerate it and keep adding the discard until you have enough for a recipe. It will last up to a week in the fridge.
What to do when the starter is active
First of all make sure your starter is active, when you see a rise and fall in your starter at about the same time each day, it should be strong enough to use. When creating a new starter, this is usually after 5-8 days.
Once the starter is active the first thing to do is give it a name, yes people name their starters. Then you can refrigerate the starter especially if you plan on baking bread about once a week. If you plan on baking everyday then the starter should be kept on the counter. And fed 1-2 times a day.
When storing in the fridge
To feed your starter once a week, start by stirring the starter then removing ¼ cup (50 grams) and discarding the remaining starter. Then feed it with 1/4 cup (50 grams) water (chlorine free – filtered or bottled), 1/2 cup (50 grams) all purpose flour (unbleached).
Lightly cover the container , let it sit at room temperature for about 2-3 hours or until light and bubbly. Then put a tight lid on the jar and place it back in the refrigerator. This should be done weekly even when not baking with your sourdough starter.
How to bake with a refrigerated starter
To start baking with your refrigerated starter, first remove the starter from the fridge there will probably be no activity since it is dormant, if there is liquid on top then either remove or stir into the starter either way be sure to stir the starter, then leave 1/2 cup (120 grams) of starter in the jar, discard the remainder, then add 1 cup (125 grams) of flour (all purpose, unbleached) and 1/2 cup (125 grams) water. Stir well, cover lightly and place at room temperature for 12 hours then repeat the feeding, until it has almost tripled in volume.
Remove the amount you need for your recipe, then feed the remaining starter as about, leave it at room temperature for about 2-3 hours then refrigerate. Repeat as above whenever you wish to make fresh bread.
Freezing the starter
So if don’t plan on baking very often, maybe once a month, then the best place for your starter would be the freezer. Before you freeze it you should feed it one more time, let it sit and grow a few hours, stir it down and then separate it into smaller containers if you wish (about 50 grams each).
Freeze it, then when you are ready to bake with it, you can just remove 50 grams at a time, place it in the fridge to thaw, remove it from the fridge and let it sit at room temperature for a couple of hours then feed it with the same weight in flour and water (lukewarm) let it sit until it doubles in size (could take up to 24 hours). Then it is ready to bake with.
Everyday for the next 7 days I will be adding the next step and also more helpful advise on making your sour dough starter.
Sourdough Starter Recipe
Ingredients
#1 RECIPE
DAY 1
- 50 grams all purpose or bread flour (unbleached)
- 50 grams lukewarm water (85F / 30C)
DAY 2
- 30 grams all purpose or bread flour (unbleached)
- 30 grams lukewarm water (85F / 30C)
DAY 3
- 30 grams all purpose or bread flour (unbleached)
- 30 grams lukewarm water (85F / 30C)
DAY 4
- 30 grams all purpose or bread flour (unbleached)
- 30 grams lukewarm water (85F / 30C)
DAY 5
- 30 grams all purpose or bread flour (unbleached)
- 30 grams lukewarm water (85F / 30C)
DAY 6
- 30 grams all purpose or bread flour (unbleached)
- 30 grams lukewarm water (85F / 30C)
#2 RECIPE
DAY 1
- 50 grams all purpose flour (unbleached)
- 50 grams whole wheat or rye flour (unbleached)
- 150 grams lukewarm water (85F / 30C)
DAY 2
- 50 grams all purpose flour (unbleached)
- 50 grams whole wheat or rye flour (unbleached)
- 115 grams lukewarm water (85F / 30C)
DAY 3
- 50 grams all purpose flour (unbleached)
- 50 grams whole wheat or rye flour (unbleached)
- 115 grams lukewarm water (85F / 30C)
DAY 4
- 50 grams all purpose flour (unbleached)
- 50 grams whole wheat or rye flour (unbleached)
- 100 grams lukewarm water (85F / 30C)
DAY 5
- 50 grams all purpose flour (unbleached)
- 50 grams whole wheat or rye flour (unbleached)
- 100 grams lukewarm water (85F / 30C)
DAY 6
- 50 grams all purpose flour (unbleached)
- 50 grams whole wheat or rye flour (unbleached)
- 100 grams lukewarm water (85F / 30C)
#3 RECIPE
DAY 1
- 1 cup whole wheat or rye flour (unbleached)
- ½ cup water (room temperature)
DAY 2
- 1 cup all purpose flour (unbleached)
- ½ cup water (room temperature)
DAY 3 (1ST & 2ND FEEDING)
- 1 cup all purpose flour (unbleached)
- ½ cup water (room temperature)
DAY 4 (1ST & 2ND FEEDING)
- 1 cup all purpose flour (unbleached)
- ½ cup water (room temperature)
DAY 5
- 1 cup all purpose flour (unbleached)
- ½ cup water (room temperature)
DAY 6 the same as Day 5 if needed
- 1 cup all purpose flour (unbleached)
- ½ cup water (room temperature)
Instructions
#1 RECIPE
DAY 1
- In a medium bowl or jar add the flour and the lukewarm water. Mix well cover loosely with plastic wrap or place the lid on the jar, but do not close it. Leave the container on the counter for 24 hours.
DAY 2
- Add the flour and water, mix well, cover loosely with plastic wrap, place in a warm area and let rest 24 hours.
DAY 3
- Add the flour and water, mix well, cover loosely with plastic wrap, place in a warm area and let rest 24 hours.
DAY 4
- Today you should be seeing lots of bubbles and there should be a slight sour aroma. Stir the starter and then remove half of it and discard. Add the flour and water, mix well, cover loosely with plastic wrap, place in a warm area and let rest 24 hours.
DAY 5
- Today you should be seeing lots of bubbles and there should be a slight sour aroma. Stir the starter then add the flour and water, mix well, cover loosely with plastic wrap, place in a warm area and let rest 24 hours.
DAY 6
- Today you should be seeing lots of bubbles and there should be a slight sour aroma. Stir the starter and then remove half of it and discard, add the flour and water, mix well, cover loosely with plastic wrap, place in a warm area and let rest 24 hours.
DAY 7
- Day 7 will be the same as day 6, after today your starter should be ready to make Bread.
#2 RECIPE
DAY 1
- In a medium bowl or jar (be sure to weigh your jar or bowl first and write it down, you will need this amount in the coming days), add the all purpose flour, the whole wheat and the lukewarm water. Mix well cover loosely with plastic wrap or place the lid on the jar, but do not close it. Leave the container on the counter for 24 hours.
DAY 2
- So this is where weighing your jar comes in, place the jar on the scale, you must leave only 70 grams of starter (the remainder is discarded).Stir the starter first. The add the weight of the jar + 70 grams, anything over that, remove and discard.Then add the two types of flour and the lukewarm water. Mix well, cover loosely with plastic wrap or place the lid on the jar, but do not close it. Leave the container on the counter in a warm spot for 24 hours.
DAY 3
- Stir the starter first. Then add the weight of the jar + 70 grams, anything over that, remove and discard.Add the two types of flour and the lukewarm water. Mix well, cover loosely with plastic wrap or place the lid on the jar, but do not close it. Leave the container on the counter in a warm spot for 24 hours.
DAY 4
- There will be bubbles at this point, you may again see some liquid on top of the dough, this is normal, you can either stir it back in or pour it out. Stir the starter first. Then add the weight of the jar + 70 grams, anything over that, remove and discard. Add the two types of flour and the lukewarm water. Mix well, cover loosely with plastic wrap or place the lid on the jar, but do not close it. Leave the container on the counter in a warm spot for 24 hours.
DAY 5
- There will be bubbles at this point, you may again see some liquid on top of the dough, this is normal, you can either stir it back in or pour it out. Stir the starter first. Then add the weight of the jar + 70 grams, anything over that, remove and discard. Add the two types of flour and the lukewarm water. Mix well, cover loosely with plastic wrap or place the lid on the jar, but do not close it. Leave the container on the counter in a warm spot for 24 hours.
DAY 6
- There will be bubbles at this point, you may again see some liquid on top of the dough, this is normal, you can either stir it back in or pour it out.Again place the jar on the scale, you must leave only 50 grams of starter (the remainder is discarded). So add the weight of the jar + 50 grams, anything over that remove and discard. Stir the starter before discarding.Then add the two types of flour and the lukewarm water. Mix well, cover loosely with plastic wrap or place the lid on the jar, but do not close it. Leave the container on the counter in a warm spot for 24 hours.
DAY 7
- Day 7 will be the same as day 6, after today your starter should be ready to make Bread.
#3 RECIPE
DAY 1
- In a medium to large glass jar with a lid add 1 cup of whole wheat or rye flour and 1/2 cup of water. Mix well then place the lid on top without closing it. Leave the container on the counter for 24 hours.
DAY 2
- First stir the starter then discard about 1/2 cup of the starter, then add the flour and room temperature water. Mix well then place the lid on top without closing it. Leave the container on the counter in a warm area for 24 hours.
DAY 3 – Feedings 2x a day (every 12 hours)
- Both feedings will be the same, stir the starter then discard about 1/2 cup of the starter, then add the flour and room temperature water. Mix well then place the lid on top without closing it. Leave the container on the counter in a warm area for 12 hours then repeat exactly.
DAY 4 – Feedings 2x a day (every 12 hours)
- Today there should be lots of bubbles and a fresh fruity aroma. You are going to feed this starter again exactly as day 3, 2x a day. Every 12 hours or so.Both feedings will be the same, stir the starter then discard about 1/2 cup of the starter, then add the flour and room temperature water. Mix well then place the lid on top without closing it. Leave the container on the counter in a warm area for 12 hours then repeat exactly.
DAY 5
- Today there should be lots of bubbles and a fresh fruity aroma. You are going to feed this starter again exactly as day 3, 2x a day. Every 12 hours or so.Both feedings will be the same, stir the starter then discard about 1/2 cup of the starter, then add the flour and room temperature water. Mix well then place the lid on top without closing it. Leave the container on the counter in a warm area for 12 hours then repeat exactly.
DAY 6
- By today your starter should have doubled in volume and have lots of bubbles and a sour fruity aroma. If you don't, then continue day 6 and 7 as you did in Day 5.
Notes
Nutrition
It’s All About Pasta
Amazing pasta recipes to make your mouth water!


Authentic Italian Desserts
75 Traditional Desserts Made Easy
I’m in the process of making the starter (#1 recipe)… following the instructions to the “T”.. I’m on day 4. no real activity. I — DO — have “hooch” on the top of the starter and an aroma, but the starter itself is still no bubbly.. I’ll continue but am wondering if this is still considered “normal” and if it’s worth continuing? thanks!
Hi Steven, in my opinion there should be quite a bit of bubbles, I never saw any hooch that early, usually it happens after it has been refrigerated (day 7 and on), maybe go another day and if still the same, I would probably start over. Hope that helps. Let me know. Take care!
I was taken by surprise on Day 6 of recipe 2 when the starter was reduced to 50 grams. Will this be a problem? Can I just correct it on Day 7?
Hi YD, since you are leaving 50 grams of starter and adding 50 grams of water and 50 grams of flour, the total is 150 grams. But if you have a recipe that you know is going to be more than 150 grams, then instead of removing 100 grams tomorrow (reducing down to 50 grams) you can reduce to 75 or 100 grams, and add 75 grams of flour and water or 100 grams each. Hope that helps. Let me know.
I’m having a hard time with this. Seems like the dough ball is hard as a rock and very difficult to mix into new flour and water the next day. I am weighing everything. Is the dough supposed to be that hard??
Hi Jackie, no it should not be hard at all it’s a very soft dough, try adding a little more water or less flour. What kind of flour are you using?
Hi Rosemary, sorry im confused, i cant understand your “starter” for sourdough bread and i can see its a 7 day prpocess, but what amount of ingredients do I start with on day 1?
Thanks
Sharon
Hi Sharon, if you go down to the recipe card at the end of the post, it lists the ingredient amounts. Just choose which starter you prefer (they all work well) and always stick to that recipe #. Hope that helps. Let me know how it goes or if you have more questions.
question: my 1st time making sourdough starter (plus newbie bread baker). I’m on day 7, option 1 & just realized I didn’t remove 1/2 the starter on day 6! I did today (& added the flour/water). Will the starter still work? Should I now treat today as day 6 & tomorrow as day 7? Thanks so much for your detailed instructions – can’t wait to make the bread 😉
Hi Sharon, If it is really bubbly and growing then just continue, if it isn’t then yes repeat day 6. Let me know how it goes.
I’m incredibly frustrated – I’ve made the starter – where’s the actual bread recipe????
What do I do with this?
Hi Marijo, sorry here is the link. https://anitalianinmykitchen.com/sourdough-bread/
Perfect!
Thank you so much – can’t wait to make it!!
Marijo
For recipe #1 do I add the flour and water on day 7 and then discard and make my bread.
If I can reuse my discard when should I freeze it.
Hi Rae, so your discard can be frozen, you should give it one more feeding, let it sit and grow a few hours, stir it down and then separate it into smaller containers if you wish (about 50 grams each), freeze it, then when you are ready to bake with it, you can just remove 50 grams at a time, place it in the fridge to thaw, remove it from the fridge and let it sit at room temperature for a couple of hours then feed it with the same weight in flour and water (lukewarm) let it sit until it doubles in size. Then it is ready to bake with. Hope that helps. Take care.
I was so happy when I received your email regarding sour dough starter. I have been wanting to do this for quite sometime. You have brought my inspiration back! Thank You!
I have 2 questions though before I get started: (1) When you say put the lid on the jar but don’t seal it, I am not really understanding this. Do I not turn the lid on the jar, or do I just set the lid on the jar, or do I put the lid on top of the jar off to the side of the opening? (2). Since I am not familiar with how this type of yeast rises, what size jar should I use?
Since I wasn’t ready yesterday to start with lesson #1 post, as usual I will be a day late in following your 7 day postings. Looking forward to my day #8!
Thank You,
Mary
Hi Mary, so glad you are inspired. Yes just set the lid on the jar without turning it. The jar or bowl should be about 1 1/2 quarters. Hope that helps. Let me know how it goes.
I would to make a gluten free sour dough starter. Do you have any recommendations for me?
Hi Catherine, I found this one that might be helpful to you. https://vanillaandbean.com/gluten-free-sourdough-starter/
Thankyou for the recipe for the starter.
Do I choose one of them or do I need all three? I hope I don’t sound daft, but I’m sure others will want to know as well. :))
I am worried that I will run out of Yeast. Always wanted my own sourdòugh starter. :))
Hi Mary, you can choose whichever one you want. It’s up to you.If you want to try them all you can. Let me know how it goes.