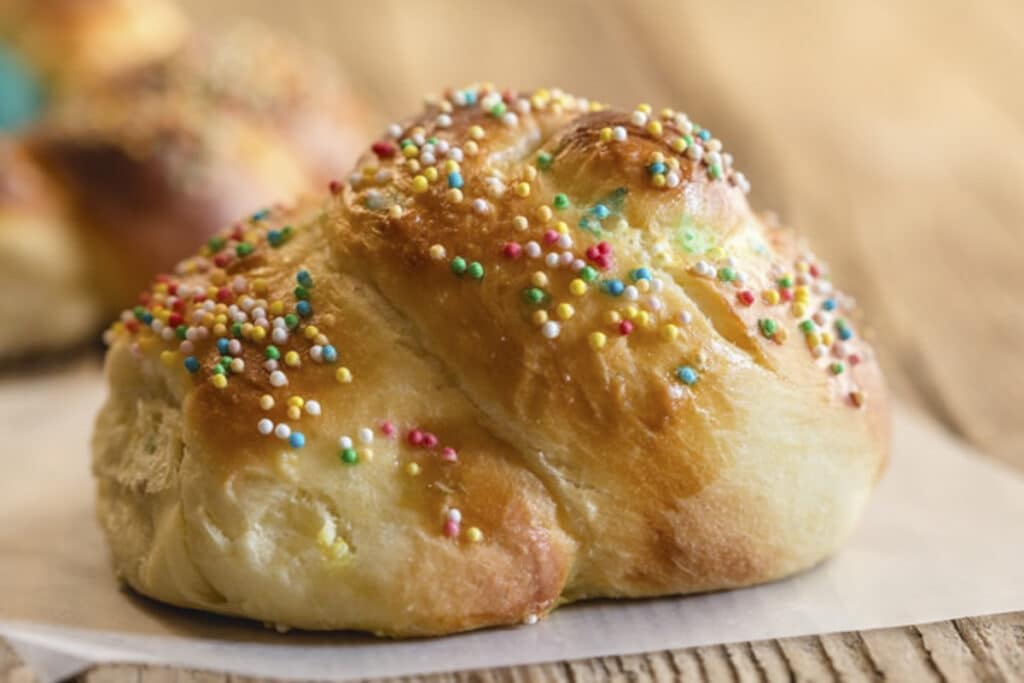
Traditional Italian Easter Bread
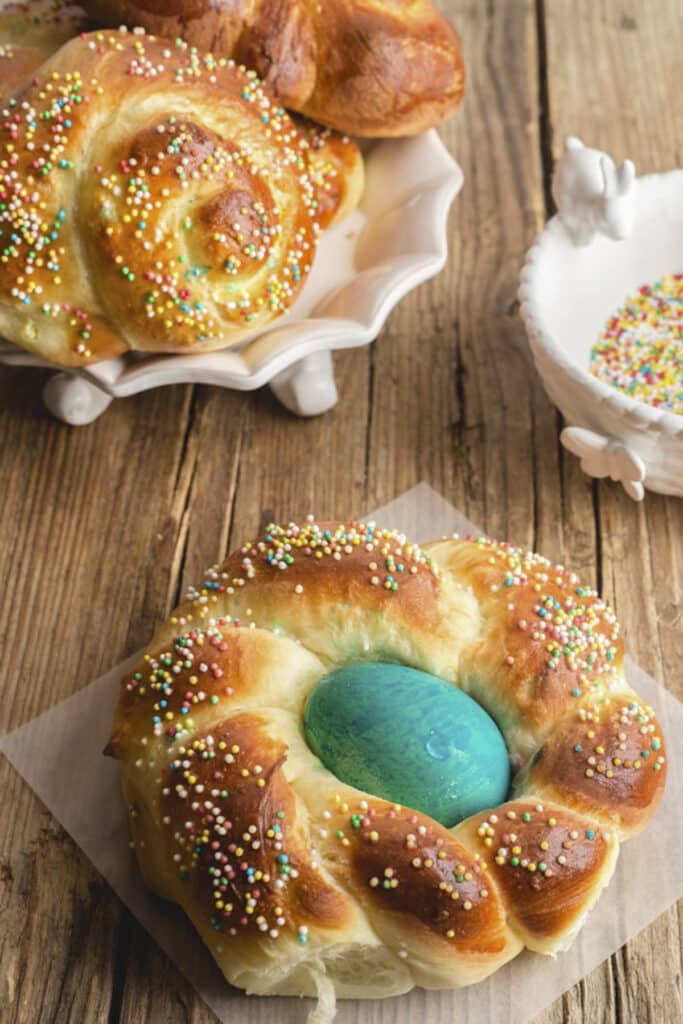
This Traditional Italian Easter Bread is a soft sweet brioche dough formed into wreaths or braided. Coloured eggs are baked into the bread and the bread is sprinkled with lots of nonpareils. Festive and bright for the Easter Holiday.
Another very popular yeast bread is a recipe called Casatiello Napoletano which is a savory stuffed bread.
I absolutely love Brioche Bread and of course this Sweet Soft Bread is a must in any Italian home on Easter. I wanted to find a true Traditional Italian Recipe and I came upon this recipe Brioche di Pasqua from a fellow Food Blogger, Chiara from Chiarapassion.com.
How to make An italian easter bread
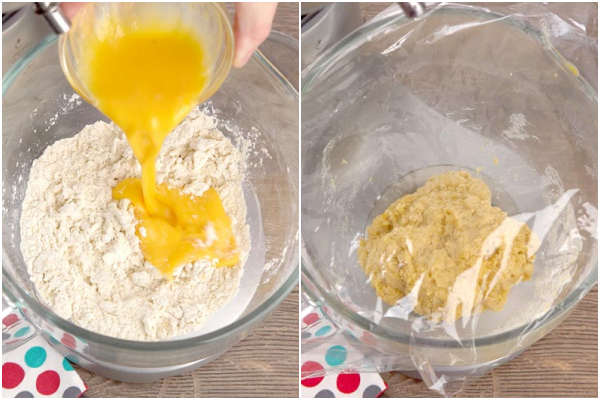
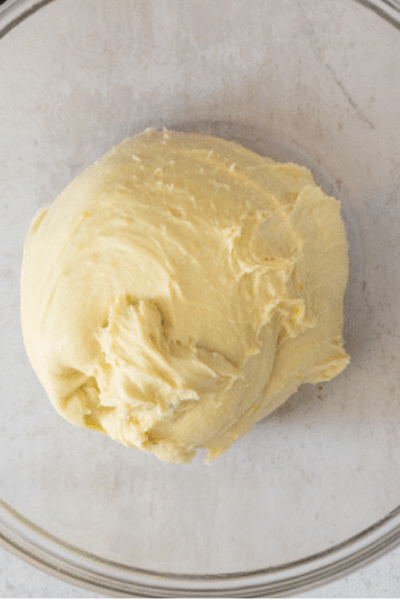
In the bowl of a stand up mixer whisk together the flour, salt, zest and sugar, make a well in the centre and add the milk and yeast, mix together with a fork.

Then add the egg. With the dough hook attachment knead just to combine. Cover the bowl with plastic and let rise in a warm draft free area.
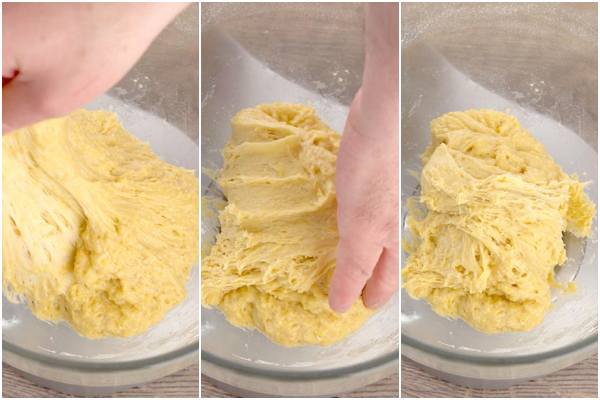
Fold both ends into the middle, repeating 4 times.
When the time has passed add the butter a little at a time at medium high speed with the dough hook, knead to just combine all the butter, then let the dough rest. Knead again until the dough is smooth and does not stick to the sides of the bowl.
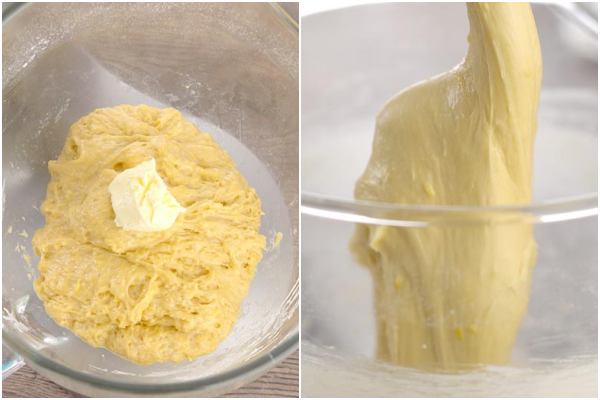
Place the dough in a lightly greased bowl, cover with plastic and refrigerate.
Move the dough to a lightly floured flat surface. Divide the dough into 4 parts. Roll each part into 2 ropes, join the 2 ropes at the top.
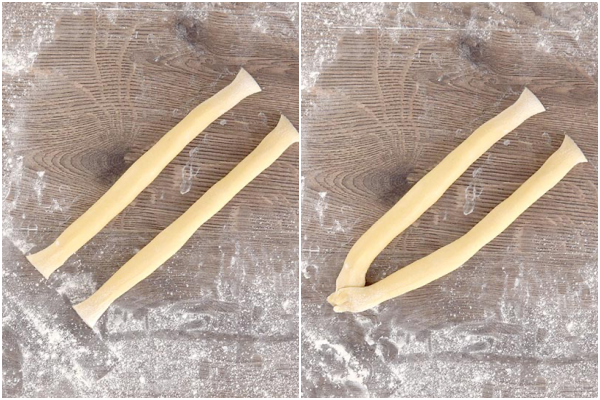
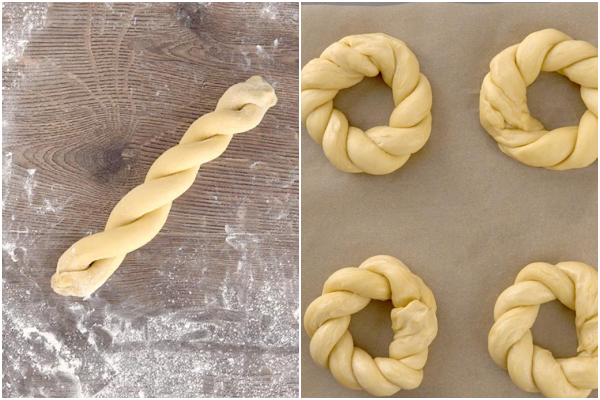
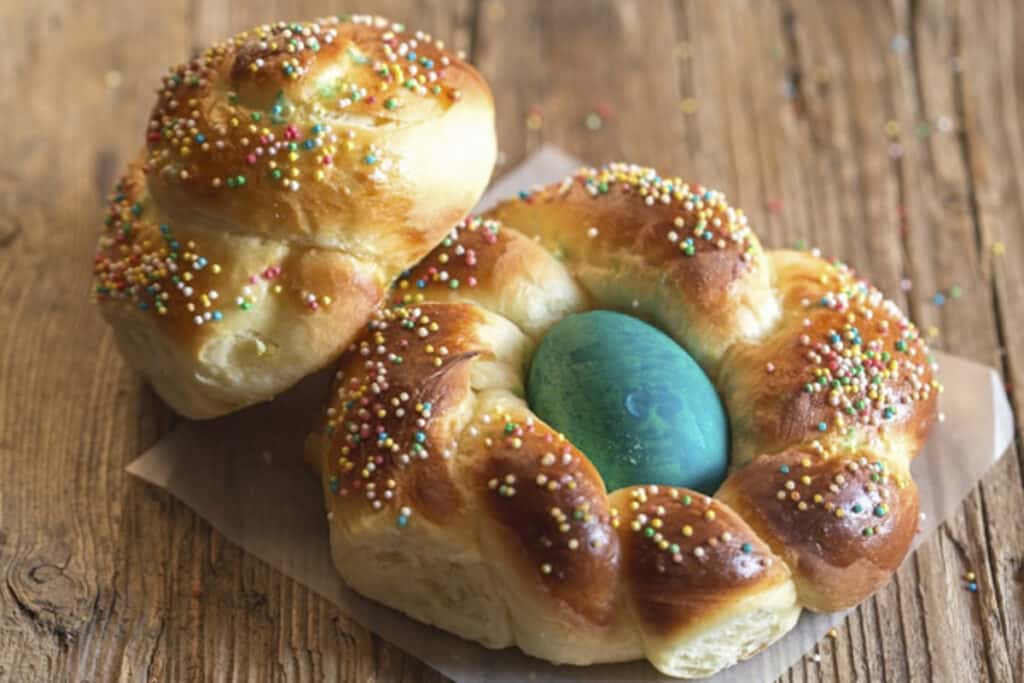
Twist the ends one over the other join the ends to form a wreath (circle) repeat with the remaining ropes. Place the wreaths on the prepared cookie sheet, cover and let rise in a warm draft free area until doubled in bulk.
Before baking an uncooked dyed egg can be placed in the dough, then the dough is brushed with a simple egg wash and covered in sprinkles (nonpareils) and baked.
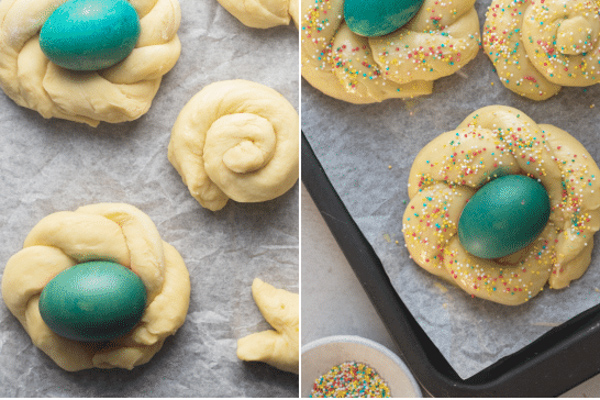
Immediately move the baked bread to a wire rack to cool.
How to know if the dough is proofed perfectly
Proof your dough with the “poke test”. With a fully proofed dough, you should be able to poke it and leave an indent that slowly starts to fill back in but doesn’t spring back completely.
If your dough is under-proofed, it will spring back almost immediately, if your dough is over-proofed it will not spring back at all.
Tips on making the best Easter Bread
- This Italian Easter Bread is a yeast bread which means you need time and patience. It’s not difficult just time consuming but absolutely worth it.
- This dough needs to rise 3x, the first time the dough (without the butter added) is placed in a bowl for 2 hours. Every 30 minutes the dough needs to be folded over.
- The second rise is done once the butter has been added to the dough and then refrigerated for 1-2 hours.
- Believe me they are worth every minute of your time!
This bread is very popular all over Italy. Sometimes I like to make an Easter Bread from the South of Italy, it is a much drier bread and is used as a dunking bread in your morning caffe latte or afternoon espresso or this Easter Sweet bread from the North of Italy. But the most popular Easter Bread which is called Colomba or Dove Bread is also worth a try.
How to colour eggs with Natural Dyes
If you decide to use coloured eggs in your bread and you don’t want to use regular dyes then there are Natural Dyes that you can use. Vegetables and spices are great for dying eggs especially red onions, paprika, dill seed and even red cabbage.
What is the significance of Easter Bread?
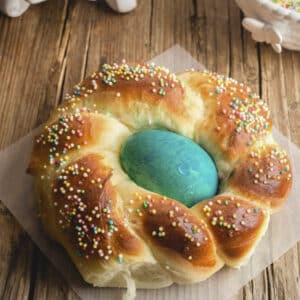
Italian Easter Bread when it is baked in the shape of a wreath it is to symbolize the crown of thorns worn by Jesus Christ. When the dough is braided with three pieces it represents the Holy Trinity.
Adding an egg to the bread represents rebirth, Christ rising from the dead.

How to Store Italian Easter Bread
Be sure to store the Brioche Bread in an air tight container or bag for up to 5 days. The breads can also be frozen again in an airtight container or freezer bag for up to 2 months. Just be sure to remove the egg before freezing.
So if you would like to surprise your family and friends with a delicious soft Italian Easter Bread, then I hope you give this a try and let me know how you like it. Enjoy!
Traditional Italian Easter Bread
Ingredients
BRIOCHE DOUGH
- 1¾ cups +2 tablespoons all purpose flour (234 grams total, if you double or triple the recipe double or triple this amount)
- 1 pinch salt*
- 1 tablespoon lemon zest
- 2½ tablespoons granulated sugar
- ¼ cup lukewarm milk (I used 2 % milk)
- 1½ teaspoons active dry yeast
- 2 eggs (room temperature) (slightly beaten)
- ½ cup butter (room temperature)
If using unsalted butter add ¼ teaspoon of salt.
EGG WASH
- 1 egg
- 1 tablespoon water
TOPPING
- 2-4 eggs (uncooked and dyed whatever colour you like)
- 2-4 tablespoons sprinkles* (if desired)
Instructions
BRIOCHE DOUGH
- In the bowl of a stand up mixer whisk together the flour, salt, zest and sugar, make a well in the centre and add the milk and yeast, mix together with a fork. Then add the eggs. With the dough hook attachment knead for approximately 1 minute just to combine.
- Cover the bowl with plastic and let rise 2 hours, every 30 minutes fold both ends into the middle (repeating 4 times).
- When the time has passed add the butter a little at a time, on medium high speed with the dough hook, knead just to combine all the butter, then let the dough rest 10 minutes. Knead again for 5-6 minutes until smooth and the dough does not stick to the sides of the bowl. Place the dough in a lightly greased bowl, cover with plastic and refrigerate for 1-2 hours.
- Move the dough to a lightly floured flat surface. Divide the dough into 4 parts. Roll each part into 2 ropes (10-12 inches / 25-30cm), join 2 ropes at the top and twist the ends one over the other (see photo), join the ends to form a wreath (circle) repeat with the remaining ropes. Place the wreaths on a parchment paper lined cookie sheet, cover and let rise in a warm draft free area for 1-2 hours or doubled in bulk.
- 15 minutes before rising time has finished pre heat oven to 390F (195C).
- Add a dyed uncooked egg (if desired) to the centre of the wreath then brush the wreaths with the egg wash (be careful not to brush the eggs) and sprinkle with the sprinkles. Bake for approximately 20 minutes or until golden, or when tapped on the bottom and there is a hollow sound. Immediately move the baked buns to a wire rack to cool. Let cool before serving. Enjoy!
EGG WASH
- In a small bowl beat together the egg and water.
Notes
Nutrition
It’s All About Pasta
Amazing pasta recipes to make your mouth water!

Authentic Italian Desserts
75 Traditional Desserts Made Easy
Did you use salted or unsalted butter in you recipe?
Hi Carlota, I use salted, but if you use unsalted then add 1/4 teaspoon of salt. Let me know how it goes.
Is it possible to double the recipe or will that mess up the rising times for the dough? Thank you!
Hi Carolyn, yes you an double the recipe and rising time will be the same. 🙂
This looks wonderful, I’ll be making this over the weekend. May I triple the recipe for 12 wreaths? Family with big appetite coming for Easter lunch 🙂
Hi Nick, sure you can triple the recipe. Happy Easter.
I had a terrible time incorporating the butter. Then during step three, I kneaded the dough for what seemed like forever (must have been at least 20 minutes). It would not pull together onto the dough hook or pull away from the bowl. I finally added flour a little at a time. At the end I just finished it by hand. Any idea what I may have done wrong? Thanks.
Hi Carol, it could have been that your butter was too hard, it should be quite soft. 🙂
Hello, is it possible refigerate after step 4, and in the morning bake it?
Hi Germa yes you can, be sure to bring it to room temperature for about 30-60 minutes and then continue with the recipe. Let me know how it goes.
I would love to make this bread. My grandmother always made one for each of her grandchildren so I would like to make it for my granddaughters. One of my granddaughters cannot have dairy. Do you think I could use Crisco butter flavored shortening instead of butter and oat milk instead of regular milk?
Hi Angela, I have never made it with those ingredients but you can try. Let me know how it goes if you. 🙂
I would try vegan butter (non dairy) and any plant based milk. My daughter is gluten free, dairy free and this is how I usually substitute.
Outstanding! My first try and the breads came out very good. I slightly overcooked them so next time, probably 15-17 mins cook time. Patience is the key with this bread. I did not use the eggs because I didn’t want to waste them if the bread didn’t work out. For Easter, cook less, use eggs. Thanks for the great recipe
Hi Anne, thanks so much, so glad you enjoyed it. And yes patience is the key. Happy Easter.
Could you let the 2nd rise in the fridge go overnight to cut your work down the day of serving?
or should I just make these a day ahead of time. Do they keep well for the next day? Thanks!
Hi Lee, yes you could let it rise overnight in the fridge, bring it to room temperature for about 30 minutes before baking. Hope that helps. Let me know how it goes.
Hello,
Would love to try to make this but I don’t have a stand up mixer. Should I wait until I purchase one?
Thank you for the explanation of what the bread represents.
Hi Isabelle, this can be made by hand kneading also, it just takes a little strength and time but it is possible. 🙂
Real italian Easter Bread is 3 pieces of dough braided together, one each to represent The Father, The Son, and The Holy Spirit! Come on!!!!
Hi Angela, if you read my post that’s pretty much what I said. 🙂
Yup – It’s exactly what you said!!
Haha thanks Diane. Have a great weekend.
Hi Rosemary! Can I divide each bread set into three ropes instead of two or will that mess up the recipe/be too hard to do with small, individual breads?
Hi Amy, sure if it works for you, you can do that. Let me know how it goes.
Hello! I am excited to try this recipe! Can I divide this recipe in two instead of five minis? If so, how long would you bake it for?
Hi Joanna, sure you can make 2 or even 1 large one. I would bake for about 25 minutes for 2 and 30-35 for one. If they start to brown too much halfway through then just cover with foil and continue baking. Let me know how it goes.
I haven’t tried this recipe, but am looking for the recipe for an
Easter bread called pichaladi? Wondering if you could help. All I ermember is it looked like a giant donut and it tasted like Hawaiian bread except it was very dense. Please help!!!
Hi Louise, I think you might mean this one. https://anitalianinmykitchen.com/italian-easter-bread/ , it is dense, a little on the dry side but made for dipping and eating with a coffee or tea. Let me know.
Hii can I use instant yeast instead of dry? If yes should I dissolve it in water and wait to bubble or just put it?
Hi Nelly, yes you can use instant the same way as active, although you are going to use less, so use 1 1/4 teaspoons of instant. Hope that helps.
Hello, this looks like a great recpie! However, I do not have a dough hook. Can I knead this by hand? If so, for how long? and what is the dough supposed to feel like? (I am new to bread making)
Hi Irene, yes you can knead it by hand, it might be quite messing when incorporating the butter. It depends it could take up to 15 minutes to knead the butter in by hand, the dough should be soft and smooth. I hope this helps.
Made this for Easter and it worked out perfectly! They looked and tasted great. Thanks!
Thanks Dina, glad you enjoyed it. Take care.
I started this yesterday. I had a hard time incorporating the butter and was worried I’d measured wrong. I left it in the fridge overnight. This morning I let it come to room temperature and then formed it into four braided rings. Maybe I wasn’t supposed to refrigerate at that point but no way could I fit formed loaves in my fridge. It took forever for it to rise and two were smaller than the others. After two hours of rising I baked them for 15 minutes before checking and they were done! Almost too brown on the bottom (need to calibrate my oven!). Let them cool, drizzled them with a bit of icing sugar, cream, anise extract glaze. Pretended I was presenting to the judges on the Great British Baking Show (when I was drizzling, my son announced, “Only 5 minutes left!”), cut one open, listened to that great sound and saw a great crumb (do you still call it crumb on bread or is crumb only for cakes?), and took a bite. Heaven! Perfect! Thanks for the recipe and especially answering people’s comments and questions. Too bad I can’t send you a photo:)
Hi Carole, thanks, haha I love that show, and your son’s comment :). And yes crumb is for bread also. So glad you enjoyed it. Take care.