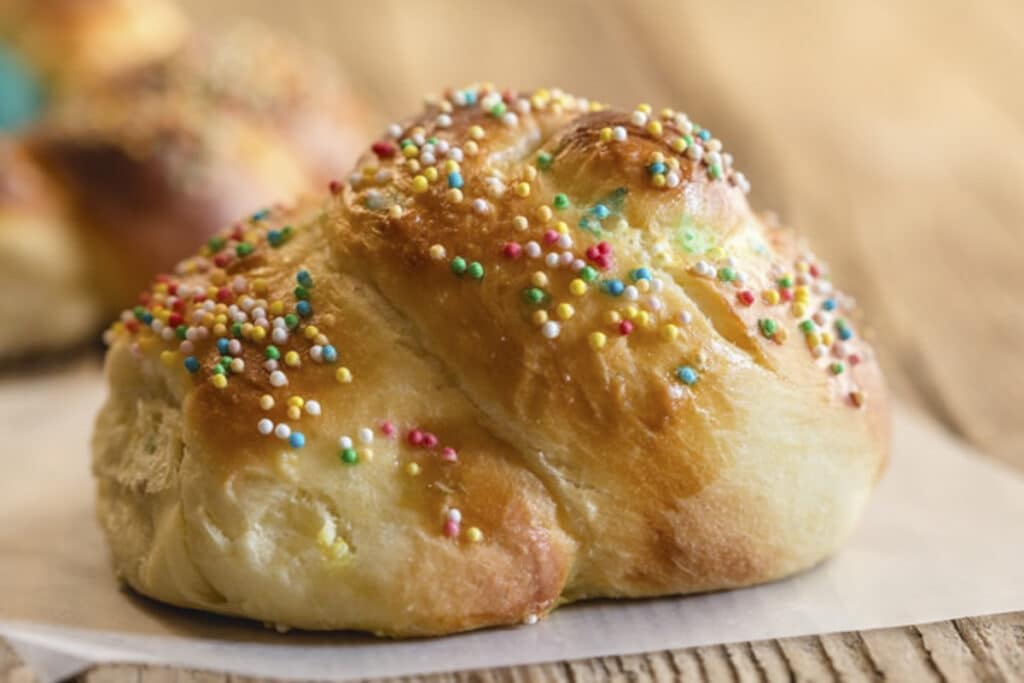
Traditional Italian Easter Bread
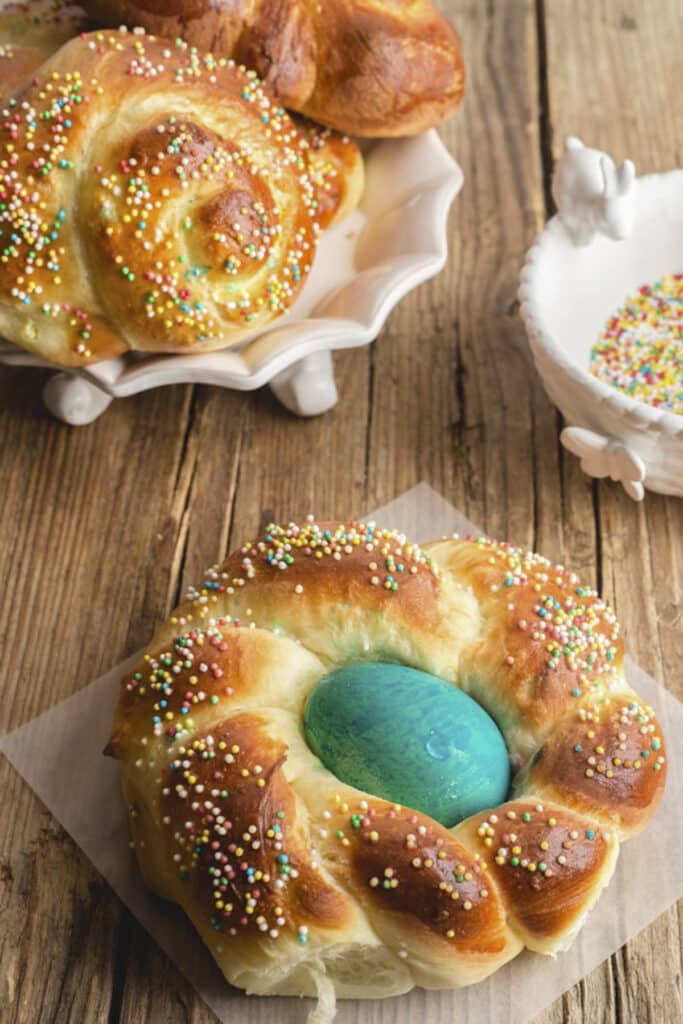
This Traditional Italian Easter Bread is a soft sweet brioche dough formed into wreaths or braided. Coloured eggs are baked into the bread and the bread is sprinkled with lots of nonpareils. Festive and bright for the Easter Holiday.
Another very popular yeast bread is a recipe called Casatiello Napoletano which is a savory stuffed bread.
I absolutely love Brioche Bread and of course this Sweet Soft Bread is a must in any Italian home on Easter. I wanted to find a true Traditional Italian Recipe and I came upon this recipe Brioche di Pasqua from a fellow Food Blogger, Chiara from Chiarapassion.com.
How to make An italian easter bread
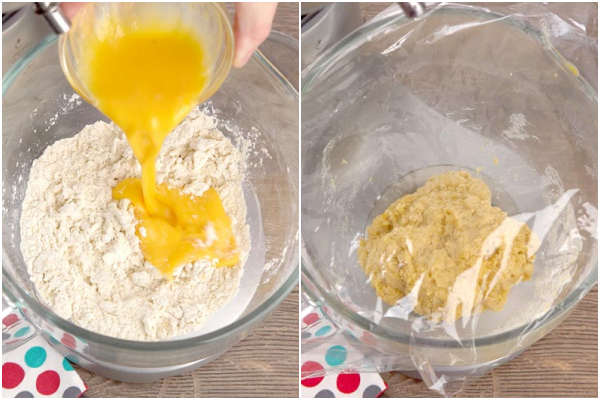
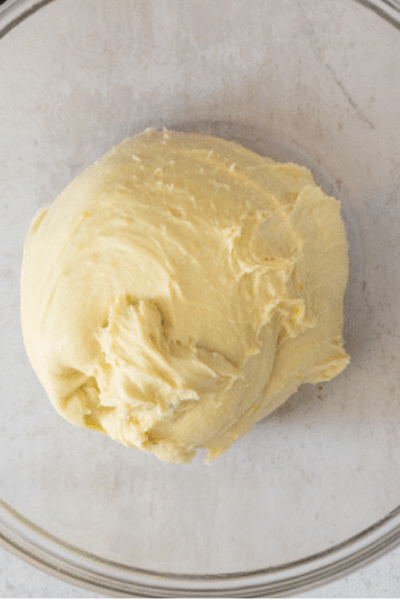
In the bowl of a stand up mixer whisk together the flour, salt, zest and sugar, make a well in the centre and add the milk and yeast, mix together with a fork.

Then add the egg. With the dough hook attachment knead just to combine. Cover the bowl with plastic and let rise in a warm draft free area.
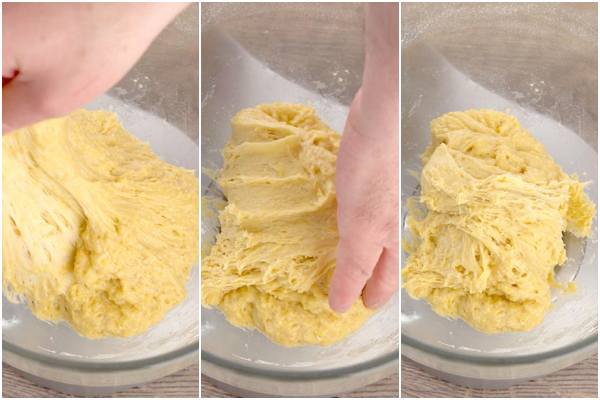
Fold both ends into the middle, repeating 4 times.
When the time has passed add the butter a little at a time at medium high speed with the dough hook, knead to just combine all the butter, then let the dough rest. Knead again until the dough is smooth and does not stick to the sides of the bowl.
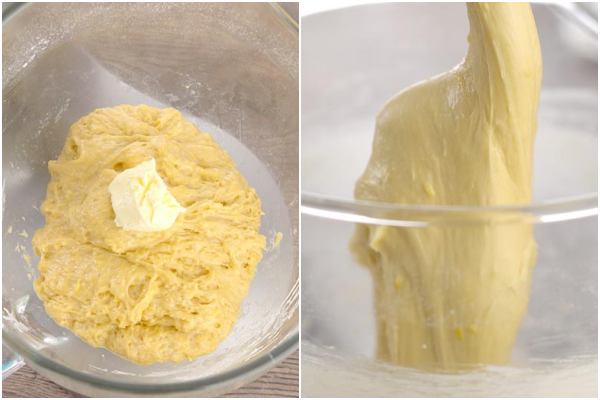
Place the dough in a lightly greased bowl, cover with plastic and refrigerate.
Move the dough to a lightly floured flat surface. Divide the dough into 4 parts. Roll each part into 2 ropes, join the 2 ropes at the top.
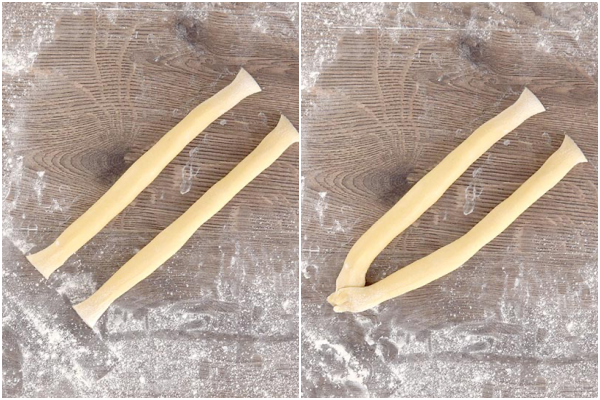
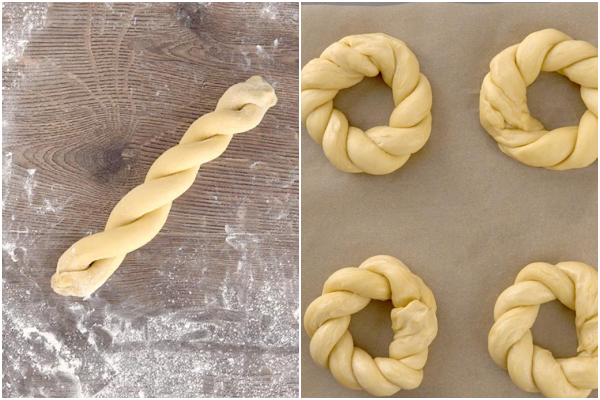
Twist the ends one over the other join the ends to form a wreath (circle) repeat with the remaining ropes. Place the wreaths on the prepared cookie sheet, cover and let rise in a warm draft free area until doubled in bulk.
Before baking an uncooked dyed egg can be placed in the dough, then the dough is brushed with a simple egg wash and covered in sprinkles (nonpareils) and baked.
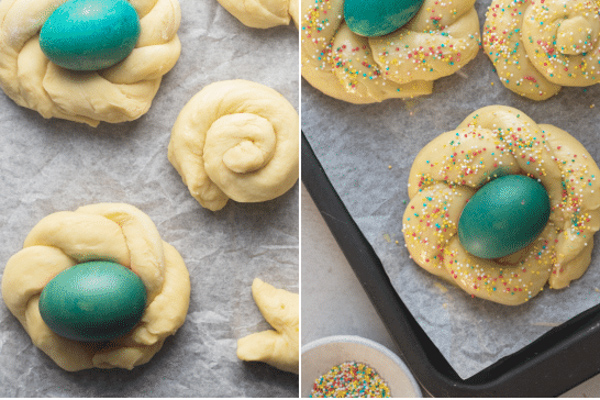
Immediately move the baked bread to a wire rack to cool.
How to know if the dough is proofed perfectly
Proof your dough with the “poke test”. With a fully proofed dough, you should be able to poke it and leave an indent that slowly starts to fill back in but doesn’t spring back completely.
If your dough is under-proofed, it will spring back almost immediately, if your dough is over-proofed it will not spring back at all.
Tips on making the best Easter Bread
- This Italian Easter Bread is a yeast bread which means you need time and patience. It’s not difficult just time consuming but absolutely worth it.
- This dough needs to rise 3x, the first time the dough (without the butter added) is placed in a bowl for 2 hours. Every 30 minutes the dough needs to be folded over.
- The second rise is done once the butter has been added to the dough and then refrigerated for 1-2 hours.
- Believe me they are worth every minute of your time!
This bread is very popular all over Italy. Sometimes I like to make an Easter Bread from the South of Italy, it is a much drier bread and is used as a dunking bread in your morning caffe latte or afternoon espresso or this Easter Sweet bread from the North of Italy. But the most popular Easter Bread which is called Colomba or Dove Bread is also worth a try.
How to colour eggs with Natural Dyes
If you decide to use coloured eggs in your bread and you don’t want to use regular dyes then there are Natural Dyes that you can use. Vegetables and spices are great for dying eggs especially red onions, paprika, dill seed and even red cabbage.
What is the significance of Easter Bread?
Italian Easter Bread when it is baked in the shape of a wreath it is to symbolize the crown of thorns worn by Jesus Christ. When the dough is braided with three pieces it represents the Holy Trinity.
Adding an egg to the bread represents rebirth, Christ rising from the dead.

How to Store Italian Easter Bread
Be sure to store the Brioche Bread in an air tight container or bag for up to 5 days. The breads can also be frozen again in an airtight container or freezer bag for up to 2 months. Just be sure to remove the egg before freezing.
So if you would like to surprise your family and friends with a delicious soft Italian Easter Bread, then I hope you give this a try and let me know how you like it. Enjoy!


Traditional Italian Easter Bread
Ingredients
BRIOCHE DOUGH
- 1¾ cups +2 tablespoons all purpose flour (234 grams total, if you double or triple the recipe double or triple this amount)
- 1 pinch salt*
- 1 tablespoon lemon zest
- 2½ tablespoons granulated sugar
- ¼ cup lukewarm milk (I used 2 % milk)
- 1½ teaspoons active dry yeast
- 2 eggs (room temperature) (slightly beaten)
- ½ cup butter (room temperature)
If using unsalted butter add ¼ teaspoon of salt.
EGG WASH
- 1 egg
- 1 tablespoon water
TOPPING
- 2-4 eggs (uncooked and dyed whatever colour you like)
- 2-4 tablespoons sprinkles* (if desired)
Instructions
BRIOCHE DOUGH
- In the bowl of a stand up mixer whisk together the flour, salt, zest and sugar, make a well in the centre and add the milk and yeast, mix together with a fork. Then add the eggs. With the dough hook attachment knead for approximately 1 minute just to combine.
- Cover the bowl with plastic and let rise 2 hours, every 30 minutes fold both ends into the middle (repeating 4 times).
- When the time has passed add the butter a little at a time, on medium high speed with the dough hook, knead just to combine all the butter, then let the dough rest 10 minutes. Knead again for 5-6 minutes until smooth and the dough does not stick to the sides of the bowl. Place the dough in a lightly greased bowl, cover with plastic and refrigerate for 1-2 hours.
- Move the dough to a lightly floured flat surface. Divide the dough into 4 parts. Roll each part into 2 ropes (10-12 inches / 25-30cm), join 2 ropes at the top and twist the ends one over the other (see photo), join the ends to form a wreath (circle) repeat with the remaining ropes. Place the wreaths on a parchment paper lined cookie sheet, cover and let rise in a warm draft free area for 1-2 hours or doubled in bulk.
- 15 minutes before rising time has finished pre heat oven to 390F (195C).
- Add a dyed uncooked egg (if desired) to the centre of the wreath then brush the wreaths with the egg wash (be careful not to brush the eggs) and sprinkle with the sprinkles. Bake for approximately 20 minutes or until golden, or when tapped on the bottom and there is a hollow sound. Immediately move the baked buns to a wire rack to cool. Let cool before serving. Enjoy!
EGG WASH
- In a small bowl beat together the egg and water.
Notes
Nutrition
It’s All About Pasta
Amazing pasta recipes to make your mouth water!

Authentic Italian Desserts
75 Traditional Desserts Made Easy
Hi, Rosemary,
Both my and my husband’s families are part Italian, and I have wanted to try this bread for the last few years to connect more with our heritage. I finally tried it this Easter, and it turned out beautifully! You’re right, it is easy to make, but requires time and patience. And you are also right that the time and patience is worth it! It is so pretty and I love the symbolism behind it. I am actually making more today, but I am going to make the swirl buns that were in your photo. I have yet to taste it as I gave the bread away as gifts yesterday, but it sure made my kitchen smell wonderfully. I am excited to taste it for myself!
Thanks so much,
Nicola
Thanks so much Nicola, so glad you enjoyed the bread. Take care and have a wonderful week.
I am trying this recipe for the first time… the dough doesn’t seem to be rising in the first stage…. am I doing it wrong? Was i supposed to proof the yeast before mixing it with the milk? Happy Easter 🐣 😊
Hi Nadia, no it doesn’t rise very much in the first rise, and no you don’t have to proof the yeast. Sorry I am late with this and it worked out. 🙂
Worth every minute! I even sent it to my family in Italy and they were impressed. I I put it in the fridge for the second rise- overnight, because I was exhausted from prepping Easter dinner. Turned out amazing!
Hi Kate, thanks so much, so glad you enjoyed it. Take care.
I made it. It smells wonderful.
It turned out just like the picture!
Thanks Evelyn so glad you liked it. Happy Easter!
These were delicious. So light and fluffy! Great texture. I think next time I’ll add a bit more sugar. Definitely my go to recipe from now on.
Hi Andrea, thanks so much, so glad you enjoyed it. Happy Easter.
Absolutely delicious recipe!!! We folllowed the exact recipe and it was incredible!!! Will absolutely make again!! Bravo!
Hi Tawnya, thanks so much, so glad you enjoyed it. Happy Easter.
Thanks so much for this recipe! But, my dough is dry!! HELP…what did I do wrong??
Hi Debbie, maybe you didn’t the correct ingredients, if it’s dry at the first stage add a little more milk, if it’s the 2nd add a little more butter. Hope that helps.
We love this recipe. Could we add a little more sugar or anise? If so how much?
Thank you
Miki. Pittsburgh PA
Hi Michelina thanks so much, you could probably add about 2 tablespoons more sugar and a or 2 teaspoon or so of anise. Happy Easter.
Hi, I don’t have a stand mixer or a bread machine so I’m going to be kneading this by hand. Do you have any suggestions for how long to knead, how I go about adding the softened butter, and any other tips you can think of? Thank you, I’m so excited to make these!!
Hi Gabriell, The first knead will be about 2-3 minutes, just to combine the ingredients, the 2nd knead will probably take about 15 minutes to knead the dough (that’s with adding the butter also), be sure that your butter is soft and add a little at a time and make sure the previous butter is added completely before adding more, wearing gloves might be easier and then continue to knead until the dough is compact. It will take a while but it can be done. Let me know how it goes.
Hi! I’m so excited to make this bread for my family. If I don’t wish to add the egg in the middle do I just roll the bread and bake it the same? Or is there a different way to shape the bread prior to baking?
Thanks in advance!
Giulia
Hi Giulia, yes just roll it the same, the egg isn’t essential. I usually leave them out too. Happy Easter.
Amazing recipe, I’ve used it so many times. Always delicious. Just a quick question can I keep bread (not baked yet) in fridge overnight?
TIA
Happy Easter and greetings from Canada
Hi Katharina, I am sure you can, just be sure to bring it to room temperature before baking an hour should be enough time. Happy Easter to you too and I can’t wait to come back home and visit my kids and family. 🙂
I’m on the second rise in the fridge right now. Can I leave it overnight at this stage or do the third rise and then refrigerate until morning?
Thank you,
Happy Easter
Hi Tonya, I think you could do either one, just be sure to let the dough come to room temperature for about an hour. Let me know how it goes.
Hi! How did the second rise overnight work? I’m at that stage now and would love to go to bed!
Is the salt the reason for adding the butter later?
Hi Amy, no it’s just a different way of making the bread, some bread are added after when the gluten has formed. Hope that helps.
I changed the recipe to 6 breads. The grams that are in parenthesis for some reason do not change when you are changing the serving amount. I used the grams not realizing that the cups do not equal the grams in this case. Plus when you do increase the servings when you are cutting the dough to make your bread its still stays at 4 parts.
Hi Rosemary, yeah I don’t know why, I think I corrected it. Sorry about that.
This was so easy to follow. Thank you for the You-Tube video. That was very helpful. They came out perfect and delicious. God bless and Happy Easter! I will have them blessed at our church on Saturday at the blessing of the food and share the blessed bread with my family on Easter Sunday. Thank you.!
Hi Mary Helen, thanks so much, I hope your family it enjoys the bread. Happy Easter, take care.
I’m about to make this recipe for the 1st time, I’m so excited! Does this recipe yield enough to shape into one large wreath? And how would that change the final rising and baking times? Thanks so much!
Hi Jen, for quite a large wreath you may want to double all the ingredients, but the rising time will be the same, although the baking time should be about 20-25 minutes, if it’s browning too much then cover it with foil and continue baking, make sure it is golden and the inside temperature should measure 190F (measure in the centre of the dough). Let me know how it goes.
Hi there! It seemed like a ton of butter that I added compared to your video! A half cup- as in one stick of butter?? I’ll still bake it and see if it turns out….!
Hi Kristen, yes it’s 1/2 cup butter.