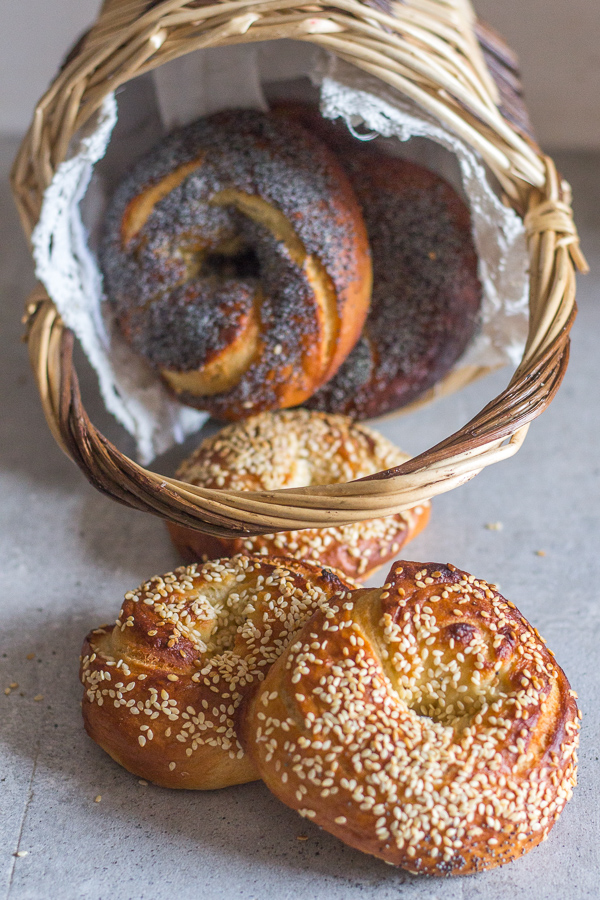
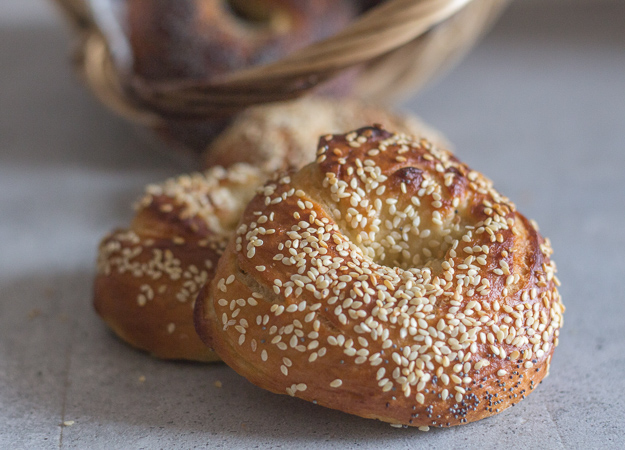
Homemade Bagels Montreal Style
Nothing like delicious Homemade Bagels and these Montreal Style Bagels are just perfect. These sweeter, denser Bagels are going to be your new favourite. Move over New York, Montreal Bagels have arrived.
If you know anything about me you know two important traits.
- I love love bagels, they are the first thing I buy in Toronto when I arrive. Cinnamon Raisin Bagels are my favourite in the morning, toasted with peanut butter!
- I can never get enough of the baking shows, The Great British Bake Off , Bake Off Italia and of course the new The Great Canadian Baking Show.
In order to watch the Canadian Baking show I had to wait until I got to Toronto, thanks to my sister for taping all the episodes for me!
We chose our day, put up our feet, pulled out a cupcake and binge watched every episode!
One of the big reasons we watched it was because one of my niece’s, my sister’s daughter’s best friends was on the show. Terri did really well, and even has a blog of her own Terri Starting from Scratch , she has some amazing recipes you won’t want to miss.
These Homemade Montreal Bagels are a recipe from the show and I have to say, that Terri’s Montreal Bagels looked amazing.
So knowing how much these bagels would be appreciated in the house (yes mostly by me!) I decided to give them a try. And nothing better than Bagels for Valentine’s Day!
The difference between Montreal Bagels and New York Bagels.
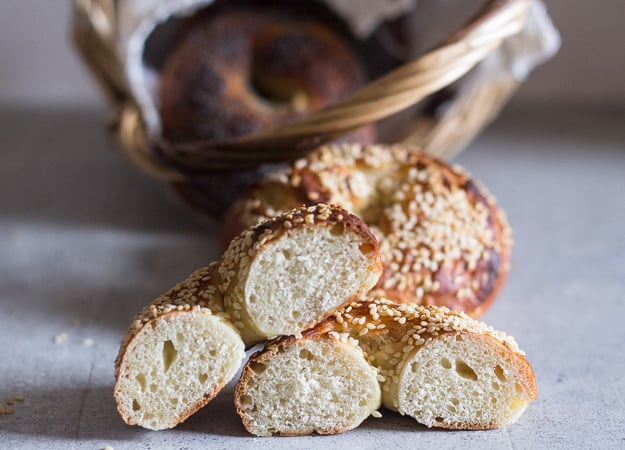
- Montreal Bagels are smaller, denser and sweeter with a crustier exterior.
- New York Bagels on the other hand are soft, chewy, doughier and larger with a smaller hole in the middle.
- Montreal Bagels are boiled in a honey water combination which is what gives them the sweeter taste.
- New York Bagels are baked in a traditional oven while Authentic Montreal Bagels are baked in a wood burning stove.
Making bagels isn’t hard but for all yeast breads you need time and patience. And believe me they are so worth it. And yes my bagel forming needs some work.
I also made this recipe with my heave duty mixer, but on the show they made it by hand so you decide.
More Yeast Breads you may Enjoy!
Homemade Mediterranean Black Olive Bread
Panettone Italian Christmas Bread
So what was the vote on these Homemade Bagels Montreal Style? I loved them, and I have to say they were one of the best bagels I have ever eaten, and believe me I have eaten a few.
My youngest daughter who is no slouch in the bagel department, thought they were excellent and was quite impressed with my bagel making ability.
And the Italian, thumps up from him also! You can freeze them too. If you make them let me know what you think. Enjoy!

Homemade Bagels Montreal Style
Ingredients
- 1 1/2 cups + 1 tablespoon warm water
- 1/4 cup + 1 teaspoon sugar
- 2 tablespoons + 1 teaspoon vegetable oil (I use corn or sunflower oil)
- 3 teaspoons active dry yeast
- 1 egg
- 1 tablespoon honey
- 1 teaspoon + pinch salt
- 5 cups + 1 tablespoon all purpose flour
HONEY BATH
- 1 cup honey
- large pot of boiling water (14-15 cups of water)
TOPPINGS
- sesame seeds
- poppy seeds
Instructions
- In a large bowl (or your stand up mixer) whisk together the warm water, sugar, oil, yeast, egg and honey (1 tablespoon), then add the salt and 3 1/2 cups of flour (one cup at a time), mix to form a soft dough (either by hand or with the dough hook attachment on medium speed).
- Either move the dough to a lightly floured flat surface or continue with the machine. Add another 1 1/2 cups + 1 tablespoon of flour (1/2 cup at a time) kneading to combine until you have a soft compact dough, that should bounce back when you press on it. (knead for approximately 10-12 minutes / 5-7 minutes with the machine).
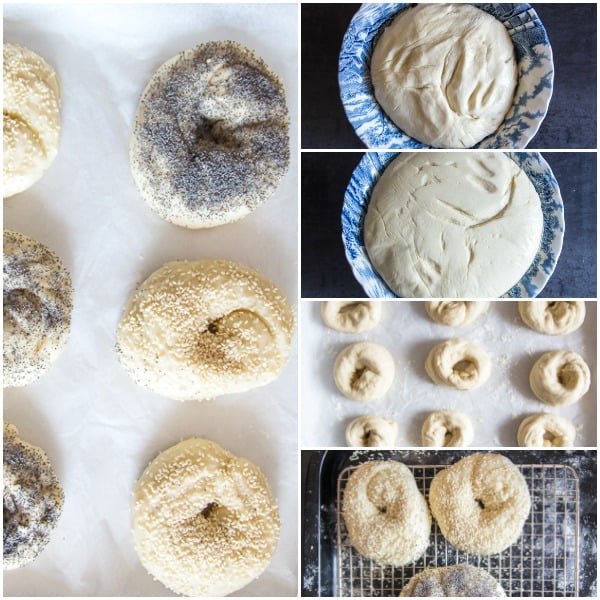
- Then place the dough in a lightly oiled bowl (be sure to roll the dough in the bowl to lightly cover it with the oil). Cover the bowl with plastic and cover with a clean tea towel. Let the dough rest in a draft free area for 30 minutes.
- Cut the dough into 16 pieces and then roll each piece into an approximate 10 inch rope, wrap the rope around your four fingers , overlapping the dough ends to form a circle. Then roll your hand back and forth on a flat surface to seal the ends. Place the bagels on a parchment paper lined cookie sheet. Make sure to keep the bagel dough covered as you work. When all bagels are formed leave the pan covered and let rest 30 minutes.
- In the last 15 minutes, start to boil the large pot of water and pre-heat oven to 450°.
- When the water is boiling add the cup of honey and mix, continue to boil.
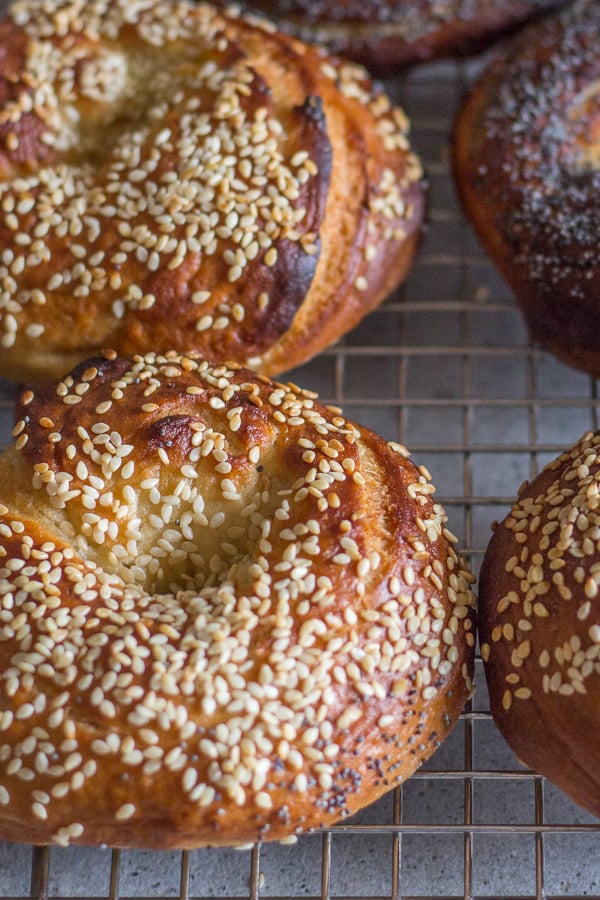
- Boil 2 bagels at a time for approximately 1 1/2 - 2 minutes on each side. Remove bagels with a slotted spoon. Place on a wire rack and sprinkle with seeds. Place bagels on parchment paper lined cookie sheets and bake until golden brown approximately 15-20 minutes. Let cool. Enjoy!
Nutrition
It’s All About Pasta
Amazing pasta recipes to make your mouth water!

Authentic Italian Desserts
75 Traditional Desserts Made Easy
Easy and delicious! I use a 50/50 combination of AP flour and 00 flour so they are a bit chewy rather than fluffy. Yum!
Hi Janet, thanks so much, so glad you enjoyed it. Take care!
Thank you for this easy to follow recipe. It was my first attempt at home-made bagels and they turned out perfectly. I wish I could add a photo, as they are such a lovely golden, honey brown. It must be beginners luck. I have to tell you that I laughed out loud every time I added “plus a teaspoon or a tablespoon” -cute.
Merci (Montreal -Style!)
Sherry G
Hi Sherry, thanks glad you enjoyed it. I usually bake with grams so when I convert to cups it’s usually a bit more than a cup so I have to add in tablespoons and teaspoons. 🙂
Can I boil the bagels in just water without the honey to make it less sweeter
Hi Vidara, I wouldn’t leave it out completely maybe try with 1/4 cup, honey also give bagels that nice golden colour. Let me know how it goes.
Hi Rosemary
I tried this recipe yesterday and found that everything went good until the boiling step. Most of them had a nice rise when I pulled them out of the water but a few shrivelled and flattened out. They all had a nice rise prior to boiling.
Thanks Carol
Hi Carol, well mine did flatten a little, but then they rose when baked. How did yours come out when they were baked?
Perfection. Delicious. Best bagel recipe.
Thanks so much Liz, glad you enjoyed them. Take care.