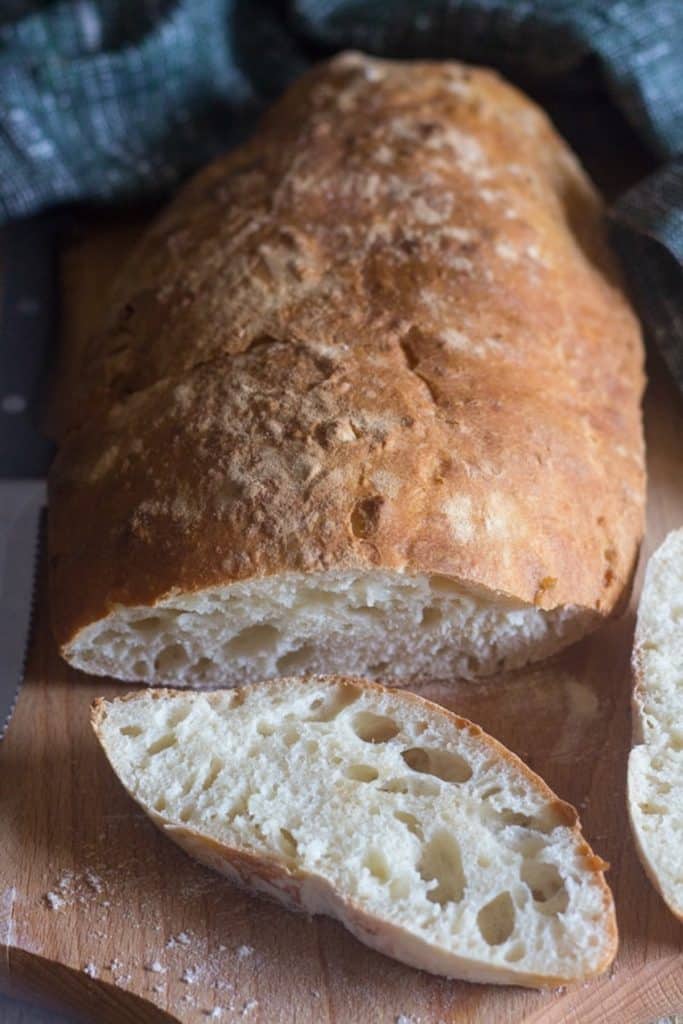
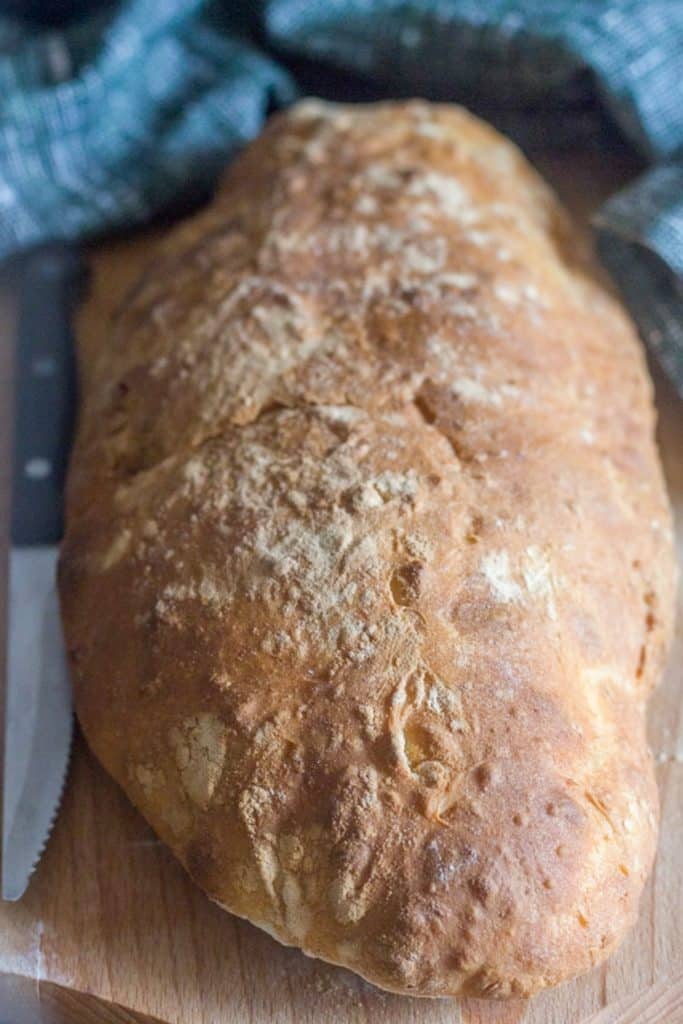
Easy No Knead Ciabatta Bread
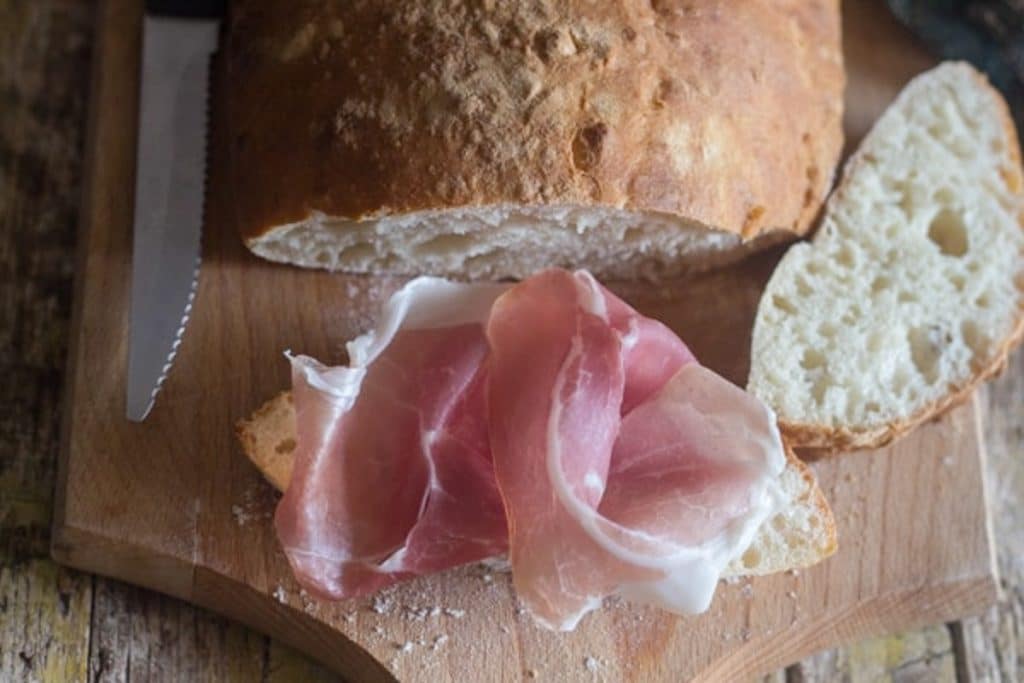
This is an Easy no Knead, One bowl Italian Ciabatta Bread. Two hours and you can have Homemade Bread for lunch or dinner. Perfect with your favorite soup or stew or with a slice or prosciutto!
When I moved to Italy, I discovered that bread was a very serious business! Fresh whether it be the local bakery or homemade fresh daily bread was a must.
Recipe Ingredients
- Water – lukewarm
- Honey
- Yeast – active dry
- Flour – all purpose flour or bread flour
- Salt
How to make a Ciabatta Bread Recipe
In a small bowl add water, honey and yeast, let sit 5-10 minutes then stir.
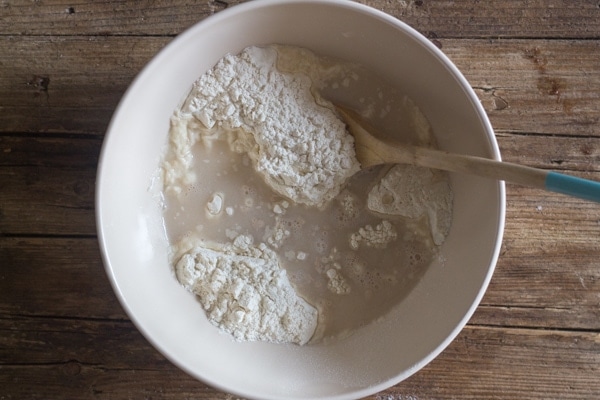
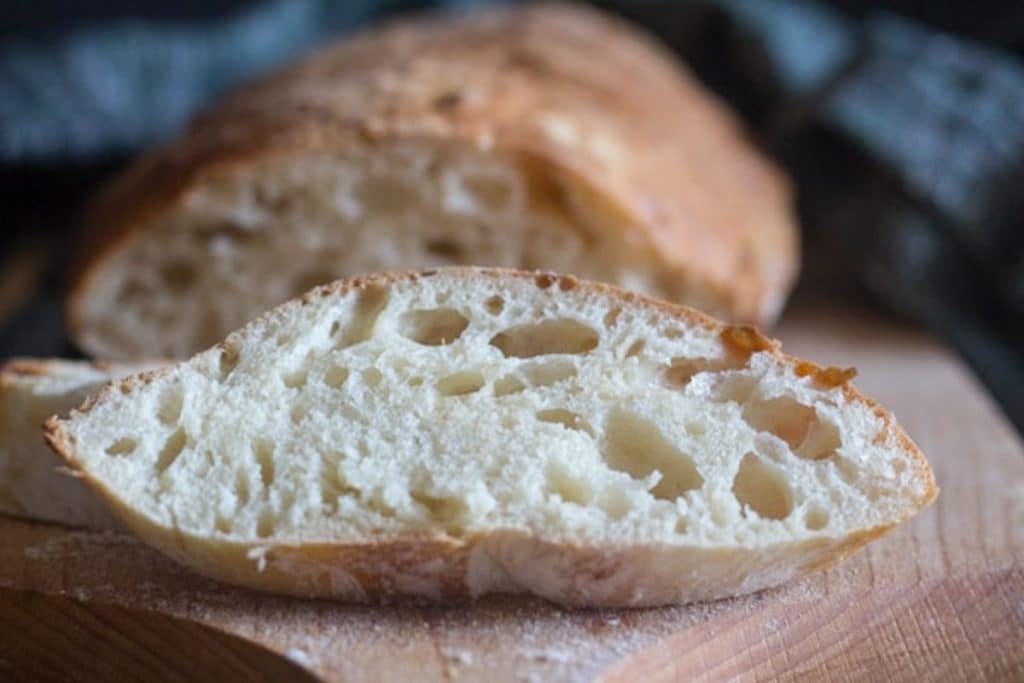
In a large bowl add the flour , make a well in the centre and add the yeast mixture and a little water, if the dough is too dry then add a little more water a little at a time, until you reach a wettish dough. But remember Ciabatta is a high hydration bread, so do not over flour, or you will not get those lovely air pockets inside the bread.
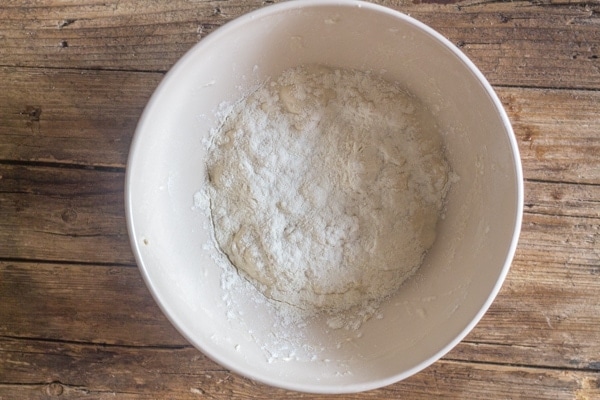
Mix together with a wooden spoon, when almost mixed add the salt and combine. The ciabatta dough will be loose and sticky. Sprinkle the top with 1 1/2 tablespoons of flour.
Cover the bowl with a large tea towel or plastic wrap.
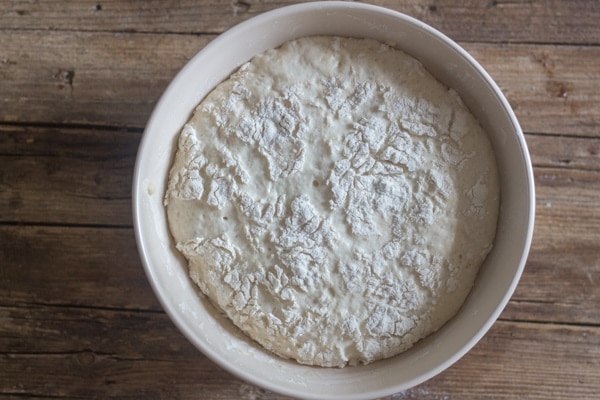
Place in a warm, draft free area and let the dough rise.
Carefully move the dough from the bowl with a bench scraper or spatula to the prepared baking sheet, making sure that the floured top of the dough remains on the top. Using wet hands can also help with moving the dough easier.

With a spatula or wet hands form the dough into an oblong loaf, place some ice cubes on a pan on the bottom of the oven to create vapor or add the pan when pre-heating the oven and pour 1 cup of very hot water into the pan before adding the dough to the middle rack. Bake until golden and baked through. Immediately move to a wire rack to cool before cutting and serving.
Why do I add ice cubes or hot water?
Adding the ice cubes or hot water to the preheated oven creates steam. They melt and evaporate at just the right time. Once they evaporate and are no longer creating steam this gives the bread a chance to form that lovely outer crust.
I recommend using a thick metal dish rather than a glass or ceramic cake pan if you are using ice cubes as the difference in temperatures can cause the dish to crack.
How to tell when bread is done
You can tell bread is done when you tap on the bottom of the loaf and there is a hollow sound, but if you want to be 100 percent sure, then using a thermometer is your best best, the bread is baked when the centre of the loaf registers 200 to 210 degrees.
What is Ciabatta Bread
This bread is originally from the North of Italy, from the Province of Rovigo in Veneto Region. It is a flat, elongated bread with a light texture. It is a very simple bread, made up of a very high quantity of water which produced a very wet dough. It produces a very large crumb. And is considered a typical old fashioned Italian bread.
Why I became intrigued with bread making I have know idea, it started in my early twenties and went from there.
I would try making something now and then from Bagels to Pizza and the occasional Loaf of Bread.
I also discovered that bread making isn’t nearly as difficult as I thought and this Italian Ciabatta (Ciabatta meaning Slipper in English, because of the shape and flatness of the bread).
Can I substitute active dry yeast?
Yes you can substitute with instant yeast, for every teaspoon of active dry yeast use 3/4 teaspoon of instant yeast. Also be aware it won’t need as much time to rise.
How to store it
Keep the baked cooled bread, closed in an airtight bag, for 2-3 days. You can freeze it in freezer safe bags, defrost the bread in the refrigerator as needed, passing them in the oven for a few minutes to revive them. It will keep up to 2-3 months in the freezer.
This Homemade Ciabatta Bread is a simple and delicious bread. The perfect addition to whatever you are serving, amazing as a dipping bread also! I hope you enjoy it! Buon Appetito!
More delicious homemade bread recipes you may enjoy!
- Best Pizza Dough
- Homemade Olive Oil Bread Rolls
- Sweet Surprise Dessert Bread
- Easy Focaccia Bread
- Traditional Italian Ciabatta Bread
Homemade Italian Ciabatta Bread
Ingredients
- ¾-1 cup + 1 tablespoon water lukewarm (divided)
- ½ teaspoon honey (or granulated sugar)
- 2 teaspoons active dry yeast
- 2 cups + 3 tablespoons all purpose flour (or bread flour) (divided) (273 grams total)
- 1 teaspoon salt
Instructions
- In a small bowl add ¼ cup of water, honey and yeast, let sit 5 minutes then stir.
- In a large bowl add the flour , make a well in the centre and add the yeast mixture and ½ cup of water (if too dry then add the extra ¼ cup 1 tablespoon at a time until you reach a wettish dough, or if too wet add more flour a tablespoon at a time). Mix together with a wood spoon, when almost mixed add the salt and combine. The dough will be loose and sticky. Sprinkle the top with 1½ tablespoons of flour.
- Cover the bowl with a large tea towel, place in a warm, draft free area and let rise for 1½ hours.
- Pre-heat oven to 425F (220C), line a baking sheet with parchment paper and sprinkle with 1½ tablespoons of flour.
- Carefully move the dough from the bowl to the prepared baking sheet, making sure that the floured top of the dough remains on the top. With a spatula form the dough into an oblong loaf.
- Place the baking sheet on the middle rack, bake for approximately 20 – 25 minutes. Move immediately to a wire rack to cool completely before slicing and serving. Enjoy!
TO CREAT VAPOUR
- While the oven is pre-heating place an empty cake pan at the bottom of the oven, add 4-5 ice cubes or a cup of very hot water before adding the bread dough on the baking sheet to the middle shelf.
Notes
Nutrition
Updated from November 27, 2018.
It’s All About Pasta
Amazing pasta recipes to make your mouth water!

Authentic Italian Desserts
75 Traditional Desserts Made Easy
Hi Rosemary,
Thanks for an awesome recipe!! Made it this morning with a view to including it at lunchtime with cold meats and salads. Half the loaf gone already and we didn’t even wait for it to cool!!
I am accustomed to making bread, including no-knead breads but I did find the bread dough spread a bit more than I wanted (didn’t alter flavour though) do you think a slightly smaller amount of water would work rather than more flour?
I’m thinking that maybe altitude and flour manufacturers play a part in end result. I’m off to make another loaf with the adjustments asked about but, would like your comments on it too.
Again, thank you!! 🙂 Lesley
PS your recipe rating doesn’t appear to be working but I’ll give it 5 stars *****
Hi Lesley, I don’t think it really matters whether you add less water or a little more flour, you decide. Glad you enjoyed the bread. Let me know how it goes with less water. Thanks I am having the stars checked out. Have a great Sunday.
I saw your recipe on Pinterest and decided to try since it seemed so simple. And it was! Crust was so crunchy and it tasted great. There were 3 of us eating it with lunch and we had to control ourselves from eating it all! One question, why more flour before baking? Mine didn’t settle in and remained on top which I had to brush off.
Hi Fran, thanks so much, so glad you all enjoyed it. The reason is to make it easier to grab since it isn’t kneaded and smooth like most bread dough. 🙂
Fantastic recipe! Ive made it 4 times in the last couple of weeks and taught my niece how to make it. Being Italian we are particular about our bread but evrryone agreed this bread was delicious just as it is & toasted. Thanks for a new addition to my baking repertoire! Grazie mille!
Hi Lynn, thanks so much, so glad everyone liked it and your niece learned how to make bread. 🙂
Thanks for this super simple recipe, made it for the first time and….wow…it was fantastic, i had a bit of a struggle getting the dough from the bowl to the baking sheet, think i might have knocked a bit too much air out doing it but it still turned out good. My son said it was nicer than the ciabatta loaves that i usually buy!
Thanks Ann-marie, so glad you and your son enjoyed it. Yes moving it to the board is a bit tricky. Have a great weekend.
A lovely looking Ciavatta bread recipe!
May l ask……. Do you have to double the yeast quantity to make two loaves?
Hi Sylvia, thanks, if you want to double the recipe then yes you have to double the yeast. I hope you enjoy it.
1 cup 2 tablespoons water (divided)
What do you mean “divided”?
It’s a total of 18 tbsp?
Hi John, yes 18 tablespoons, divided means that the whole amount is divided more than once in the the recipe. In this recipe twice, once with the yeast and then added with the flour. Hope that helps.
Love your recipe. It was simple and easy. Added parmesan and my kids loved it. Will definitely make again. Thank you for sharing.
Hi Rose, thanks so much, so glad everyone enjoyed it. Good idea with the addition of Parmesan cheese. Have a wonderful Sunday.
I made this and came out absolutely amazing. My family thought it was store bought. I have a couple question….can I use whole wheat flour and when the dough rises can I cut it into smaller pieces like sandwich bun size and then cook it? First time I made it exactly how your recipe called and came out perfect but I would like to try a different way also. Thank you for your wonderful recipes.
Hi Janet, thanks so glad you all liked it and the recipes. And yes you can use whole wheat flour although you should reduce it from 1 cup of all purpose to 3/4 cup whole wheat (because whole flour is denser), and sure you could make buns, that’s a good idea. Have a great weekend.
Hi Rosemary I tried this recipe and it turned out delicious. I posted it on my blog if you want take a look. From an italian to another meraviglioso! Thank you for sharing 🙂
Hi Annalisa, thanks, I took a look, looks great, so glad you liked it!
***** Thanks for the great recipe. The bread was delicious and so easy to make. It is bound to become a staple in our house! I did find though that it had a beautiful crust when I first took it out of the oven, but the crust softened as the bread cooled. Is that what usually happens? (Note: I did add the ice cubes in a tray in the bottom of the oven as instructed.)
Hi Debby, thanks yes that is what usually happens to the bread. I make it so often now I don’t bother with the ice cubes anymore. So glad you liked it.
Can you use whole wheat flour? Or 1/2 wheat, 1/2 regular flour?
Hi Valerie if you do you should add less whole wheat the all purpose (for example 3/4 cup whole wheat for 1 cup all purpose), because whole wheat is heavier it produces a denser dough, so less is better. So yes maybe try with 1 cup all purpose and 3/4 cup whole wheat and see how that goes. Hope that helps.
I’ll have to give this one another try, I definitely needed more flour at the beginning because by the time it was done rising it was nearly liquid. I’ve never done a no-knead style bread before so I didn’t know how sticky to let it be, but it definitely needed to be less sticky. Oh well! I like trying new breads. 🙂
Hi Monica, yes it definitely shouldn’t be liquidy, The dough will spread a little but to a certain point and then it will hold it’s shape. Let me know how it goes.
Good Morning, Can I use Bread Flour instead of all purpose??
Hi Maria, yes I’m sure that would work. Hope you like it. Have a great weekend.
Awww. Sweet post!! THANK YOU so much. This is going to be a great adventure!
Hi Karen, thanks and it sure is! Looking forward to it.
Hi we are in lockdown and only have cake flour. Is that ok?
Thank you
Hi Rosina, you could try it, it will probably be a very soft dough, but that’s ok. Take care.
I love making ciabatta!! Frankly, I never know how it’s going to turn out but the smell is phenomenal. Sometimes working with such a wet dough is a challenge but we love getting our hands into it 🙂 Great photos!!
Hahaha Marisa yes we do! It is a delicious bread.
From one Italian to another–delizioso!
Grazie Mille Diane! 🙂