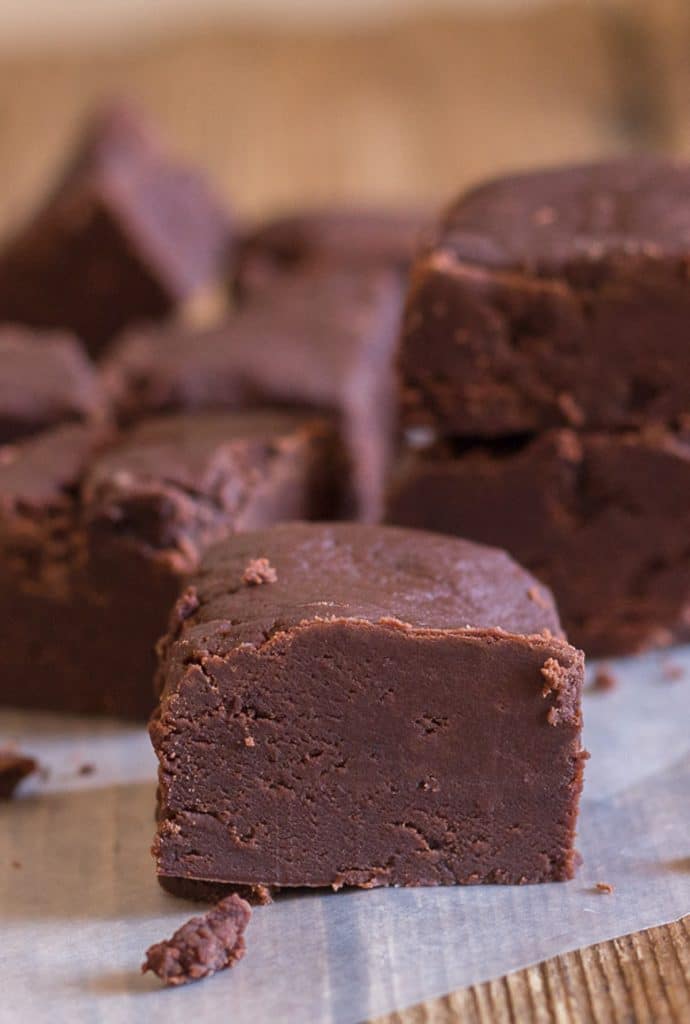
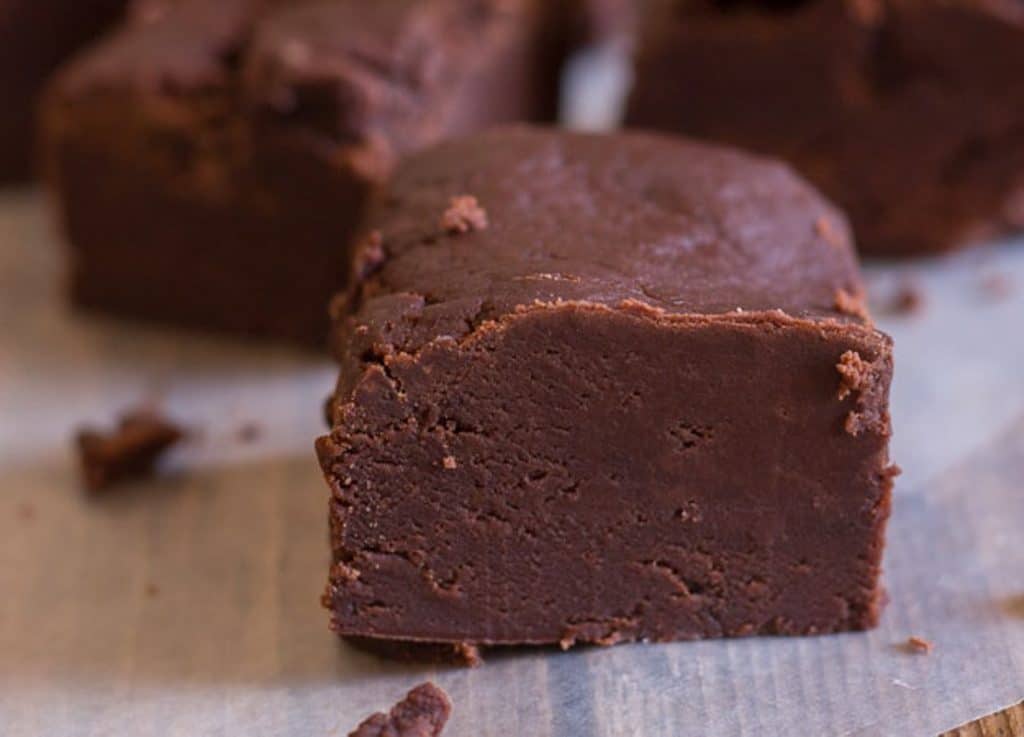
Old Fashioned Chocolate Fudge
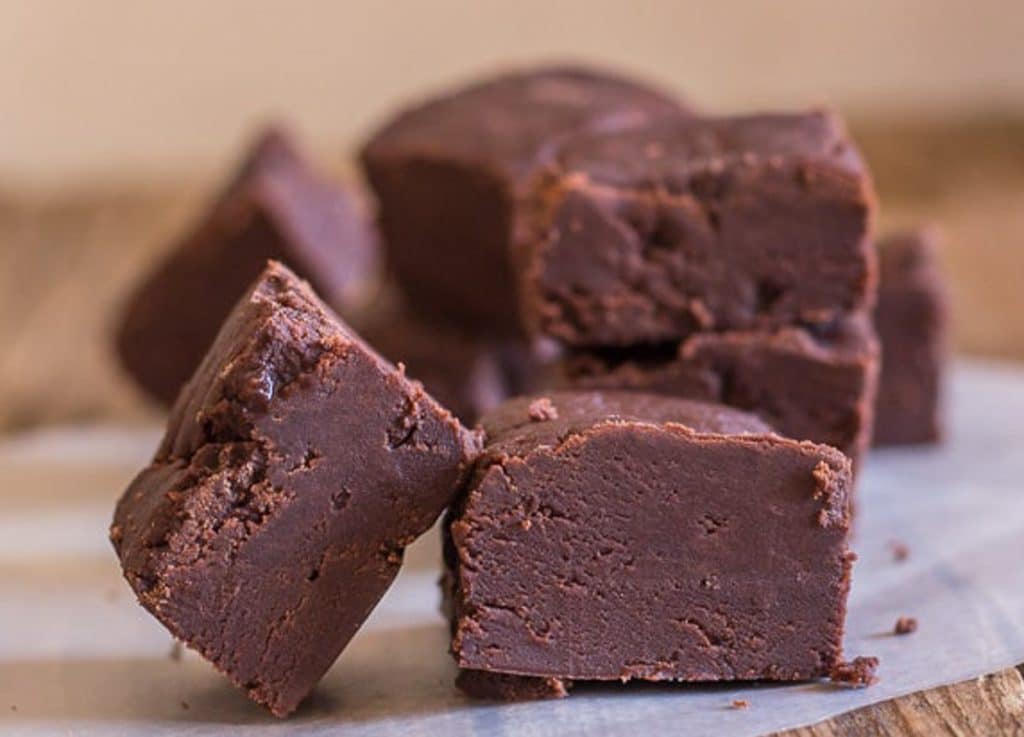
Old Fashioned Chocolate Fudge, this is the best, creamiest chocolate fudge, made the old fashioned way! And only 6 ingredients. The perfect Homemade Chocolate Candy, one everyone will love.
I have been a big Candy lover for a long time, especially anything Chocolate such as these Easy Homemade Filled Chocolates or these Italian Chocolate Kisses / Baci.
Old Fashioned Chocolate Fudge is everything a homemade fudge should be, so get your candy thermometer ready.
I have been searching and searching for the chocolate fudge that I had tasted when I was about 8 or 10 years old, if you can believe that! This fudge melted in your mouth and was just a little bit crumbly.
I can remember going to the Christmas Bazaar at the Church on Saturday afternoon with a couple of my school friends. I bought my dime bag of chocolate fudge and I still remember thinking “this is the best Fudge I have ever eaten”.
And when we went back to get another bag, the lady was sold out. A sad day for me!
I think in my quest for “the One” I tasted fudge from any and all chocolate stores. And unfortunately they were all the creamy types usually made with sweetened condensed milk, just like my Double Chocolate Peanut Butter Fudge or this Easy Walnut Fudge I wanted that crumbly melt in your mouth fudge!
Fast forward to a few weeks ago and I decided I would google until I discovered my Chocolate Fudge. And discover I did, thanks to Hershey’s, apparently it is their Recipe that gives you that divine fudge.
Recipe Ingredients
- Sugar – granulated
- Cocoa powder – unsweetened dutch processed
- Salt
- Milk – whole/heavy milk
- Butter – I use salted – room temperature
How to make Chocolate Fudge
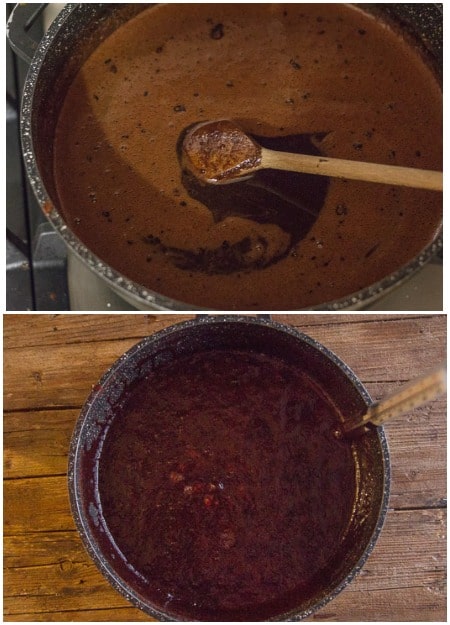
Line a square pan with buttered parchment paper. In a medium heavy saucepan stir together the sugar, cocoa and salt, then add the milk and stir with a wooden spoon (not a whisk or metal spoon).
Cook over medium heat stirring continuously until mixture starts to boil, a strong boil. Turn heat to low medium and continue to cook without stirring until the correct temperature is reached.
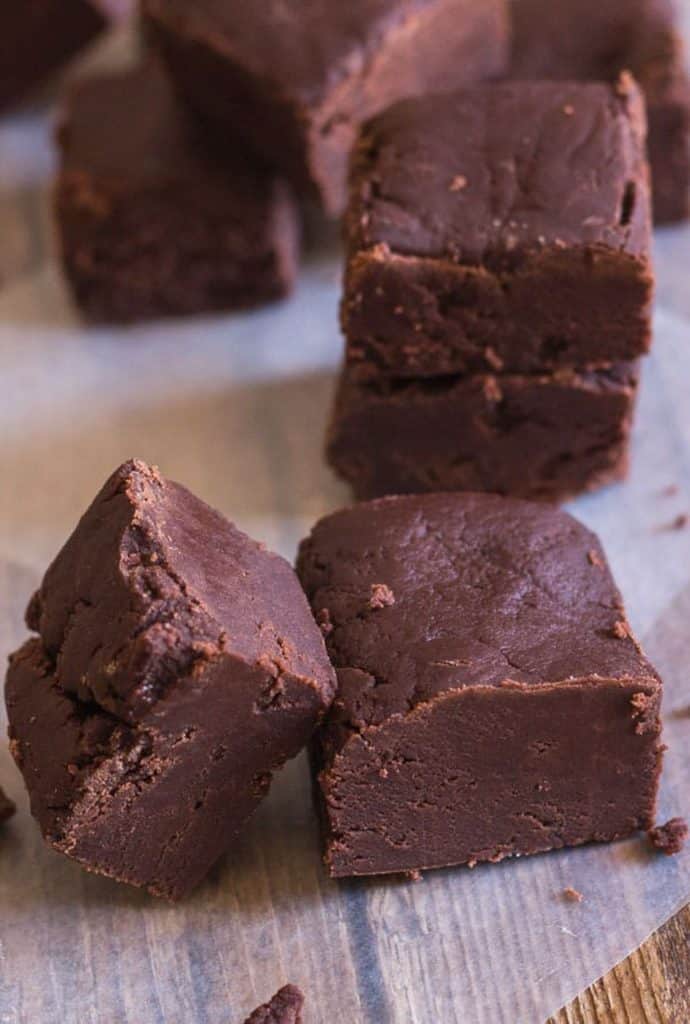
Remove the pot from the heat, add the butter and vanilla. Do not stir. Cool to room temperature. Then beat with a wooden spoon just until mixture begins to lose some of it’s gloss.Spread the fudge quickly in the prepared baking dish and let cool completely, even overnight (at room temperature). Cut it into squares.
Adjusting the Fudge Recipe for High Altitude
To adjust the temperature to your altitude, deduct two degrees from the temperature required for every one thousand feet of altitude above sea level. For example, in this Fudge recipe, if you live 5,000 feet above sea level, you would deduct 10 degrees from 234 degrees.
How to Store Homemade Chocolate Fudge
Wrap the cut pieces in parchment paper or aluminum foil and store in an airtight container or sealable plastic bag. Fudged stored at room temperature can last from 7 – 14 days.
Fudge can also be stored in the refrigerator wrapped and placed in an airtight container. In the fridge fudge will last 2 – 3 weeks.
How to freeze it
Freeze the fudge in a double bag, well wrapped. You can freeze it either in pieces or the whole slab. Fudge will keep for up to 3 months in the freezer.

What to make with fudge
If by chance you have some leftover fudge or for some reason your fudge doesn’t turn out, don’t despair and certainly don’t throw it out! Cut up some fudge add it to some hot milk and stir until smooth and there you have some amazing hot chocolate, maybe the best you have ever had?
Or melt some of the fudge, either in the microwave or over a pot of boiling water and drizzle it over some ice cream or as a ganache on a cake. Hot fudge sauce never tasted so good.
Fudge makes a wonderful gift idea. Wrap it with some transparent wrapping and tie with a bow, or place on a decorative plate or how about place a stick in the middle and make fudge pops!
Can I add Nuts or Peanut Butter
Yes you can add nuts such as walnuts, hazelnuts, pecans, pistachios, peanut butter, mini marshmallows, dried cranberries or even broken candy canes. The best time to add these ingredients is when you add the butter and vanilla. I would also recommend roasting the nuts first to give the best flavor to your fudge.
If you prefer peppermint fudge then substitute the vanilla extract with peppermint extract or even almond or orange.
How to roast nuts
Place nuts in a single layer on an ungreased baking / cookie sheet. Bake in a pre-heated 350F/180C oven for 5 to 8 minutes or until they are golden brown, remove immediately from the pan to a clean bowl to cool.
How to keep your fudge from being gritty or grainy
- Make sure the sugar has dissolved.
- It could be the fudge wasn’t beaten long enough or hard enough.
Does the weather affect fudge?
Yes it does, on a humid day, once the candy has cooled it may start to absorb moisture from the air, so on a humid day the candy will end up being softer than it is supposed to be.
Therefore it is always better to make candy (fudge) on dry sunny days. Although if you have no choice and you must make it on a humid day, then cook it to the highest recommended temperature, which is 237-240F / 114 – 115C.
Cool weather also helps the candy cool faster that way it has a lesser chance of forming crystals.
Why is my fudge soft?
Most of the time the reason is because your fudge has not reached the right temperature, it is very important to use a good candy thermometer for this.
I hope you enjoy this Homemade Chocolate Fudge! And let me know how you like it. Enjoy!
More Chocolate Candy Recipes
- Homemade Chocolate Mint Filled Chocolates
- Chocolate Torrone
- Creamy Old Fashioned Caramel Candies
- Homemade Italian Chocolate Kisses / Baci
Old Fashioned Chocolate Fudge
Ingredients
- 3 cups granulated sugar
- 2/3 cup cocoa (unsweetened dutch processed)
- 1/8 teaspoon salt
- 1 1/2 cups whole milk
- 1/4 cup butter* (I use salted) (room temperature)
- 1 teaspoon vanilla
*if you use unsalted butter then increase the salt to 1/4 teaspoon.
Instructions
- Line an 8 inch square pan with buttered parchment paper.
- In a medium heavy saucepan stir together sugar, cocoa and salt, then add the milk and stir with a wooden spoon (not a whisk or metal spoon).
- Cook over medium heat stirring continuously until mixture starts to boil (a strong boil), approximately 15 minutes.
- Turn heat to low medium and continue to cook without stirring until temperature reaches 234 °F (112C) Approximately 30 minutes.
- Remove pot from heat, add the butter and vanilla. Do not stir. Cool to room temperature (110°F/43C), approximately 30 minutes. Then beat with a wooden spoon just until mixture begins to lose some of it's gloss (approximately 6-8 minutes).
- Then spread quickly in prepared cake pan and let cool completely, even overnight (at room temperature). Cut into squares. Store in an airtight container at room temperature.
- You can also freeze the fudge in a double bag, well wrapped. Freeze either in pieces or the whole slab. Can be frozen up to 3 months. Keeps in an airtight container for approximately 2 weeks or in the fridge for 3-4 weeks. Enjoy!
Notes
Nutrition
Updated from November 18, 2017.
It’s All About Pasta
Amazing pasta recipes to make your mouth water!


Authentic Italian Desserts
75 Traditional Desserts Made Easy
Rosemary, thanks so much for going to the trouble to search for and try out fudge revokes until you found “the one”. I am 64-years old, and I can still remember the taste of the old-fashioned fudge my first grade teacher, Mrs. Poole, used to bring in to treat the class. (Now I realize how generous that was of her!) I thought she was ancient, with her white-hair, but it was her mother who made the fudge, so she was probably about my age!
This IS that fudge, and I am forever grateful to you for the recipe. I’ve tried that microwave/marshmallow fluff stuff that they try to pass off as fudge… this recipe is in an entirely different class. I will be gifting this to our closest friends, along with our homemade caramels, this Christmas.
Hi Laura, thanks so much. I was pretty thrilled when I found it too. This is the one fudge recipes my daughters actually eat. And what a great idea as a gift idea.
Thank you! Your recipe served as the base for the fudge I made. I was craving something sweet and had no money to buy something, but I did have most of the ingredients in your recipe. I only had powered milk so I added a splash of oil when I mixed it up hoping to make it closer to ‘whole’ milk. I also didn’t have butter, only margarine and used that. Crossed my fingers and it turned out great, smooth and creamy and set up quickly….LOVE IT! I’ve recently moved to a new apartment and have to say I’m not happy having an electric stove (love gas stoves), I’m still trying to get use to it. I did notice one thing when cooking the fudge, the size of the burner seems to make a big difference. I started cooking it on a burner to small for the size of the pot I was using (I was worried about burning) but it was taking forever to cook so I moved it to a burner that totally encompassed the bottom of the pan and it cooked beautifully….still learning :-). Thank you again for posting your recipe. Five Stars!
Hi Karen, so glad it worked out for you and thanks for letting me know about the substitutions you made. Nothing like fudge! Have a great weekend.
Hi your recipe is wonderful, when I was 6 our neighbor would make fudge and when I found your recipe I knew right off this was similar to your. We would watch her make it till I was about 13 mow I’m 63 with 5 children and 11 grandchildren and now thanks to you, I can now make it for our family. If your readers follow your instructions completely with patience, this delicious decadent recipe will be their only recipe to make. Thank you so much for sharing.😊
Pat from Pa
Hi Pat, thanks so much, I knew when I made it too that it was “the one”. And yes patience is exactly what you need. Im sure your children and grand children will love it. Have a great week.
My first attempt didn’t go so great. It took FOREVER to get to softball temperature. It didn’t quite set (very soft/gooey and grainy. Not sure what I did wrong, going to try again tonight — any suggestions?
Hi Xander, make sure you have a lot of time and be patient and don’t rush it. Trust me it’s so worth it. Good luck. 🙂
This brought back childhood for me..I always had to help stir the fudge…It is the same fudge my mother use to make..Delicious! It is easy and will come out right everytime with patience..it takes some time to get to 234 degrees. I went to 235 on my candy thermometer..and be patient and wait the 30 minutes to stir after putting the butter and vanilla in..Thank you for the recipe..The taste is heavenly..yummm..
Hi Gillian, thanks so much, and yes it’s patience that is required, but so worth it! So glad it brought back memories. Have a great week.
I’ve never tried making fudge before, so I don’t know how its supposed to work. I just finished this recipe, I followed the instructions and temps, and it’s still cooling after putting in the pan, so I guess I’ll see later, but it really seems like it is more of a texture and consistency of a dk hardish caramel, not a fudge (little stiffer/harder/brittler)
Should I wait and see if it gets more like that texture when it’s completely cooled?
Hi Gina, well as long as you followed the recipe it should work. So yes just wait until it sets and then let me know.
When you get to step 6, do you let it cool in the fridge over night, or at room temp? Thanks
Hi Jason, let it cool at room temperature unless of course your house is extremely hot.
Hi, is the butter salted or unsalted? I made this before but took it off before it reached 234 so I don’t want to fail this time. Thanks!
Hi Evan I use salted butter. Let me know how it goes.
I made the recipe exactly how it says and also made sure it reached 240 temp and it still did not set! This is the 2nd time I tried. First time I did not have a candy thermometer so I tried with the ball test and it didnt set. So this time, I went out and bought a candy thermometer and still no luck! Going to try and put it back on the stove like one of the other ladies did and see how it goes. The flavor is amazing though!
Hi Shelly, sorry it didn’t set, my house is really hot and I have a hard time with fudge during the summer months, could that be it? It might be best to wait until it cools down a bit. I know the flavour is delicious. Let me know how it goes.
I am in Fresno Ca. It is still pretty warm here so our AC is always on inside. I put it in the fridge over night once it cooled to room temp and it almost set to the right consistency but not quite solid enough. I’m going to use up the rest of my ingredients and try again today. Thanks!
Hi Shelly, oh ok, let me know how it goes. Have a great weekend.
I followed this to the letter, and it worked perfectly. Thanks! I have a candy thermometer, and I think it’s necessary as it did take a while for the fudge to reach 234.
Hi Peggy, thanks so much, so glad it worked out and yes I think you definitely need a candy thermometer.
I tried making the fudge.I followed the directions,it never got hard.I read the comments and the question I have is do you put the butter and vanilla in when you have reached the 235 or do you wait till its 122.
Thank you Jeff
Hi Jeff, you add the butter and vanilla when it’s reached 235 right after you remove it from the heat, do not stir it and let it cool to 110F. Then beat with a wooden spoon for about 5 minutes or so until it starts to lose it’s gloss. Then continue with the recipe. Hope that helps
I have made alit of fudge using choc chips and after turning g it down you don’t stir for 8 minutes, if you do t have a termature do you let it boil about 8 minutes
Pauline
Hi Pauline, it depends on how long it takes it to reach 234 degrees F on a candy thermometer (without stirring). Then continue as written, hope that helps.
Hello! I’m going to try this tonight😊 But first- when you say cocoa- does that mean cocoa powder? And can I use a loaf pan instead of a square pan so that I get slabs of fudge instead of cubes or will it not set in a deep pan?? Thanks!!
Hi Kayla, yes cocoa powder. I think a loaf pan would work. Let me know how it goes. 🙂
Thank you!! I’m just making it now- but I can’t get it to reach 234- should it take a long time?? (I calibrated my candy thermometer so I know it’s accurate… so I’m not sure if I should take it off the heat!?
Hi Kayla just wait it can take a bit.
I lost my mom’s old fashioned beaten fudge recipe and I have spent hours googling for it to no avail until today. As soon as I saw the recipe you posted I knew I’d found it. I remembered it was made with whole milk and that the butter and vanilla were not stirred in until the fudge had cooled to room temp. Maybe I’m lucky but this has only failed me one time and that was when a friend and I were trying to make some for a Christmas event at church. We got ahead of ourselves and stirred the butter and vanilla in before waiting for it to cool. All was not lost though, we spooned it over French vanilla ice cream and it was delicious. One of my favorite things about this, in addition to the taste of course, is that it is very inexpensive to make. I have one fudge recipe that is pretty good, but it is made with chocolate chips. It ends up costing about $9 per batch if you use good ingredients. Now I just have to go out to get some whole milk.
Hi Patricia, haha I bet it was amazing over ice cream. I should try that. 🙂 And yes when I tried this recipe I thought yup this is it. The one I have been searching for. Let me know how it turns out. Have a great weekend.
So guys I tried it and I couldn’t get it to set. With that same batch I decided to just throw it back on the heat and repeat the heating and cooling process, figured it couldn’t hurt considering I was just gonna throw it away and it actually set the second time and it taste great so maybe if you batch doesn’t set if all else fails try this. Mine just didn’t get hot enough the first time.
Hi Miranda, thanks for the update. Old fashioned Fudge can be very fussy to make, glad it worked out.
I can’t tell if I’m making this right. My first 3 times were disasters (wouldn’t set, wouldn’t set, burnt). The 4th time someone told me to take into account elevation because I live 6,000 sqft above sea level I’m supposed to take 12 degrees off the 234 temperature. Well I wanted to be safe and do 220 so I did that and when I got to the stirring part it set in the pot after like 3 min, I tried to transfer it to the pan but it was too late. It tasted good but crumbled when I tried to transfer to the pan. Should I cook to even lower than 220? Or stir for only 2 min?
Hi Julia, well since it didn’t burn then I would leave it at 220 maybe 218, but yes I would stir it for less, 2-3 minutes just until it starts to lose it’s gloss. Hope that helps, let me know. 🙂