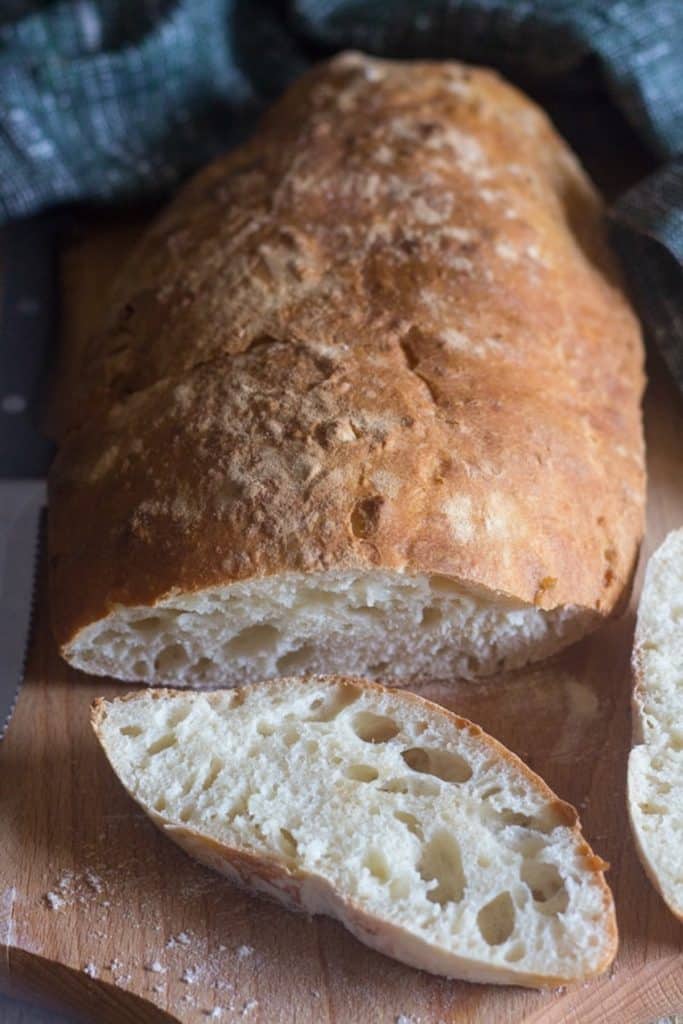
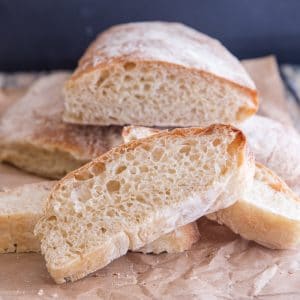
Traditional Italian Ciabatta Bread
This delicious Italian Ciabatta Bread is made the Traditional Italian way, with a biga, it makes the perfect sandwich bread or why not serve it on the side with your favourite soup or stew? Homemade bread is not as hard as you think!
How many people are now taking up baking their own bread now? To tell the truth I have always been a lover of making bread, in fact I even started a new blog All Things Bread before all this merda happened.
Whenever I go to the grocery store or bakery for bread, this is always the first bread I ask for. Since the Italian is the main bread eater in the family, this is also his favourite.
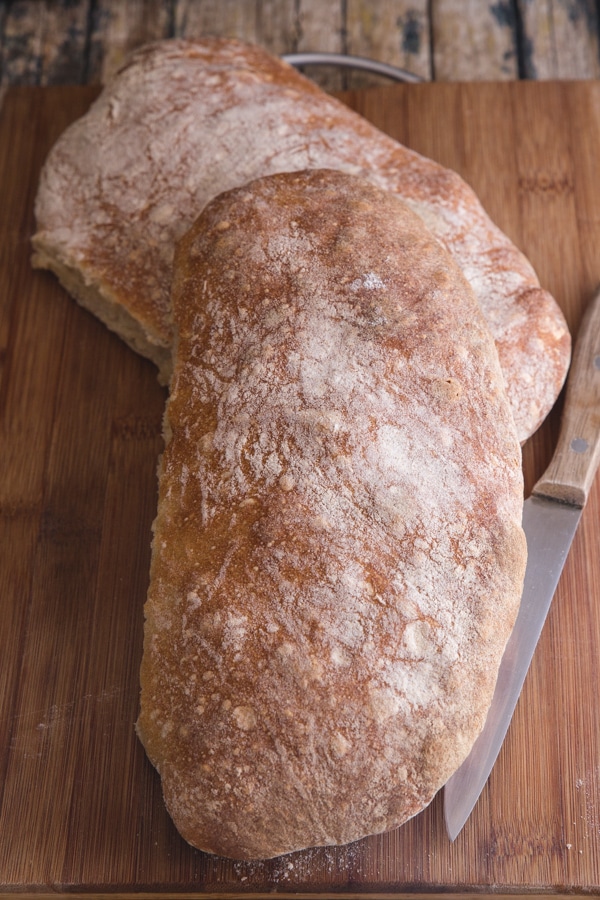
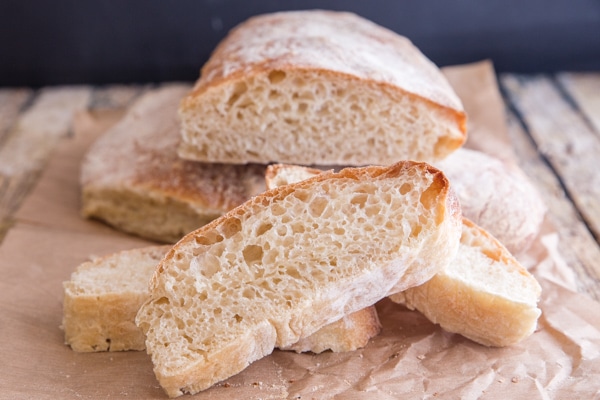
This bread does not have a high crumb, but it does have lots of wonderful holes and a lovely crust. Ciabatta which means slipper in English, pretty much explains it perfectly. Low and flat!
How to make Traditional Ciabatta Bread
First make the biga, in a medium bowl combine the flour and yeast then add the water and stir to combine.
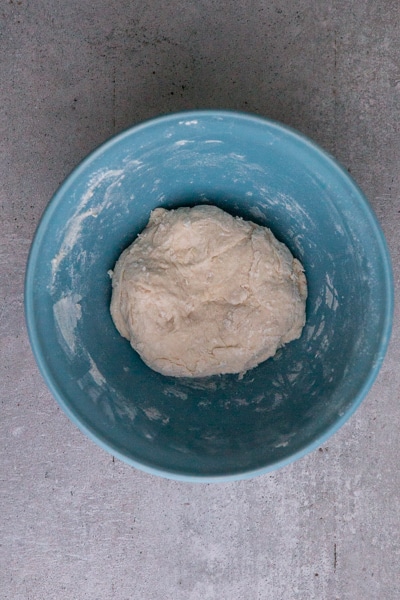
Cover the bowl with plastic wrap and let rise in a cool dry area for 8-12 hours.
In the bowl of the stand up mixer whisk together the flour, yeast and salt, then add the water and biga.
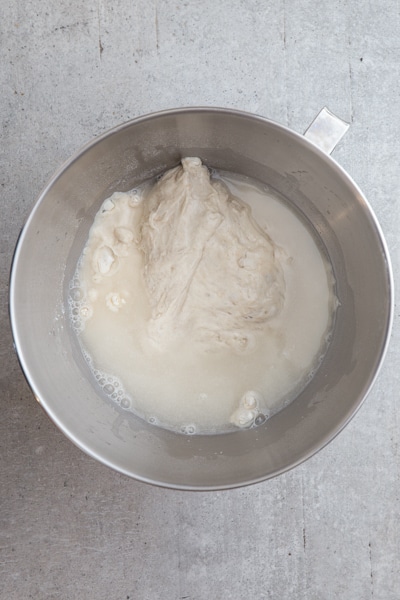
With the flat beaters mix until the mixture starts to come together for about 2-3 minutes.
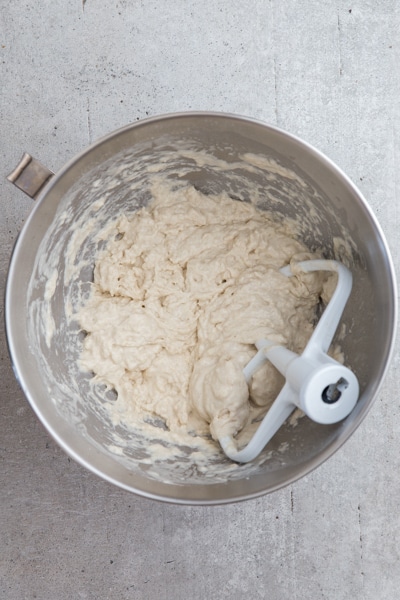
Then switch to the dough hook and knead for another 3 minutes.
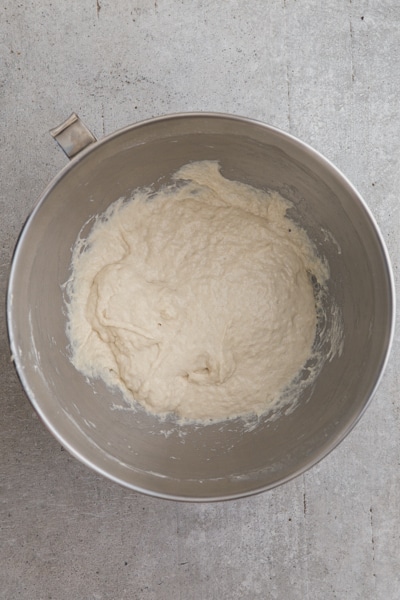
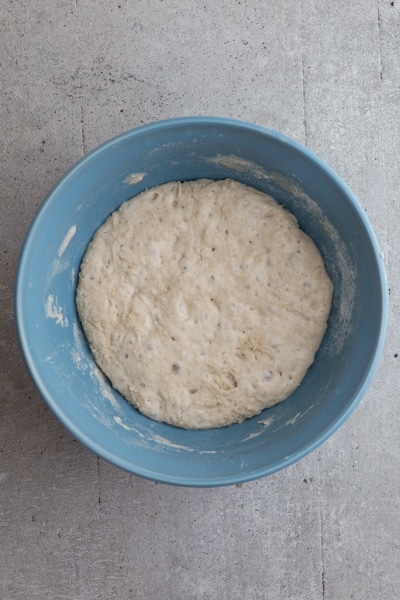
With the help of a spatula place the dough in a lightly oiled bowl, cover with plastic wrap.
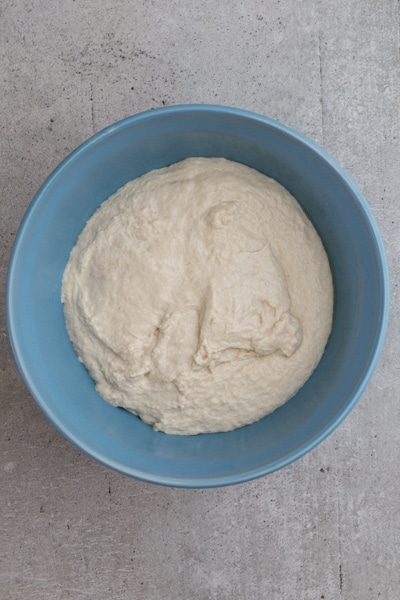
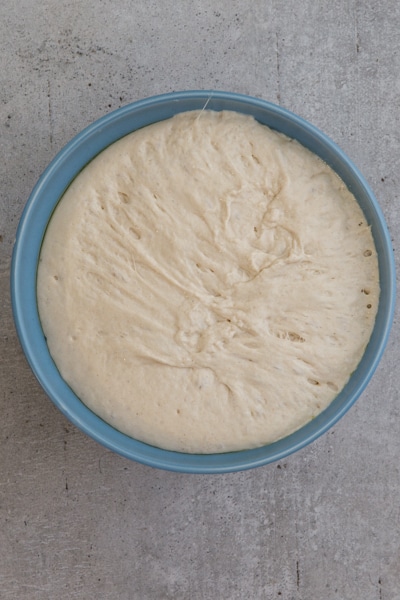
Let rise in a warm draft free area for about one hour or until doubled in bulk.
Move the dough to floured flat surface, sprinkle the top of the dough with flour and divide into two parts.
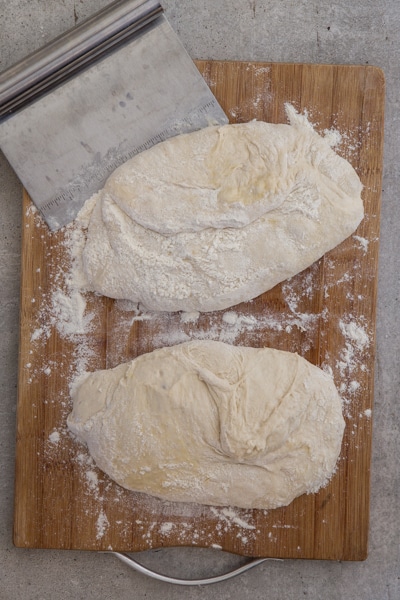
Form each part into an oblong shape, place on parchment paper that is lightly sprinkled with flour, then lightly sprinkle the dough with flour.
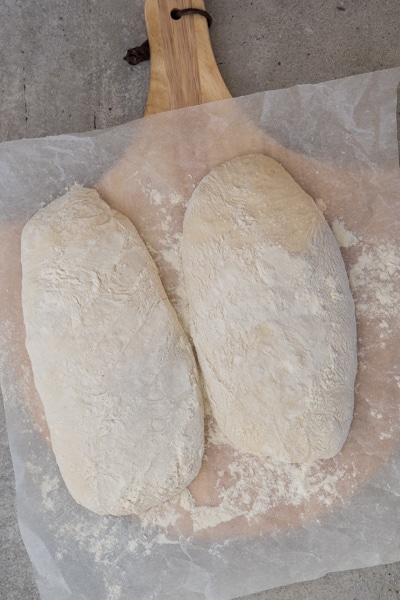
Cover with a clean tea towel and let rise 1 hour or until doubled in bulk.

Place a baking sheet (upside down) or a baking stone in the oven before pre-heating the oven. Don’t forget to place an empty oven proof cake pan on the bottom of the oven also.
Before putting the dough in the oven add either a cup of boiling water or some ice cubes (8-10) in the cake pan, then quickly & carefully place the parchment paper and bread on the cookie sheet or baking stone and bake for approximately 20 minutes.
Move the baked bread immediately to a wire rack to cool.
What is a Biga?
You may think that a Poolish and a Biga are the same, but the main difference is that a Poolish is a liquid dough and a Biga is a solid dough.
A Biga is a type of rise used in Italian baking. Many popular Italian breads, including a ciabatta and Pandoro, are made using a Biga.
The addition of a Biga is said to add more flavour to the finished product and is also used in breads that need a light, open texture with holes.
Why add a pan of water while the bread is baking?
Adding water to an oven creates a moistened environment, this allows the bread to rise easier by delaying the setting of the crust. It makes bread deliciously light and crusty. The best way is to put an oven safe pan in the oven while re-heating then add a cup of boiling water or some ice cubes to the pan, place the bread in the oven and bake.
Reasons dough doesn’t rise
There are quite a few reasons why the dough doesn’t rise, the main ones being, your yeast has expired or dead, the room where your bread is rising is too cold, so more time is needed and your liquid is too hot which killed the yeast.
The best temperature for bread to rise in, is 80F / 26C. The best temperature to for the biga to rise in is 71F / 22C, if you home is warmer than that, then the best place to put the biga is in the fridge.
When you remove it from the fridge, be sure to let it come to room temperature, about 45-60 minutes before continuing with the recipe.
How to tell when the bread is done
There are three ways to tell when the bread is done, the first is by looking at the colour of the bread, which is usually a light to dark golden brown (depending on the bread), the second is by knocking on the bottom of the bread, if there is a hollow sound it usually means the bread is done and the third is by the internal temperature which should be 190F (88C) or 200F (93C) for Brioche type breads.
What are the best ways to eat Ciabatta?
In Italy we like to use slices for a simple sandwich, or even open faced sandwiches, topped with Italian cold cuts, such as prosciutto or salami. It also makes a great dipping bread or even drizzled with olive oil.
Be sure to serve this bread with your favourite Soup , Stew or even Pasta dish. You need something to soak up the leftover sauce in your dish!
How to store the bread
It should be stored in an airtight bag, it will keep for up to three days at room temperature. The baked cooled bread can also be frozen, place in freezer safe bags or container.
Place the frozen bread in the fridge to thaw, then warm in the oven before serving.
More delicious Bread Recipes
- Hot Cross Buns Recipe
- Fast & Easy No-Knead Bread
- Homemade Whole Wheat Bread
- Italian Focaccia Bread
- Italian Crescente Bolognese Recipe
So if you have always wanted to try making bread, then why not give this Traditional Italian Ciabatta a try and let me know how it goes. Enjoy!
Traditional Italian Ciabatta Bread
Ingredients
FOR THE BIGA
- 1 cup + 2 tablespoons all purpose or bread flour (146 grams)
- 1/8 teaspoon active dry yeast
- 1/2 cup lukewarm water (temperature 105F / 40C) (118 grams)
FOR THE DOUGH
- 1 1/2 cups all purpose or bread flour (195 grams)
- 1 1/2 teaspoons active dry yeast
- 1 teaspoon salt
- 3/4 cup lukewarm water (temperature 105F / 40C) (176 grams)
Instructions
- First make the biga, in a medium bowl combine the flour and yeast then add the water and stir to combine. Cover the bowl with plastic wrap and let rise in a cool dry area for 8-12 hours. If your house is on the warm side then place the biga in the fridge for 8-12 hours, remove from the fridge and let it come to room temperature for about 45-60 minutes.
- In the bowl of the stand up mixer whisk together the flour, yeast and salt, then add the water and biga. With the flat beaters mix until the mixture starts to come together for about 2-3 minutes. Then switch to the dough hook and knead for another 3 minutes. This is a soft sticky dough.
- With the help of a spatula place the dough in a lightly oiled bowl, cover with plastic wrap and let rise in a warm draft free area for about one hour or until doubled in bulk.
- Move the dough to floured flat surface, sprinkle the top of the dough with flour and divide into two parts. Form each part into an oblong shape, place on parchment paper that is lightly sprinkled with flour, then lightly sprinkle the dough with flour. Cover with a clean tea towel and let rise 1 hour or until doubled in bulk.
- Place a baking sheet (upside down) or a baking stone in the oven, and an empty oven proof cake pan on the bottom of the oven, then pre-heat the oven to 450F (230C)
- Before putting the dough in the oven add either a cup of boiling water or some ice cubes (about 8) in the cake pan, then quickly & carefully place the parchment paper and bread on the cookie sheet or baking stone and bake for approximately 20 minutes.Move the baked bread immediately to a wire rack to cool. Enjoy!
Nutrition
It’s All About Pasta
Amazing pasta recipes to make your mouth water!

Authentic Italian Desserts
75 Traditional Desserts Made Easy
Yeah…..awesome thank you
1st time I have ever tried to make Ciabatta I made it into rolls as opposed to bread
And it has turned out amazing
Sorry knocked one star off rating as the actual page is a little difficult to follow in places …personally I would have found it easier with the ingredients and method at the top Followed by the pictures, as a novice I constantly returned to read and re- read parts and got lost as to where the info was I was searching for…however after having used this once I think it will be easier to follow next time
But apart from that excellent x
Hi Jeeves, thanks glad you like it, at the top of the page there is a jump to recipe button, that will take you straight to the recipe, I hope that helps.
Love this recipe; best ciabatta recipe I’ve found. I found the biga was very dry so I used more water and reduced it in the dough. Absolutely perfect.
Thanks Sue, glad you enjoyed it. Take care.
Good Day
I have tried to bake Ciabatta bread on numerous occassions but my bread looks good and taste good
but there are no holes in the bread? What am I doing wrong, please advise. Love your recipes.
Thanks you
Hi Mercia, it could be that you are adding too much flour, you want a wet dough, or before you shape the dough, fold it a few times like an envelope and then shape it and see if that helps. Let me know. Thanks glad you like the recipes.
Trying it today, looks wonderful.
Thanks Betty, hope you enjoy it.
Love this recipe thank you!! My son refuses to eat store bought ciabatta again lol❤️ He’s 16 and we are Italian so bread has to be good😄 made this to a of times, thanks again!
Hi Mina, thanks so much, glad your son enjoyed it so much. Take care.
How will my dough be affected if I don’t have a stand up mixer, flat beaters or dough hook. Have you done this without the machinery?
Hi Cynde, I have never made it without a machine, but since it is a wet dough you could try mixing it together with a wooden spoon, for about 4-5 minutes. Let me know how it goes if you try it.
Best recipe ever, the ciabatta turned out so good, thank you for your sharing…yumm
My dough was too wet, it’s like a wet lump…followed measurements and steps very carefully…but something doesn’t look right in the after the machine kneaded the dough…didn’t look like what is was in your pictures…please help to advise…
Thank you 🙏
Hi Tana, if it is too wet then add a little more flour to bring it to the same way as mine. 🙂
This recipe worked perfectly, the only issue I had was it collapsed slightly after it cooled but that was due to an error on my part. Had a followed the last part of the recipe to the letter I am sure It would have been perfect. As it was though, it tasted fantastic and had a large open crumb as is expected from Ciabatta. I made the biga in my bread machine’s tin and then added the dough ingredients the next day and used the dough setting to mix and knead. Then transferred the dough to floured baking paper for final proof.
Thanks Andrew, glad you enjoyed it and sharing making it in a bread machine. Take care.
Can this recipe be made using a bread machine?
Hi Rebecca, I really don’t know, I don’t have never used a bread machine. Sorry.
I made the dough in my machine and continued from there as per recipe. Make the biga in the machines tin the night before and just leave it to sit until ready to add the other ingredients.
Made this today and my family is already begging me to make more! How would the baking time change if I were to make this into one loaf?
Hi Madison, I would probably add 5-10 minutes to the baking time, but keep your eye on it. Glad everyone enjoyed it.
Thanks! Dough was too wet to be able to lift as one ball on to the parchment paper… I think I might have overworked the dough in my attempt as this round turned out very flat! The only other difference is that yesterday, I kneaded by hand with a spatula and wet hands. Today, I kneaded with wet hands and a spatula, but left it in the bowl to avoid sticking to the countertop. Maybe this lost a little flour?
Any input would be appreciated!!
Hi Maddy, ciabatta dough is quite wet, that’s what gives it the flat shape and holes, when you are working with it moving it to a flat surface etc, use some flour. I hope that helps. Let me know.
What a delicious recipe! Made it for the first time today. Followed the recipe to the T and perfect! and so simple. Crispy outside soft inside. One problem tho, had I known I’d would have made more. Made 2 decent banquettes and it was finished in 5 min.
Hi Francesca, thanks so much, glad you enjoyed it. Take care.
Fantastic! Thsnk you so much. This recipe is just what I was hoping for. It was easy but delicious!
As Always, thank you!
Cheryl
Thanks Cheryl, glad you enjoyed it. Take care.
Your bread certainly does have “lots of wonderful holes and a lovely crust.” Lovely to look at and I’m sure delicious to eat. Great tips about getting bread to rise and bake properly in the oven, too. You’ve given me the incentive to try baking bread again!
Hi Kathryn, thanks and yes give it a try, it is an easy recipe. Let me know if you try it.
Yum!! I went right to your new bread blog, always happy to have new resources for great recipes. As an Italian American I understood your “merda” reference, “merda” indeed! I hope your husband is safe.
Hi Debbie, thanks so much, and yes he is so far so good, so happy when this nightmare is over.