Easy Homemade Filled Chocolates
Whether you’re gifting them to a loved one, creating a personalized treat, or simply satisfying your own sweet cravings, making Homemade Filled Chocolates at home is an incredibly rewarding fun experience. From a white, milk or dark chocolate filling to a caramel filling, the choices are endless. One thing is certain these homemade chocolates are better than bought!
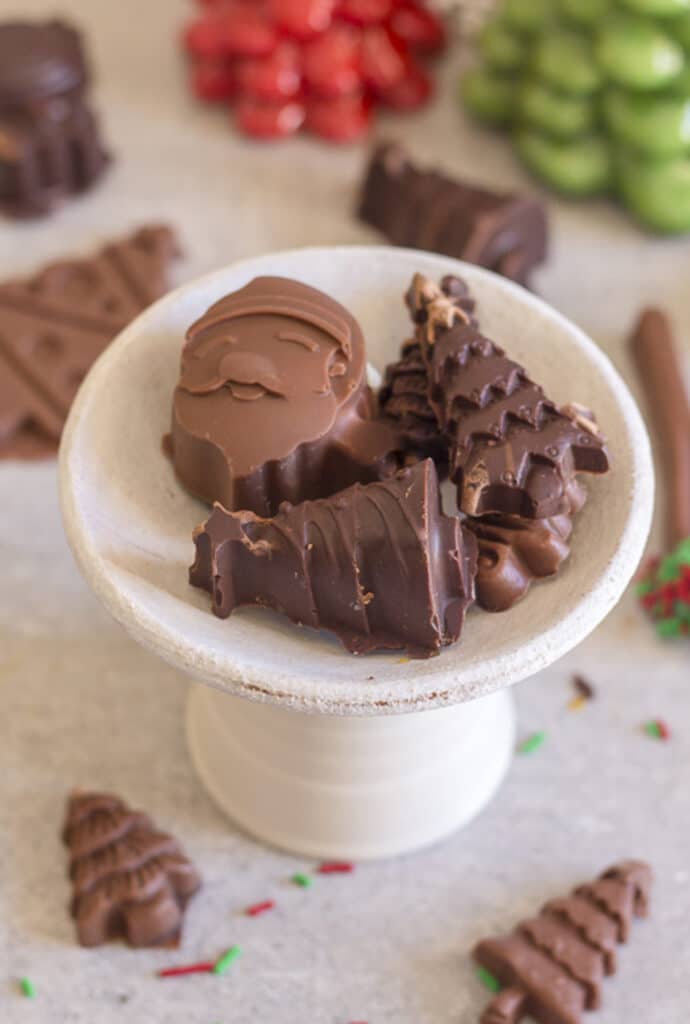
In my opinion there is nothing like biting into a delicious and creamy chocolate! Homemade chocolates really aren’t hard to make they just require a little bit of patience and time, and they really are so satisfying to make and enjoy! I love making a couple of my favorite Italian chocolates such as Baci or Gianduiotto or another holiday chocolate of choice, Mint Filled Chocolates.
Recipe Ingredients
- Chocolate – dark, milk and white chocolate
- Powdered sugar – also known as icing sugar or confectioners sugar
- Cream – heavy, whole or whipping cream, with at least 30% fat content
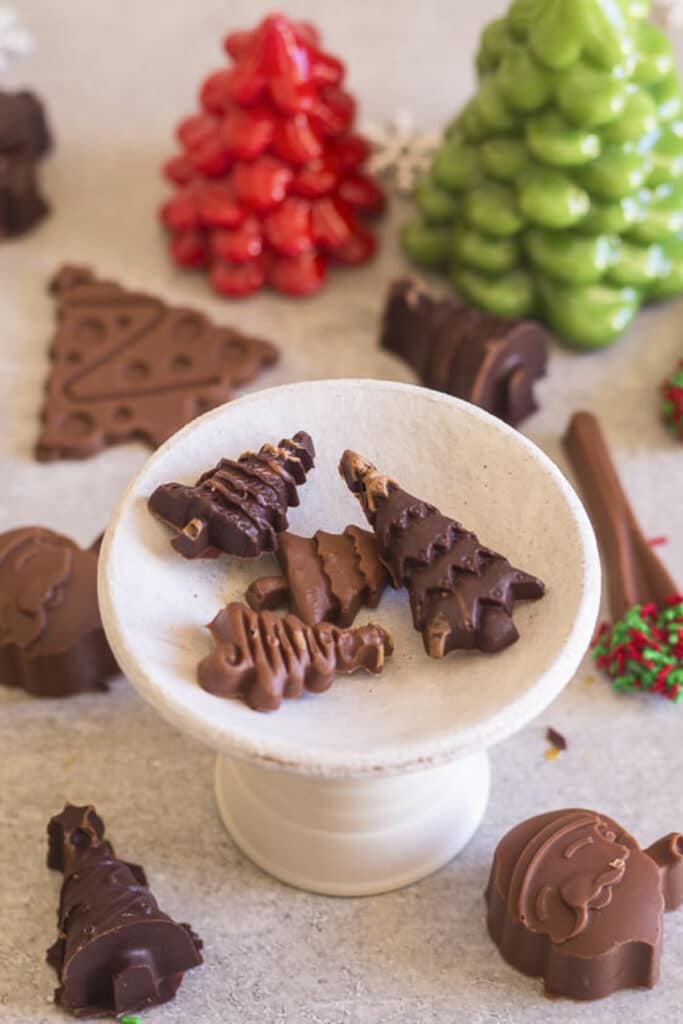
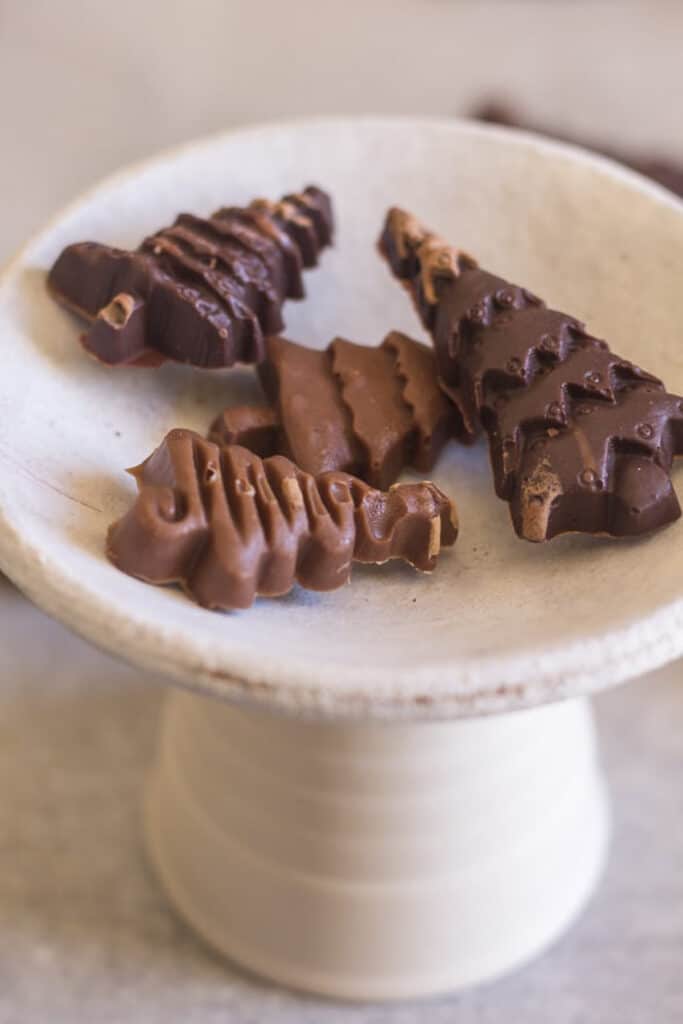
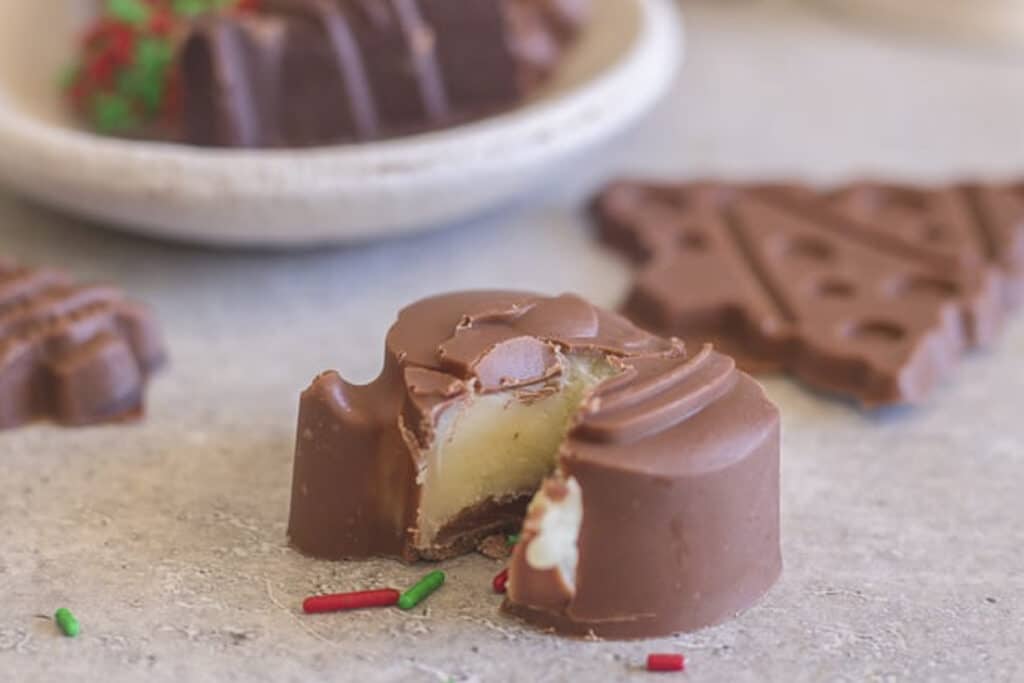
I used silicone molds to make the chocolates. I made Christmas shaped filled chocolates, plain chocolates and some really cute spoons that were dipped in red and green sprinkles. Coffee and chocolate lovers will love the spoons. They all make great Christmas gifts.
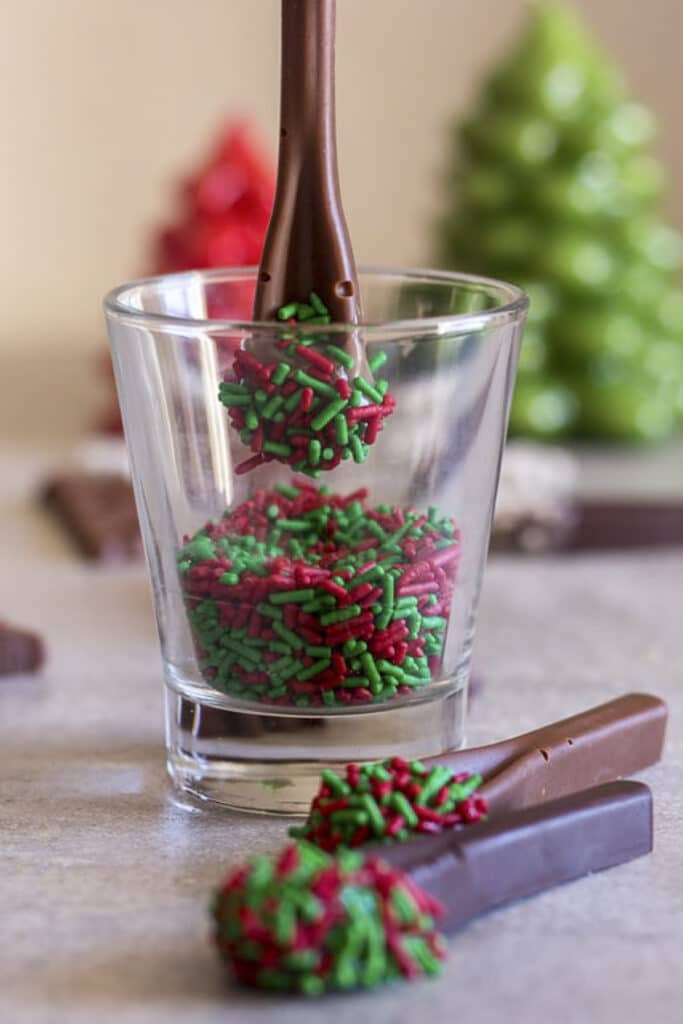
How To Make Filled Chocolates
On low heat place the dark chocolate (I did half and half) in a small-medium bowl over a pot of water. Melt until smooth, stirring often with a fork or whisk. Remove from heat, let cool down (see tempering chocolate below).
Coat the chocolate molds swirling it around (I used a pastry brush to fill in the empty spots) and then tip it over to empty out the excess chocolate. Place the mold in the freezer for approximately 10 minutes, remove and coat one more time with the melted chocolate. This time refrigerate while making the Chocolate Filling.
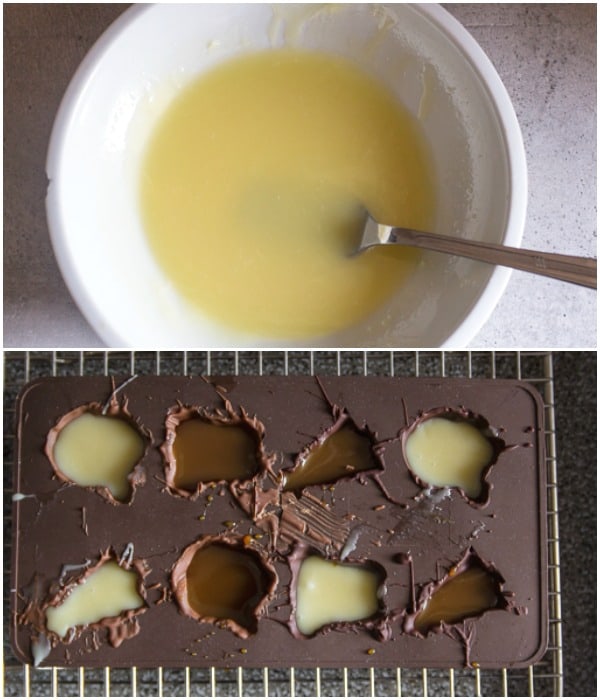
Heat the cream until very hot but not boiling. In a medium bowl add the chopped chocolate and sugar, pour the hot cream over the white chocolate mixture, stir until smooth.
Let sit until cooled and thickened. Remove the mold from the fridge, place the chocolate filling in a pastry bag or use a small spoon and fill the molds 3/4 full, tap the mold down a few times on counter top to remove air bubbles.
Top with the remaining melted dark chocolate, and again tap mold lightly on counter top to remove air bubbles remove excess chocolate with a spatula and refrigerate until firm. Remove the chocolates carefully from the mold and serve.
How To Temper Chocolate
- To temper chocolate all you need is a bowl, a pan and a thermometer.
- You can use either a double boiler or place a bowl over a pot of simmering water (make sure the bowl does not touch the water).
- Use a good quality chocolate (be sure to chop it into pieces) keep aside a quarter of the chocolate in a separate bowl to add later.
- Bring the water in your saucepan to a simmer.
- Using a silicone spatula continuously stir the chocolate until it is melted and smooth.
- Place your theremometer in the chocolate and bring it to –
- 118F (48C) for Dark Chocolate
- 112F (45C) for Milk Chocolate
Or
- Remove the bowl of chocolate from the saucepan and carefully wipe the steam from bottom of the bowl.
- Do not let even one drop of water fall into the chocolate because it will cause the chocolate to seize and then your chocolate is completely ruined! So please be careful!
- Then add the remaining chocolate to the melted chocolate, this will help bring down the temperature of the chocolate.
- Keep stirring until the temperature of the chocolate reaches –
- 89-90F (32C) for Dark Chocolate
- 86-88F (30C) for Milk Chocolate
Variations for the filling
- Caramel: Soft, gooey caramel is a classic favorite.
- Nuts: Roasted and chopped nuts, such as almonds, hazelnuts, or pecans, add crunch and flavor.
- Fruit Preserves: Fruity fillings like raspberry, strawberry, or apricot add a delightful contrast to the chocolate shell.
- Ganache: Creamy ganache, made with chocolate and cream, can be infused with various flavors like coffee, mint, or orange.
- Peanut Butter: A peanut butter filling creates a heavenly combination with chocolate.
- Coconut: Sweetened shredded coconut, sometimes mixed with condensed milk, provides a tropical twist.
What Is Bloom?
When chocolate has been improperly handled, it forms a gray or white cast on the surface. There are two types of bloom that occur on chocolate, each from a different cause.
When you prepare to use your chocolate, it may have bloom on the surface, particularly if it has beenused previously. This bloom is nothing more than cocoa butter on the surface of chocolate, and it willdisappear once the chocolate has been melted and tempered.
Fat Bloom – is caused by either improper tempering of chocolate or by exposure to high temperatures during storage. This type of bloom is cocoa butter that has come to the surface of the chocolate and set, resulting in gray streaks or spot on the surface of the chocolate.
Sugar Bloom – is caused by exposure to moisture, usually in the form of high humidity. This type of bloom is actually minute crystals of sugar that have formed on the surface of the chocolate after moisture.
When chocolate is remelted and tempered, as long as the moisture that caused it has evaporated before the chocolate is used it is fine to use.
How To Store Homemade Chocolates
Homemade chocolates stored in a tightly sealed airtight container will last 1-2 months in the fridge and 1-2 weeks in a cool room. Stored in an airtight freezer safe container they will keep for up to 6 months.
How To Tell If Chocolate Is Bad?
In most cases you’ll be able to see white spots or mold growing on the chocolate bar. When that happens, discard the chocolate immediately. If you find any local discolorations, or it starts to smell off throwing the chocolate in the trash can is the best thing to do as well.
More Homemade Chocolate Recipes
- Homemade Chocolate Mint Filled Chocolates
- Old Fashioned Chocolate Fudge
- Loaded Double Chocolate Clusters
- Chocolate Torrone
Whatever filling you decide to use, white or milk chocolate, they are really delicious. A nice and easy way to end Christmas dinner or share as a gift. Enjoy!
Homemade Filled Chocolates
Ingredients
CHOCOLATE MOLD
- 5 ounces dark chocolate (or milk chocolate or half of each) good quality chocolate
WHITE CHOCOLATE FILLING
- 2 1/2 ounces chocolate (white or milk chocolate) good quality chocolate
- 2 tablespoons powdered sugar
- 3 1/2-4 tablespoons cream heavy, whole or whipping cream
Instructions
CHOCOLATE MOLD
- On low heat place the 5 ounces of dark chocolate (I did half and half) (broken into pieces) in a small-medium bowl over a pot of water (make sure bowl does not touch the water). Melt until smooth, stirring often with a fork or whisk. Remove from heat, let cool down (10-15 minutes). See below for tempering instructions.
- Coat the chocolate molds swirling it around (I used a pastry brush to fill in the empty spots), then tip the mold over to empty out the excess chocolate (I let it drain for approximately 5-10 minutes over a cookie rack), place the mold in the freezer for approximately 10 minutes, remove and coat one more time with the melted chocolate. This time refrigerate while making the Chocolate Filling.
CHOCOLATE FILLING
- Heat the cream until very hot but not boiling. In a medium bowl add the chopped chocolate and sugar, pour the hot cream over the white chocolate mixture, stir until smooth (you may have to place the bowl over a pot of boiling water or in the microwave if it doesn't completely melt).
- Let sit approximately 15-20 minutes until cooled and thickened. Remove the mold from the fridge, place the chocolate filling in a pastry bag (or use a small spoon) and fill the molds ¾ full, tap the mold down a few times on the counter top to remove the air bubbles, top with the remaining melted dark chocolate, and again tap the mold lightly on the counter top. Remove the excess chocolate with a spatula and refrigerate 30 minutes to 1 hour until firm. Remove chocolates carefully from mold and serve. Enjoy!
Notes
Nutrition
Republished from December 12, 2015.
How long would I be able to keep these in the fridge?
Hi Leslie, homemade chocolates stored in a tightly sealed airtight container will last 1-2 months in the fridge and 1-2 weeks in a cool room. Stored in an airtight freezer safe container they will keep for up to 6 months. Hope that helps.
Could you post a video ?
Hi Abigail, if you look at this post there is a video, it’s almost the same just a different filling. I hope it helps. https://anitalianinmykitchen.com/filled-chocolates/
Hi Rosemary, I looked on that link but there was no video posted 🙁
Hi Yoyo, this link https://anitalianinmykitchen.com/filled-chocolates/. It’s at the top of the post. Let me know.
Hi there,
I am wondering how to make these AWESOME looking chocolates in advance and freezing them. How do you recommend i do that?
Thank you,
Brenda
Hi Brenda if you freeze or refrigerate chocolate it can cause the chocolate to bloom (where the chocolate turns white) this doesn’t effect the taste just the looks of the chocolates. Although if you store the chocolate between layers in an airtight container in a cool dark area they should keep for 2-3 weeks. If you want to try freezing them be sure to wrap each chocolate individually then place them in an airtight container. Refrigerate them for 24 hours then move them to the freezer, then just reverse this when you want to serve them. Hope that helps. Let me know how it goes.
Thank you for sharing. I love making home made chocolates, especially at Christmas.
For flat chocolates, I use the insides of the previous years advent calendars. Just remove all the cardboard, foil etc and give it a good clean. I’ve done this for about 6 or 7 years now and pop them in Christmas cellophane bags x
Hi Deb, thanks and what a great idea!
Do you have a recipe for chocolate cream filled chocolates like a butter cream only chocolate filled
Hi Pat, no the only one I have is the one on this post. Sorry.
Pat just replace the white chocolate with Your choice of dark, the following the recipe, hope this helps.
My husband and I made these today. So good and easy to follow recipe. Thank you!
Hi Michelle, thanks so much, so glad you and your husband liked the recipe. Take care.
These look absolutely amazing. Just a question, if I may. How long will these last before going off? I want to make and sell/gift chocolates but it didn’t say how long they last. Thank you in advance.
Hi Jasmin, if stored in an airtight container, single layers (separated with parchment paper) and kept in a cool area they should last 2-3 weeks. Hope that helps.
Great recipe!
Hi there! Thank you for the wonderful recipe. One question: when you say you used a pastry brush to fill in the nooks and crannies, was it a full-size pastry brush? I was thinking of using a normal, synthetic paintbrush but I’m not sure if that’s food-safe. I’d love some advice. Thank you!c
Hi Amanda, I just used a medium although small would work too, sized pastry brush, I don’t think I would use a paintbrush, you could possibly lose bristles in the chocolate. Hope that helps.
In step five, do you mean that I would need to heat the cream but not boil, then pour the hot cream over the chocolate and sugar?
Hi Kat, yes exactly, heat it until hot but not boiling. Hope you enjoy it. 🙂
hi do you think you could small ice cub trays if you don’t have chocolate molds?.
Hi Chantal apparently you can, I have never done it before, I don’t know if they would be hard to get out of the tray, but you could try, let me know how it goes if you decide to do it. 🙂
Your chocolates look delicious and fun to make! I should give this a try before. I’ve never made chocolates!
Hi Lauren, thanks so much. They are really easy. 🙂
What a wonderful idea! A great way to start off Christmas and delicious too.
Thanks Martin and yes they were. 🙂
Do these need to be refrigerated?
Hi Cheddar, yes I would probably refrigerate them until you serve them. Happy New Year.
These chocolates look delicious. I can’t wait to try them.
Annamaria
Thanks Annamaria, hope you enjoy them.