Homemade Rustic No Yeast Bread
This easy No Yeast Bread is perfect when you don’t have time for a traditional yeast bread or you don’t have any yeast. It’s delicious plain or even toasted. Made in a one bowl so clean up is a breeze! No need to live without bread!
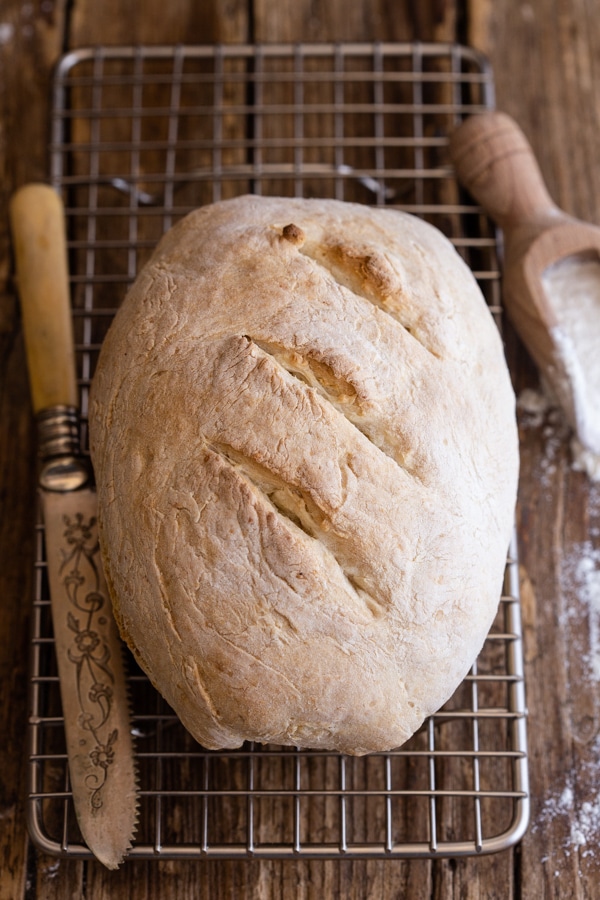
Homemade No Yeast Bread
So it seems we are getting to the point where it is extremely difficult to find yeast, so what’s the next best thing? Yup bread without yeast, so why not make a Sourdough Starter and while you wait until it is active enough to use, you can always make your bread and eat it too with this recipe.
My daughter has already made this bread three times and loves it. She toasts it and of course like any good Italian tops it with her favourite Hazelnut Spread.
The best thing about this bread is it’s made in one bowl, no heavy kneading needed and of course no rising time.
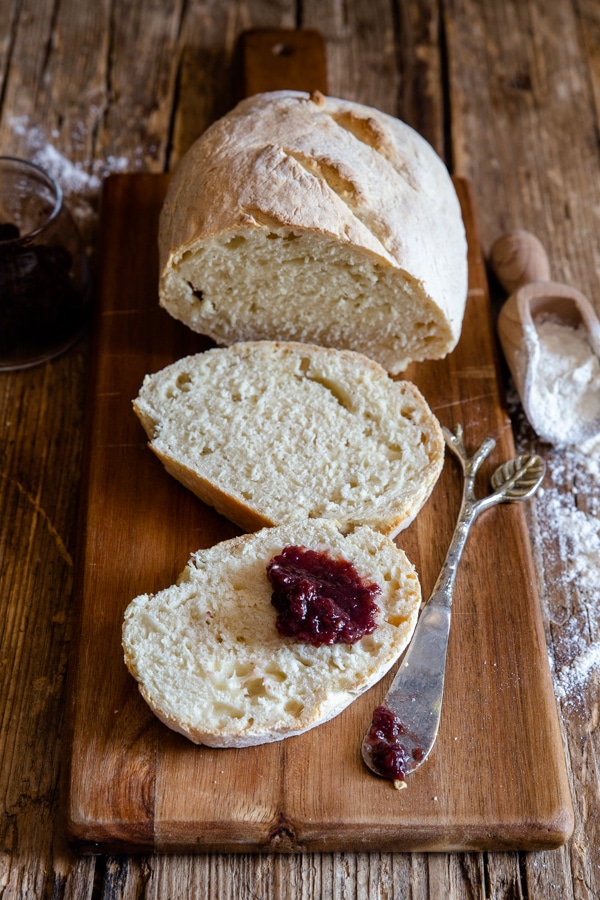
How to make No Yeast Bread
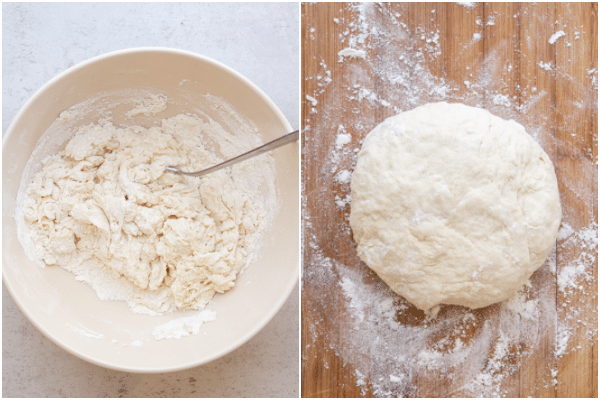
In a large bowl whisk together the flour, sugar, salt and baking powder. Then add the water and mix together, either with a fork or spatula.Sprinkle a flat surface with a little flour, place the dough on top and knead until smooth.
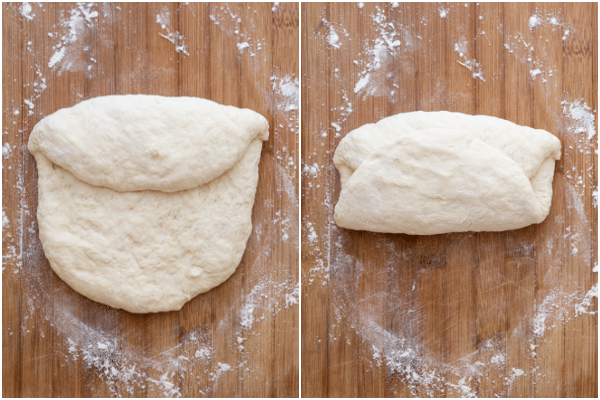
Gently flatten with the palm of your hand into an oval shape, then fold like an envelope. Sprinkle with flour if needed.
Then form into your preferred loaf shape and place on a parchment paper lined cookie sheet. Bake for about 25 minutes.
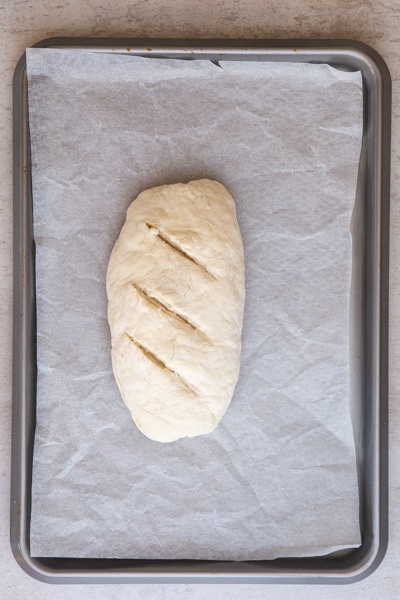
Let cool on a wire rack before serving.
Why cool bread on a wire rack?
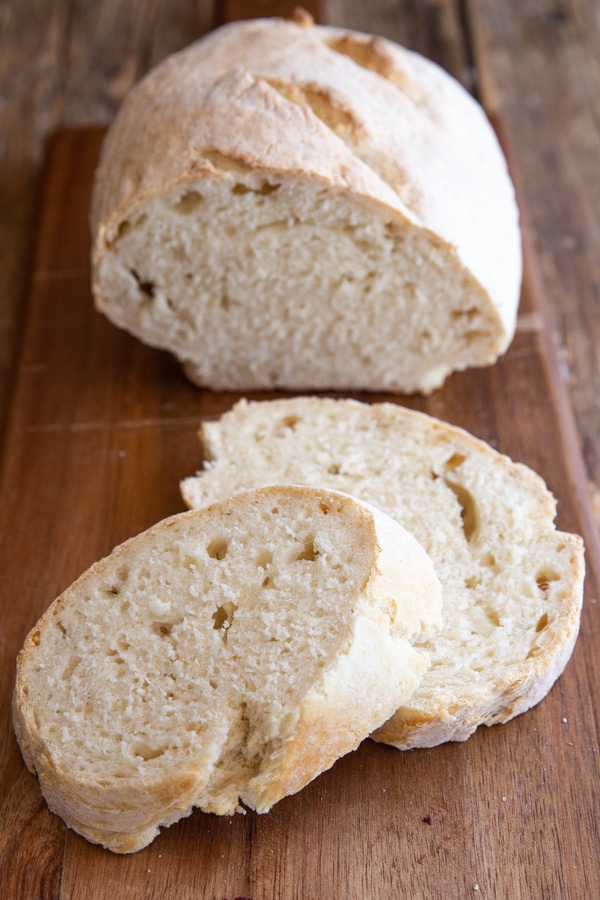
Bread should be cooled on a wire rack and not in the pan because the loaf will become moist, soggy, and sponge-like quite quickly, because the moisture in the pan condenses onto the bread. So be sure to immediately move the bread to a wire rack to cool.
More Delicious No Yeast Recipes
La Piadina – Italian Flatbread
So whenever you need or want a quick bread recipe, why not try this Homemade No Yeast Bread. Take Care!
Homemade Rustic No Yeast Bread
Ingredients
- 2 cups all purpose flour
- 1/2 teaspoon sugar
- 1/2 teaspoon salt
- 2 teaspoons baking powder
- 3/4 cup water (lukewarm no-chlorine)*
*Lukewarm temperature 80F (26F).
Instructions
- Pre-heat oven to 425F (220C). Line a cookie sheet with parchment paper.
- In a large bowl whisk together the flour, sugar, salt and baking powder. Then add the water and mix together, either with a fork or spatula.Sprinkle a flat surface with a little flour, place the dough on top and gently knead for a minute or two until smooth. Gently flatten the dough into a small rectangle with the palm of your hand and fold it like an envelope. Sprinkle with flour if needed.Then form into your preferred loaf shape, score the top and place on prepared cookie sheet. Bake for 15 minutes then lower the temperature to 350F (180C) for another 10 minutes.Let cool on a wire rack before serving. Enjoy!
Video
Notes
Nutrition
Updated from April 20, 2020.
Very simple recipe and tastes great! 🙂
Hi Jessi, thanks so much, glad you liked it. Happy New Year.
yummmm
Thank you for this recipe. I made a loaf tonight to go with our split-pea soup. I added garlic powder and Italian seasoning. It turned out wonderfully! I will note that I put some butter on top right after pulling it out of the oven. And it turned out perfectly – not hard like a “brick” like a few others stated. It had a perfect crust.
One other strange note: I placed it in the microwave (NOT TURNED ON!!) to cool because I left the house for a bit and didn’t want my cats messing with it! (haha). Maybe that did something to hold the moisture in and keep it soft. Not sure, but whatever I did, I will repeat for next time because we loved this no-yeast bread!
Hi Kelly, thanks so much, I have no idea why it’s like a brick, it never is for me either. Good tip with microwave though. Happy New Year.
Where should I store it? I definitely want to eat the rest of it. It was very tasty!
Hi Jordan the baked bread should be stored in an airtight bag and keep at room temperature. It should last 2-3 days. 🙂
I love this recipe! Delicious and easy to make! Thank you for sharing it for everyone to see!
Mine did not come out in the right shape at all… But it tasted SOOOOOOOOOO good! Great for when you don’t have any yeast at home!
Thank you! 😊
Hi Jasna, thanks so much, so glad you enjoyed it. Take care.
Love this…just made for the first time…was a bit too salty for me…may skip the salt next time…use a bit more sugar…will try other suggestions also with the melted butter and spices! This is so easy! I’m impressed! Thank you!
Thanks Kristin, glad you like it. 🙂
I made this recipe today. It came out just like your picture; and did not get toasty brown, but remained light cream-tan. It does have a hard outer crust, until it cools and draws some moisture from its interior. Once cool and slice-able; it’s ok with lots of butter and honey. But, this is just flour and water and plain tasting. It’s easy and fast to stir up. To give it more flavor, I will replace the water with broth and maybe some other seasonings. Thank you for the recipe
Hi bb yes it was just a simple bread I shared during the lockdown from March when it was so difficult to find yeast. It’s nothing really special although it does the trick. Have a great week.
I just bought some Steak to make Philly Cheesesteak sandwiches but had no break and I didn’t feel like going out to buy some. So I happened upon this recipe for simple bread which was all I really kneaded…uh, needed! I took it out of the oven and let it sit for about 10 minutes or so and then made the sandwiches (2). It was just enough bread for me and my wife. Satisfied.
Hi Bart, thanks so much so glad it worked out. Take care.
This bread looks really good. Thank you for the recipe
Hi Kaushalya, thanks and your welcome. I hope you like it.
I followed the ingredients to the letter and ended up with a brick. What did i do wrong? i used all the samke ingredients.
Hi Lauren, it could be you baked it too long or your baking powder has expired.
I never thought making bread without yeast and kneading for hours was possible. Plus this was so easy. It was late and I realizied I ran out of bread and wanted some with my meal. Your homemade bread recipe is really appreciated and I followed it to the letter. I was wondering is there a way to make the crust a little softer and not so hard? Thanks again.
Hi Joan, thanks so much, so glad you enjoyed it. I think because it is made with baking powder and not yeast that makes the crust harder. Although I have heard if you brush the crust with melted butter as soon as it comes out of the oven, that should help. Let me know if you try it. Take care.
Since I only had whole wheat flour, I substituted 3/4 cup of WW flour for every 1 cup of AP flour – just like you suggested! It is now my favorite recipe for homemade bread! I am NOT a baker, therefore I never have yeast on hand…but this recipe is so easy & so yummy, and can be used for breakfast, lunch, or dinner! Thank you so much.
Hi Liz, thanks so much, so glad it worked out for you. Have a great weekend.
I made a beef stew for dinner, and I was looking for a bread recipe that I could make with ingredients I had on hand. I found this one and it was *perfect*!
It was quick and easy, and very tasty. I did add about a half teaspoon of rosemary, I’ll add more next time.
Hi Romana, thanks so much, so glad you enjoyed it and yes great idea with the addition of rosemary. Have a great week.
Don’t know what I’m doing wrong, I did use gluten free all purpose flour, and it just comes out like a dry brick.
Hi M, I have never made this bread with gluten free flour, could it be the type of gluten free flour you are using? Sorry.
Bobs mill GF flour (1:1) did not work. Mine is a brick too. Baking bread gluten free is very hard. It was a risk I took. I am sure there is nothing wrong with the original recipe. Just don’t substitute!
I had the same problem. Subsequently I used a little more water mixed with milk and increased the baking powder.
Also the high heat is too my h for a conventional oven. Gas oven provide more moisture.
All in all I was disappointed with the initial recipe and what might have hone wrong is beyond me. Instructions followed to the letter and my BRICK was formed…inside was slightly undercooked so I stuck it in the microwave oven with the cut side down…in increments of 15 seconds. Them it was passable.
Think I’ll stick to toast breads from now on.
Thank you anyway for the recipe.
Made this bread to go along with some soup I made for my daughter for dinner. This is the third time I made it and it is so easy and delicious !! The only thing I did different was I added some garlic powder and Italian seasoning to the mix. When finished I melted butter with a little garlic powder and Italian seasoning to baste on the top when done baking !! So delicious !!
Hi Cathleen, thanks, glad you like it and what a great idea, sounds delicious. Take care.