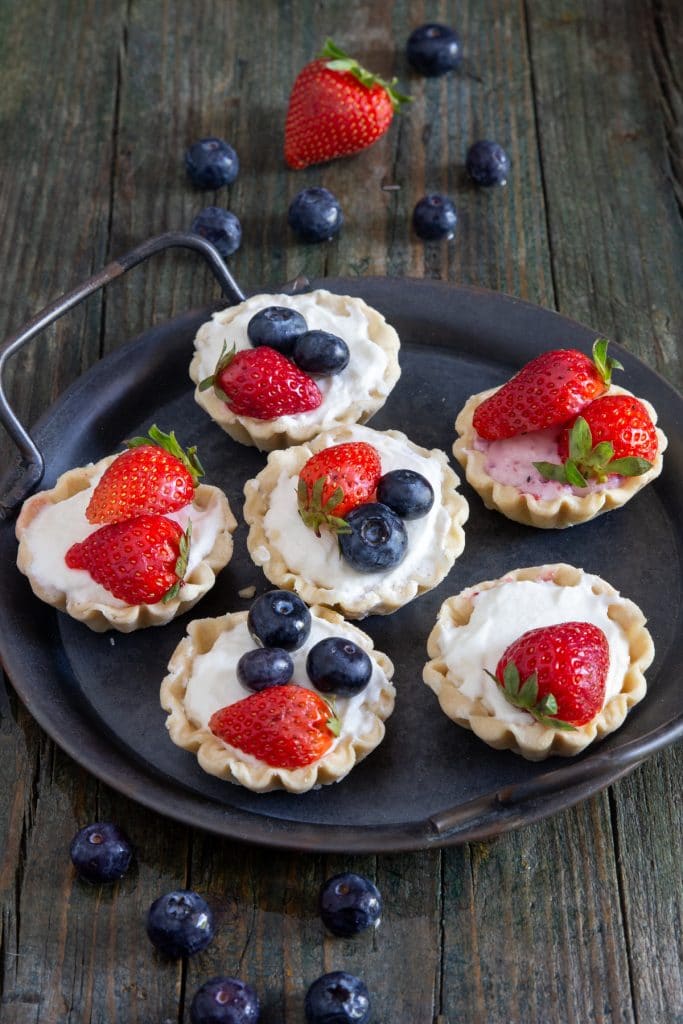
Patriotic Cheesecake Mini Tarts
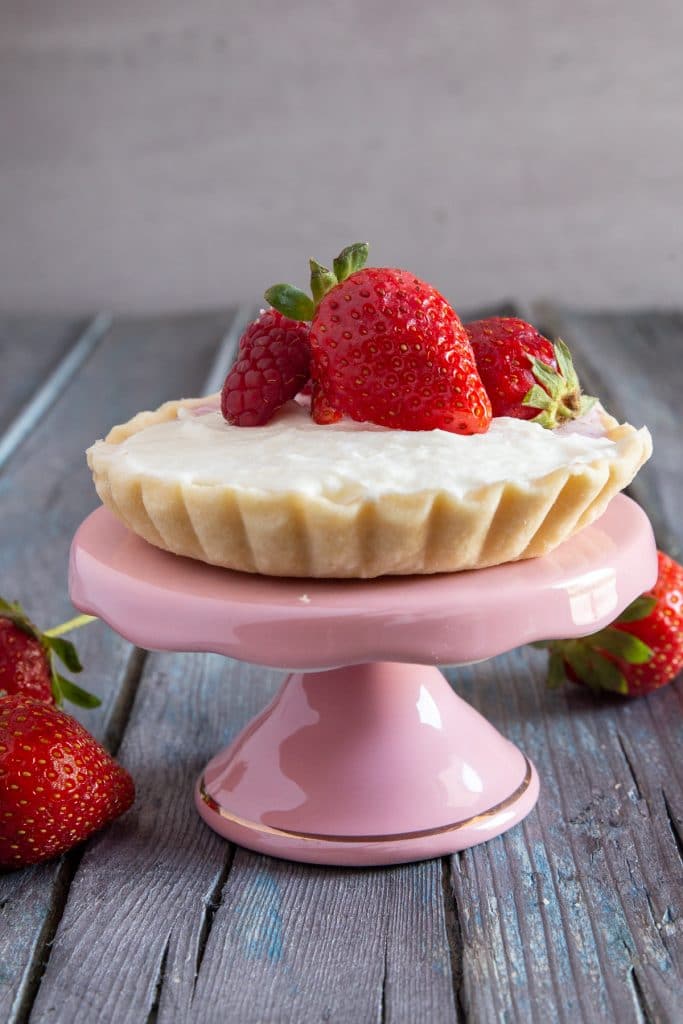
These Mini Tarts are filled with a creamy no-bake cheesecake filling and topped with fresh summer berries. A delicious way to celebrate Canada Day or the 4th of July. These easy cheesecake tarts can be made with a homemade pastry or your favorite store bought, they will surely be a hit with everyone!

I have always loved the festivities of Canada Day when I was home, and I always tried to show it to my kids here in Italy also. For dessert I would usually make a Strawberry Shortcake, with loads of whipped cream and strawberries.
But then they discovered Cheesecake and there was no going back. So why not try some mini tarts or even make it into a single Pie?
Recipe Ingredients
You can make a homemade pie dough or use your favorite store bought pastry
- Flour – all purpose
- Salt
- Sugar – just a pinch
- Butter – cold
- Water – cold
For the cheesecake filling
- Cream cheese – whole fat
- Cream – whole, heavy or whipping cream, with at least 30% fat
- Powdered sugar – also known as icing or confectioners sugar
- Vanilla
- Milk – 2% or whole milk
- Gelatine – powdered or 4 leaves
Extras
- Jam – strawberry, cherry and or blueberry
- Fresh fruit (such as strawberries, blueberries and raspberries) sliced
- Cake – such as pound cake, sponge cake or your favorite vanilla cake
- Limoncello or pineapple juice to soak the cake
How to make Cheesecake Mini Tarts
Making the dough
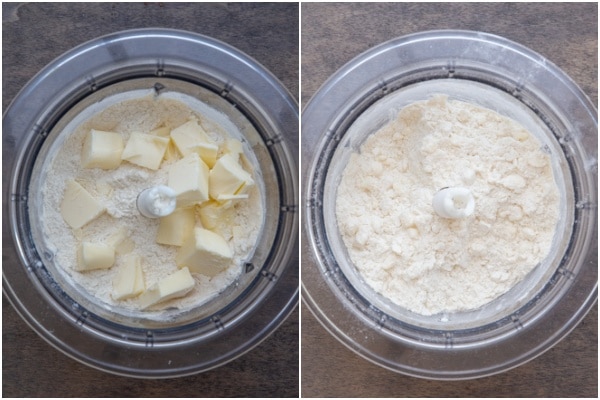
Whisk the flour, salt and sugar in a large bowl, add the butter and mix using a pastry blender or even your clean fingers until the mixture resembles coarse crumbs (the size of peas).
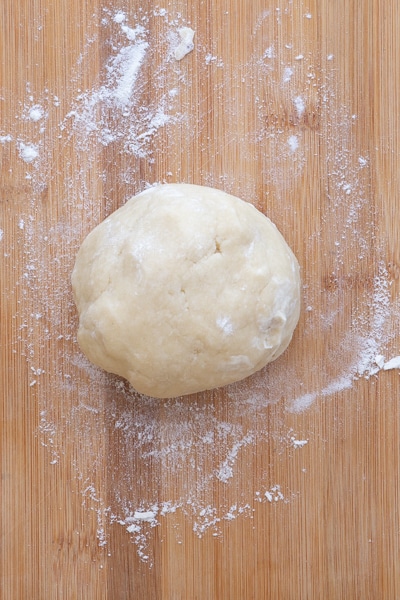
Add the water (one tablespoon at a time) and combine just until dough starts to come together. Then move it to a lightly floured flat surface and knead lightly into a round ball. Wrap in plastic and refrigerate for at least 30 minutes.
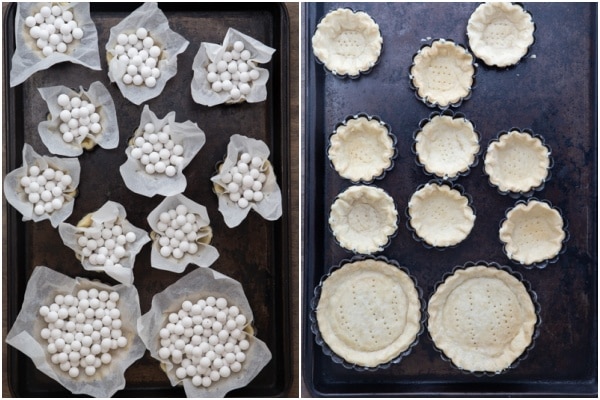
Roll the pastry to 1/8 inch thickness, cut out with medium or large round cookie cutters (depending on the size of your tart pans, fit into the lightly greased and floured tart pans, prick the dough well with a fork.
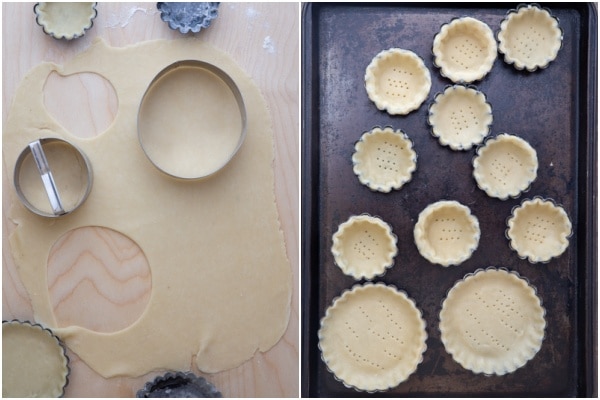
Cover with a square of parchment paper add some dry beans, rice or even sugar. Bake in a pre-heated oven for 10-15 minutes, remove the beans and paper and continue to bake for another 5-10 minutes or until golden brown. Remove from the oven and let cool completely before filling.
If making a single pie, then roll the dough out to 1/8 inch thick fit in the lightly greased and floured pie pan, prick the dough with a fork, cover with parchment paper and dry beans, rice or sugar and bake for approximately 15-20 minutes, remove the parchment paper and beans and continue to bake for another 15-20 minutes or until golden brown. Remove from the oven and let cool completely before filling.
Making the Cheesecake filling
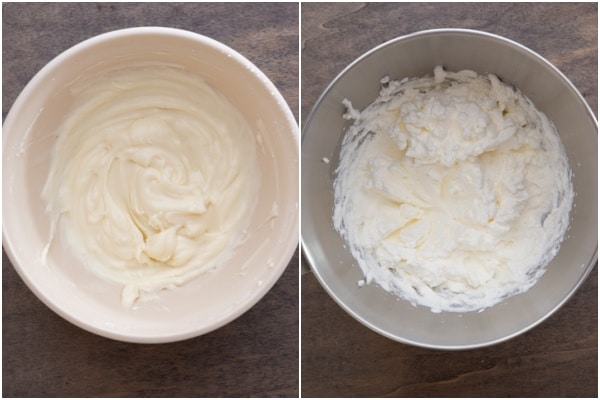
Beat together the cream cheese, sugar and vanilla until creamy, set aside. In a large bowl beat the cold cream until stiff peaks appear, set aside.
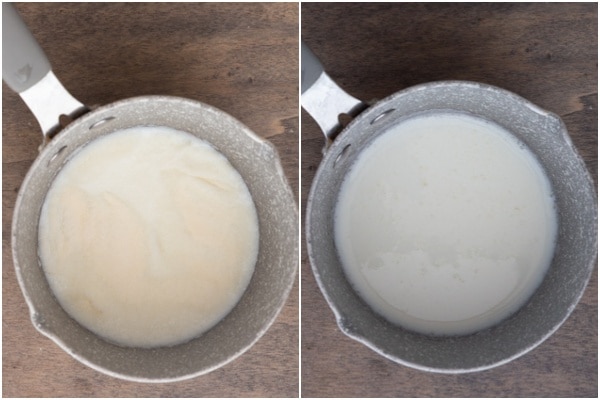
In a small pot add the milk and sprinkle the gelatine on top, let stand one minute, then place the pot on low heat and heat just until the gelatine has dissolved, stirring often (1-2 minutes), do not boil, then immediately remove from heat.
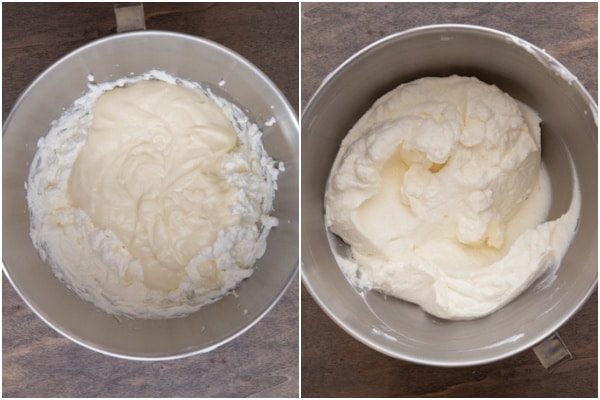
Fold the gelatine into the cream cheese mixture, then gently fold it into the whipped cream, mix until combined.
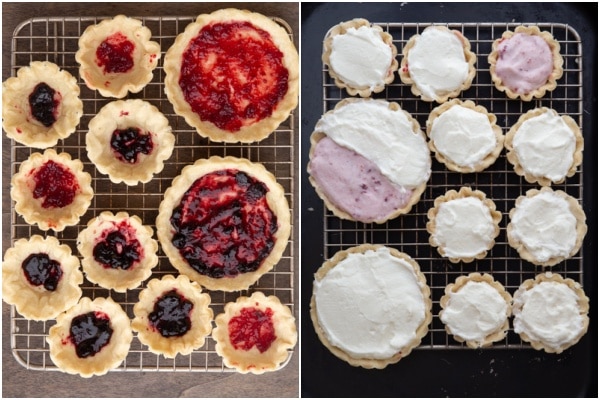
Putting it altogether
Spread the cooled tarts on the pie on the inside with strawberry or blueberry jam, evenly top the jam with the cheesecake filling, cover loosely with plastic wrap and refrigerate 4-5 hours or overnight. Decorate with red or red and blue berries before serving.
How to blind bake pastry
- Roll half the dough on a lightly floured flat surface to approximately 1/8- to 1/4-inch thickness.
- With a round cookie cutter cut out 6-8 circles.
- Place a circle in a each muffin cup (flatten into place with the bottom of a small glass lightly floured)
- Trim the excess dough with a sharp knife.
- Prick the bottoms of each shell with a fork.
- Place a square of parchment paper or a cupcake casing in each shell.
- Fill with some dried beans, rice or sugar.
- Bake for approximately 10 minutes, then remove the paper and dried beans and bake again for approximately 5 minutes or until golden brown.
- Remove from the oven and allow to cool completely.
Can the dough be made in a food processor?
Yes it can, I usually make my dough using a food processor, so fast and easy. Whisk the flour, salt and sugar in the bowl of the processor, add the butter and pulse a few time to form coarse crumbs.
Add the water a tablespoon at a time (I only need 2 tablespoons) just until the dough comes together, then move to a lightly floured flat surface and gently knead a few time to form a compact dough. Wrap in plastic and refrigerate at least 30 minutes.

How long does pie dough last in the fridge
Wrap the raw pie dough well in plastic wrap and refrigerate, it will keep for up to 3 days in the fridge. It can also be frozen. Wrap well in plastic wrap or foil and place in an airtight freezer bag, it will keep for up to 6 months in the freezer.
The dough can be thawed on the counter, ready in 60 minutes or in the fridge. You can also freeze the unbaked tart shells. Bake the shells from frozen, do not thaw first.
Do I need to use gelatine?
If you are making mini tarts then you can leave out the gelatine, it will make a creamier filling. I like a firmer filling so I use it. If you are making a single pie then gelatine is required, because you are making slices and you want the filling to hold up and not spill all over the plate.
How many tarts does it make
I made 10 mini tarts (2 inch/5 cm) and 2 medium tarts (4 inch/10cm). You will notice a tart has a pink filling. I was trying to get a red color without adding coloring, so i stirred in some jam, it didn’t come out as red as I was hoping so I didn’t continue.
How to store the Mini Tarts
The filled tarts should be stored in an airtight container in the fridge, they will keep for up to 3-4 days.
So thanks to you all of you wonderful readers I wish you an amazing Canada Day or 4th of July, lots of good food shared with family and friends. Enjoy!

More Tart recipes to try
- Old Fashioned Butter Tarts
- Chocolate Mousse Tarts
- Ricotta Spinach Tarts
- Easy Puff Pastry Strawberry Tarts

Patriotic Cheesecake Mini Tarts
Ingredients
PASTRY DOUGH ** for 1 pie crust
- 1 cup + 2 tablespoons all purpose flour (140 grams total)
- 1 pinch salt
- 1 pinch granulated sugar
- ¼ cup + 2 tablespoons cold butter (cubed) (84 grams total)
- 2-2½ tablespoons cold water
CHEESECAKE FILLING
- 4 ounces cream cheese
- ¼ cup + 2 tablespoons powdered/icing sugar (45 grams total)
- 1/2 teaspoon vanilla
- ½ cup cream (whole/heavy or whipping cream – at least 30% fat)
- 1 tablespoon milk
- ½ tablespoon gelatin
EXTRAS
- 1 cup fresh strawberries, blueberries and or raspberries
- 3-4 tablespoons strawberry, cherry or blueberry jam
Instructions
- Pre-heat oven to 375° (190 celcius)
PASTRY DOUGH
- This can be made either by hand or food processor. Whisk the flour, salt and sugar into a large bowl or processor bowl, add the butter and combine (using a pastry blender or even your clean fingers) or pulse until the mixture resembles coarse crumbs (the size of peas).
- Sprinkle the water (one tablespoon at a time)on top and combine just until the dough starts to come together. Then move to a lightly floured flat surface and knead lightly into a round ball. Wrap the dough in plastic wrap and refrigerate for at least 30 minutes before using.
- Remove from fridge and knead the dough a couple of times to soften it up again on a lightly floured surface. Roll out to 1/8" thickness. Place cut out dough into lightly greased and floured tart pans. Prick the bottom of the dough and place a piece of parchment paper on each shell and fill with dried beans, rice or sugar bake for approximately 15 minutes, remove paper and beans and bake for another 5 -10 minutes more or until lightly golden. Remove from oven and let cool completely before filling.
CHEESECAKE FILLING
- In a medium bowl beat together the cream cheese, sugar and vanilla until creamy, set aside. If not using gelatin then fold this mixture into the whipped cream.
- In a large bowl beat the cold cream until stiff peaks appear, set aside.
- If using the gelatin, in a small pot add the milk and sprinkle the gelatine on top, let stand one minute, then place the pot on low heat and heat just until the gelatine has dissolved, stirring often (1-2 minutes), do not boil, then immediately remove from heat. Fold the gelatine into the cream cheese mixture, then gently fold it into the whipped cream, mix until combined.
PUTTING IT TOGETHER
- Spread a little jam on the bottom of each tart. Top and spread evenly some cheesecake filling. Place the tarts on a plate, cover lightly with plastic wrap and refrigerate for 4-5 hours or overnight.
- Top the chilled tarts with fresh fruit before serving. Enjoy!
Notes
Nutrition
Updated from June 17, 2016.
It’s All About Pasta
Amazing pasta recipes to make your mouth water!

Authentic Italian Desserts
75 Traditional Desserts Made Easy
Can you freeze them?
Hi Anne, not filled, because the filling will change, although you can freeze the dough either rolled into empty tart shells or whole. Take care!
Do you think these would taste good with cranberry sauce on the bottom and cranberries on top?
Hi Laura, yes I think that would work. Let me know how it goes. Take care!
Yum – those look amazing. Pinning to try! Thank you for sharing with us at the #HomeMattersParty
Thanks Jamie. Have a great weekend.
These tarts look delicious and beautiful! Thanks for linking up at Welcome Home Wednesdays!
Dying your dough to be festive is brilliant! You could even try blending up some strawberries or something if you don’t like food coloring! 🙂 Love love this idea!
Hi Laura, great idea, I am going to try this next time. Have a great weekend.
yum! thanks for sharing this! maybe I’ll make it for the 4th 😀
Hi Tianna, thanks hope you enjoy it. Let me know. Have a happy holiday.
These are so super cute and they look delicious! Thanks for sharing with us at Merry Monday this week!
Thanks Marie, very happy to share them.
Cute, delicious, and just in time for the 4th! Great post!
Come over to my link party and share this with everyone:
http://www.twentysomethinginthe2010s.com/peace-love-link-up-013/
Hope to see you there!
Thanks Ashleigh, shared. 🙂
Congrats! You have been chosen as a feature on the next Peace, Love, Linkup! Grab an “I was Featured” button and stop by tomorrow at 6 to share more great content! Hope to see you again!
Thanks Ashleigh! Have a great holiday weekend.
Your crust sounds fantastic and of course the simple filling with fruit makes my mouth water. Will definitely try it for Fourth of July this year. #BestIdeaEver.
Thanks Nancy Hope you enjoy it!
Looks delicious Rosemary! I love the red, white and blue — very patriotic and your store experience just goes to show that sometimes we find what we’re looking for in the least likely place. That’s happened to us before 🙂 Your dessert looks “almost” too pretty to eat. I don’t think I’d be able to leave it alone. Buon fine settimana!
Hi Marisa, thanks and I know I love those small stuff them to overflowing stores. Have a great week. 🙂