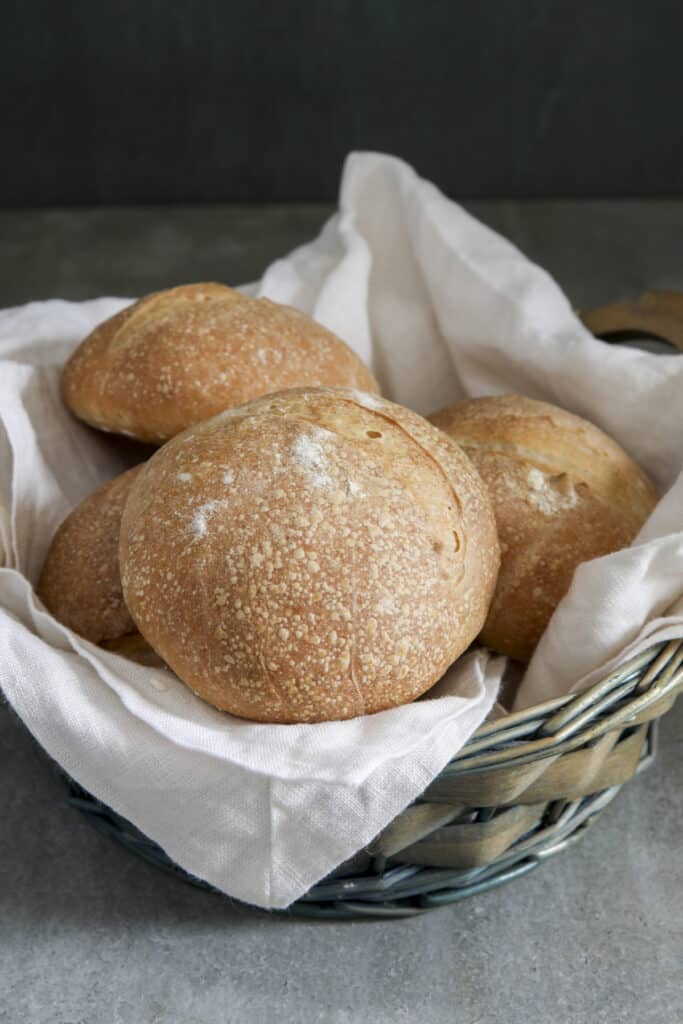
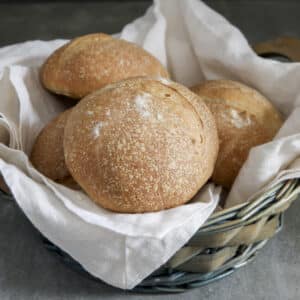
Overnight Italian Buns
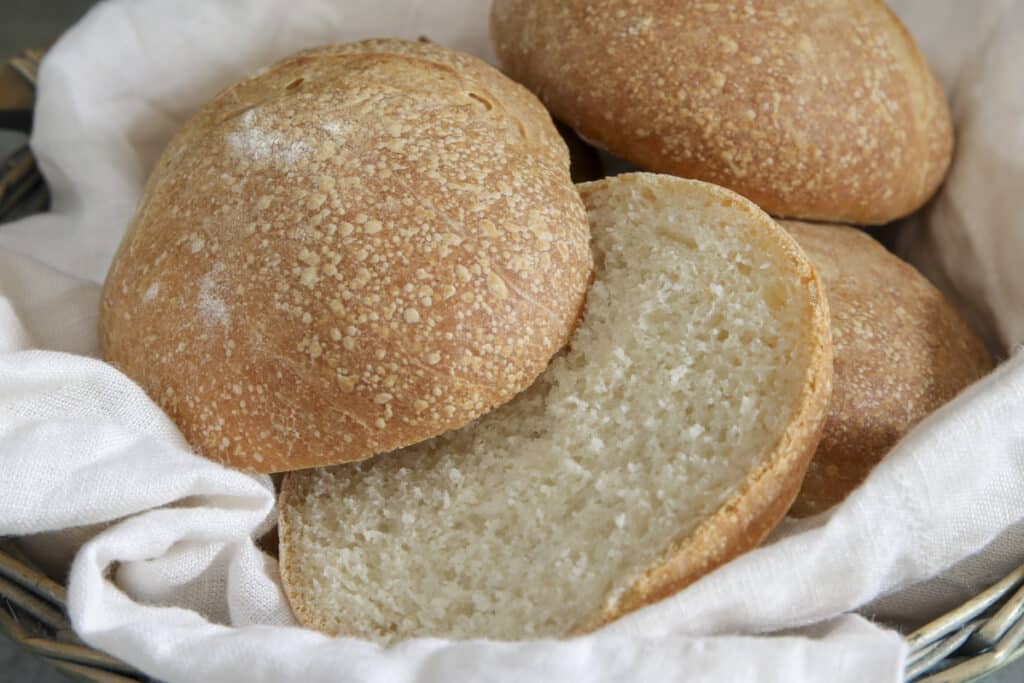
These overnight Italian buns are made with an overnight cold rise which enhances the flavor and texture of the bread! They are simple to prepare and the result is fresh, chewy rolls with a slightly rustic crust.
When it comes to homemade Italian bread there isn’t a slice I don’t like! From a traditional Italian ciabatta bread to a rustic Italian bread, no Italian kitchen is complete without a loaf of Italian bread of some sorts!
These overnight Italian buns are my latest favorite and the recipe is so simple! After you make the dough, it ferments slowly in the refrigerator overnight, similar to sourdough bread but with much less work!
The result is a dinner roll that has a soft chewy interior with a slightly crusty exterior! It’s the perfect homemade bread to serve with a meal or to use for a sandwich.
- It’s an easy dough to make, allow it to have a cold rise up to 12 hours in the refrigerator, shape, rise and bake! It’s really that simple!
- Allowing the Italian overnight bread to slowly ferment, develops a flavorful bun that tastes so much better than anything you could ever buy.
- Shape into several bread buns, a few rolls or even one large bread bowl or a small loaf! It’s perfectly suitable to fit any occasion.
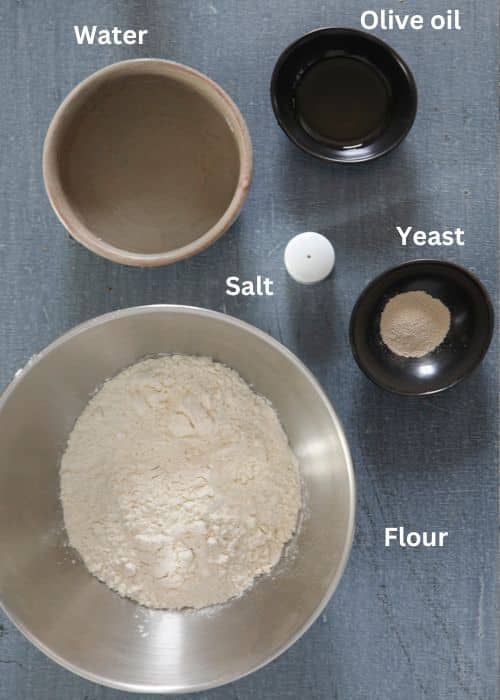
Recipe Ingredients
- Active dry yeast: Always make sure your yeast is fresh and active for a proper rise.
- Water: Room temperature lukewarm water is best. Too hot and it will affect your yeast. Too cold and your yeast won’t activate.
- Olive oil: Adds a little flavor to the dough.
- Flour: All-purpose flour or bread flour can be used. Bread flour results in chewier Italian buns.
- Salt: Flavors the dough.
Substitutions and Variations
- Instant yeast: I recommend using active dry yeast, but if you only have instant yeast, that works, too. Your dough may rise faster, so just keep an eye on it!
- Brush with seeds: If you love your buns with seeds on top, it’s easy to do! Beat one egg white with 1 Tablespoon of water and brush over the top of your loaves near end of baking time. Sprinkle with seeds of choice such as sesame seeds and bake a few more minutes.
- Cheese: If you love the addition of cheese with your bread, you can top your buns with shredded Parmesan cheese or cheddar cheese before baking like I do in these homemade cheese buns.
- Knead by hand: While I love the convenience of a stand mixer and dough hook, this recipe can be made entirely by kneading the dough by hand.
- Need it faster? While these buns are so easy, they are more delicious with a long cold rise. If you need something quicker, you can let them rise in a warm draft free area for a couple of hours and then continue with the recipe or why not try my fast and easy no knead bread which is baked the same day.
Start with the yeast
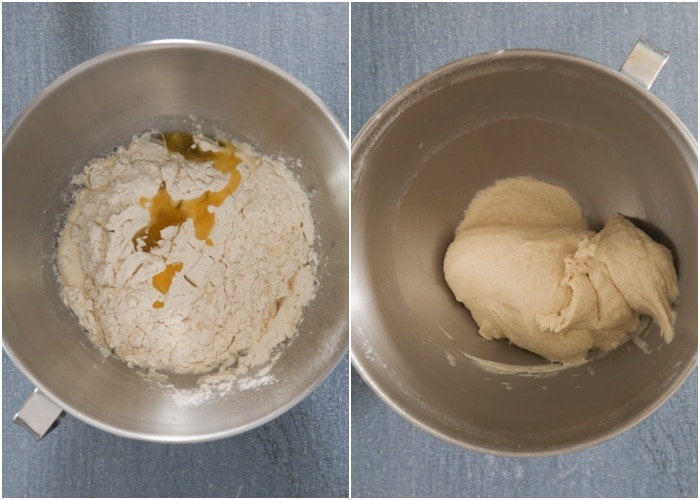
In the bowl of a stand mixer, add the water and sprinkle the yeast on top, let sit for 10 minutes to activate then stir to combine. Add the olive oil and flour, then using the dough hook attachment start to knead before adding the salt. Knead until the dough is compact and pulls away from the sides of the bowl.
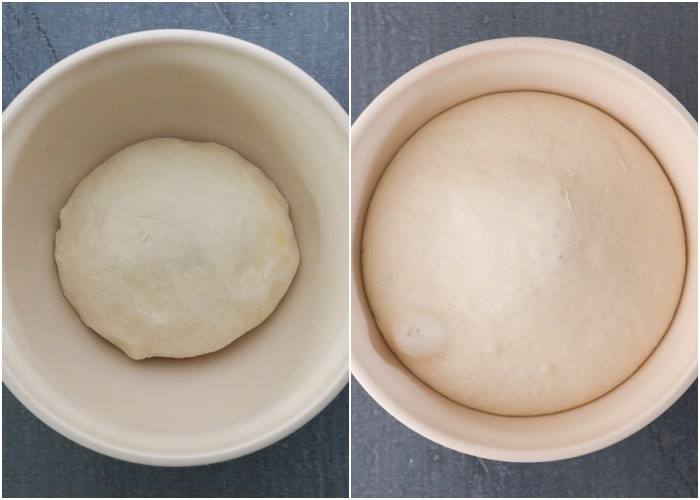
Remove the dough from the mixer bowl, form into a dough ball, place in a lightly oiled bowl, cover with plastic wrap and refrigerate for an overnight rise.
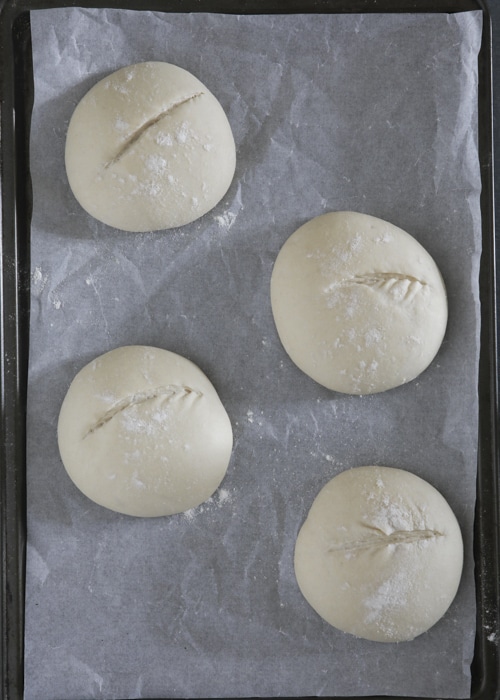
After the cold rise, remove the bread dough from the refrigerator and place on a lightly floured work surface. Divide the dough into 4 parts then form into balls.
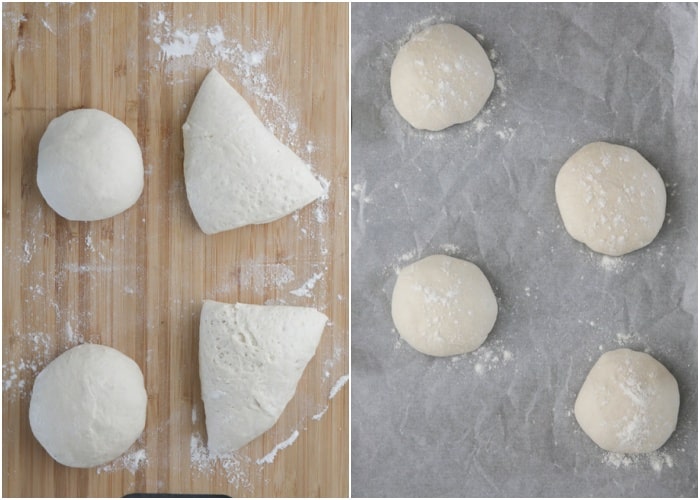
Place on a piece of parchment paper lined baking sheet, cover with a clean tea towel and perform a second rise until doubled in size.
Bake the buns until golden brown and baked through. Immediately move to a wire rack to cool completely.
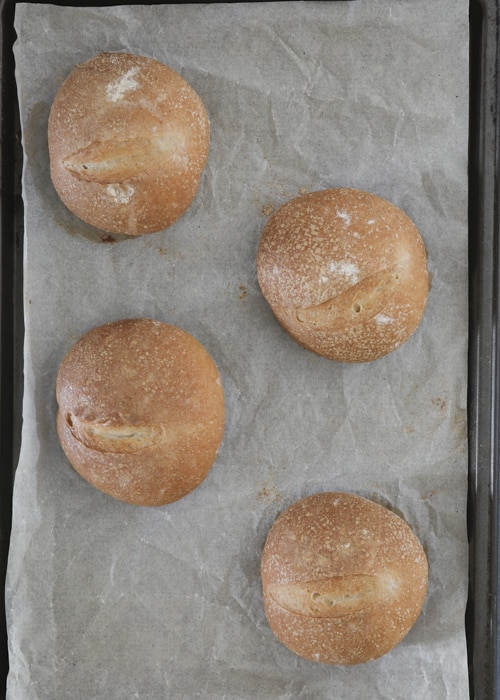
Your bread is done when it is golden brown! All ovens bake differently and if you are new to bread baking it can be hard to exactly know when bread is done. To ensure it is baked through, measure with a digital thermometer and the internal temperature should be 190°F.
Bread Tips
- Adjust as needed: The more you bake homemade bread the more you will know! If your dough is too dry then add a bit more water, if it is too wet add a bit more flour.
- Avoid overworking the dough: For Italian buns with soft, fluffy centers don’t overwork the dough! Handle the dough gently to retain the airy holes that develop during fermentation.
- Use a baking stone: If you have pizza stone, this can create a better rise and a more crusty exterior as the stone helps distribute heat evenly.
- Egg wash: If you like your rolls with glossy sheen to them, make a simple egg wash and brush on before baking.
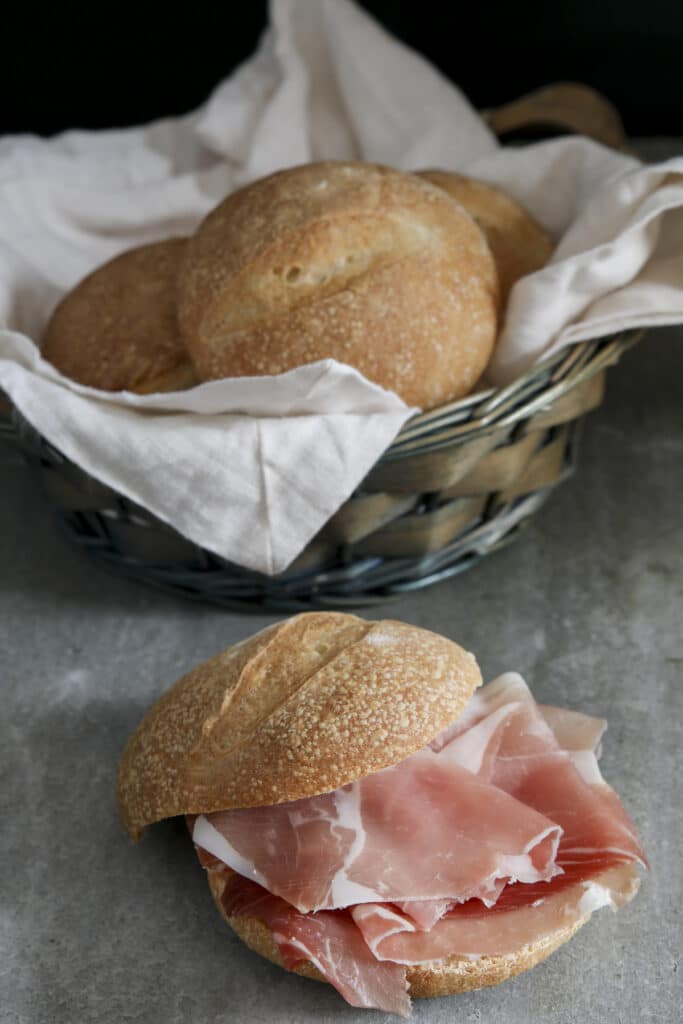
How to enjoy these overnight Italian buns?
I love to use these anywhere I would use a hamburger bun! From these Italian cheese stuffed burgers to my easy tuna burgers or even an Italian sliced beef pizzaiola, these Italian buns are a great choice. I even use them instead of a ciabatta roll for my caprese panino!
storing the baked buns
Cool completely then seal in an airtight bag. If these are stored away from direct sunlight and stay well-wrapped they should last several days at room temperature.
For longer storage, wrap individually and freeze in an airtight container or bag. Store frozen for up to three months and thaw as needed.
I hope you enjoy these homemade buns as much as my family does. Perfect with a meal or made into a sandwich. Buon Appetito!
Best Italian Bread Recipes to Try
- No Knead Ciabatta Bread
- Rustic No Yeast Bread
- Olive Oil Bread Rolls
- Italian Focaccia Bread
- Soft Italian Flatbread
Overnight Italian Buns
Ingredients
- 1 teaspoon active dry yeast
- ⅔ cup water room temperature
- 1 tablespoon olive oil
- 2 cups all purpose flour or bread flour
- ¾ teaspoon salt
Instructions
- In the stand mixer bowl add the water and sprinkle the yeast on top, let sit 10 minutes then stir to combine. Add the olive oil and flour start to knead then add the salt. Knead 7 – 8 minutes until compact and the dough pulls away from the sides of the bowl.
- Remove the dough and form into a ball, place in a lightly oiled bowl cover and refrigerate 10-12 hours.
- Remove the dough from the bowl and place on a lightly floured flat surface, divide the dough into 4 parts, and form into balls. Place on a parchment paper lined baking sheet, cover with a clean tea towel and let rise 1 hour or until doubled in bulk in a warm draft free area.
- Pre-heat oven to 425F/220C.
- Bake for 15-20 minutes or until golden brown and baked through. To help give the buns a crunchier crust, spray the buns with water and the oven before baking, (bread is baked with an internal temperature of 190F/88C). Immediately move to wire rack to cool completely. Enjoy!
Notes
Nutrition
It’s All About Pasta
Amazing pasta recipes to make your mouth water!


Authentic Italian Desserts
75 Traditional Desserts Made Easy
Hi Rosemary I made these buns and doubled the recipe on Saturday. On Sunday I made them and they were so easy and really good. I make a lot of your recipes and they all turn out great. So easy. Thank you.
Hi Phyllis, thanks so much, so glad you enjoyed them. Take care!
Hi..nothing better than homemade. Can we add something to add more flavor like grated Parmigiano or Romano? How much?
Be well,
John
Hi John, thanks and I agree, and yes you could I probably would start with 3-4 tablespoons. Let me know how it goes. Take care!
Can I use yeast meant for bread making machine?
Hi Pat, yes you can use bread machine yeast. I hope you enjoy them. Take care!
Is it possible to convert it to a sourdough recipe. How much starter to use instead of dry yeast. Thank you
Hi Valerie, yes it is, for 1 teaspoon of yeast, use 50-60 grams of sourdough starter, and 25 grams less of water (2 tablespoons) and flour (1/4 cup flour). Although the second rise will probably take about 3-4 hours rather than 1. Hope that helps. Let me know how it goes.
Hi
I noticed that when you double the recipe the amount of water is not double. Is this correct?
Hi Vicky, sorry about that I corrected it, it now shows, I forgot to concert it to cups. Take care!